
Brooding is the process of caring for day-old chicks from birth up to about 8 weeks of age. During this time, chicks need warmth, clean water, proper feed, and protection. Get this stage right, and the rest of their growth becomes much easier to manage.
The brooding period is critical. Chicks are fragile in their early weeks, and poor management at this stage can lead to high mortality rates, slow growth, and disease outbreaks. Whether you are raising chickens, turkeys, or pheasants, the principles remain the same. You need to provide the right environment, the right temperature, and consistent daily care.
There are different housing stages in poultry farming. Brooding units house chicks from day one until they no longer need extra heat, usually around 8 weeks. After that, growing pens take them through up to 20 weeks. Then laying pens or cages are used from the point of lay until the birds are culled, which can be up to 78 weeks.
Understanding how to set up a brooder house properly will save you money, reduce losses, and give your flock the best start possible. Here is a clear, practical guide on how to do it.
1. Preparing the Brooder House
Before your chicks arrive, the brooder house must be ready. A poorly prepared house puts young chicks at risk right from the start.
A. Choosing the Right Location
Pick a location that is dry and well-drained. Avoid damp or waterlogged ground. Wet soil encourages soldier ants, disease organisms, and parasites that can harm or kill your chicks. The house can be a vacant room, a wooden structure on skids, or any suitable enclosed space on elevated ground.
B. Cleaning and Disinfecting
If the house has been used before, here is what to do before bringing in new chicks:
i. Remove cobwebs: Brush off all cobwebs from walls and corners.
ii. Clear old litter: Remove the old bedding material completely.
iii. Sweep and wash: Sweep the concrete floor thoroughly, then wash every corner of the house.
iv. Block all holes: Seal any gaps or holes in walls and floors to keep out rats and predators.
v. Disinfect: Use Izal, Dettol, or any suitable poultry disinfectant on all surfaces.
vi. Dry the house: Leave it open for at least 2 days to dry completely before adding fresh litter.
vii. Add new litter: Spread dry, clean litter on the floor at about 2 to 3 inches deep.
C. Setting Up Before Chicks Arrive
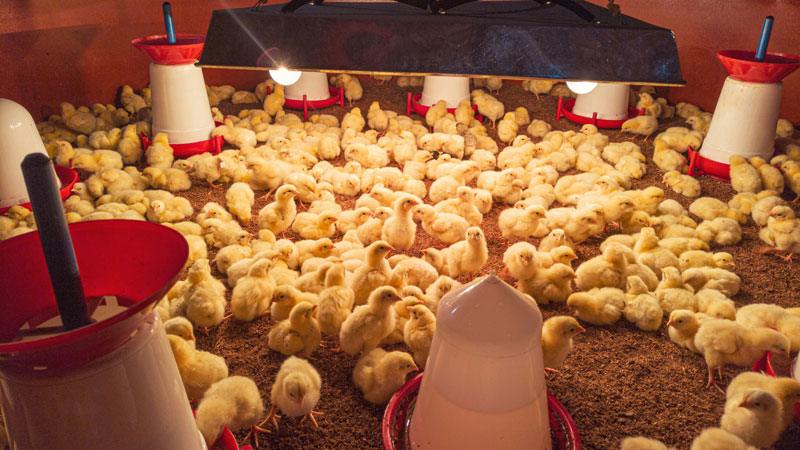
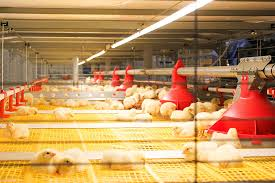
With less than 24 hours to arrival, double-check everything. Make sure the brooder guards are in place to confine the chicks, flat feeders and drinkers are set up, feed mash is available, windows or netting are covered with mat or nylon to retain heat, and your heat source, whether electricity, gas, a stove, or coal pot, is working properly.
2. Daily Operations in the Brooder House
Once chicks are in the house, you need a routine. Consistency is what keeps them healthy.
i. Disinfect your feet: Before entering, dip your feet in the disinfectant pit at the entrance. This stops you from carrying germs into the house.
ii. Check for sick or dead chicks: Remove them immediately to prevent disease spread.
iii. Wash and refill drinkers: Collect the drinkers, wash them outside, refill with clean water, and return them.
iv. Fill feeders: Make sure feeders are stocked with feed mash before serving water.
v. Adjust the heat source: Keep bulbs or lamps low enough to warm the chicks but not so close that they can touch them.
On the first day chicks arrive, keep lights on and provide feed mash on egg trays for the first 4 days. For water, dissolve 2 teaspoons of Terramycin soluble powder into a gallon of water to help reduce stress and prevent early infections.
Read Also: How to Control and Prevent Disease Outbreak on your Poultry Farms
3. Types of Brooding
There are two main types of brooding used in poultry farming.
A. Natural Brooding
This method works best on small farms where only a few chicks are raised each year. A broody hen provides all the warmth the chicks need. Depending on her size, she can brood between 15 and 20 chicks. Before placing chicks with her, check that she is healthy and free from lice, ticks, and other external parasites.
B. Artificial Brooding
This is the process of raising chicks without a hen, using a temperature-controlled brooder instead. It is the most common method on commercial farms. Here is why most farmers prefer it:
i. Season flexibility: Chicks can be raised at any time of the year.
ii. Scale: One person can manage thousands of chicks at once.
iii. Sanitation control: Hygiene conditions are easier to manage and monitor.
iv. Temperature regulation: You have full control over the heat supplied to chicks.
v. Planned feeding: Feed schedules can be followed precisely without interruption.
A good brooder must have a reliable temperature control system, good ventilation, adequate lighting, enough space, and protection from predators and fire hazards.
4. Management of Chicks in the Brooder
Good daily management makes the difference between a thriving flock and a struggling one. Here are the key practices to follow:
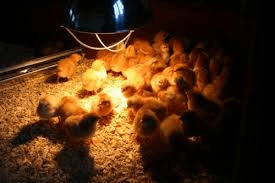
i. Control temperature: Adjust heat based on the age and behavior of the chicks. If they huddle together, it is too cold. If they spread to the edges, it is too hot.
ii. Keep the house dry: Dampness causes disease. Use a deep litter system to absorb moisture.
iii. Prevent litter eating: Scatter mash on egg case flats when chicks are first introduced to discourage them from pecking at the bedding.
iv. Provide balanced feed: Use a standard, nutritious chick mash formulated for their growth stage.
v. Ventilate properly: Fresh air must be able to enter the brooder without creating cold drafts.
vi. Provide clean water twice daily: Dirty water is a major source of disease in young chicks.
vii. Add green feed at 3 weeks: Chopped green grass can be introduced after 3 weeks to boost Vitamin A intake.
viii. Clean feeders daily: Dirty feeders attract bacteria and reduce feed intake.
ix. Vaccinate regularly: Follow a structured vaccination program to protect against common poultry diseases.
x. Avoid overcrowding: Too many chicks in a small space leads to slow growth, stress, and increased death rates.
xi. Inspect birds daily: Check each bird’s condition and droppings for any signs of illness or abnormality.
xii. Keep a vet contact: Always have a veterinarian you can call when something looks wrong.
Read Also: Poultry Feed Mill and Formulation of Rations
Summary on Preparing a Brooder House and Rearing of Chicks
| Topic | Key Points |
|---|---|
| Brooding period | Day 1 to 8 weeks of age |
| Housing stages | Brooder unit, growing pen, laying pen or cage |
| Location | Dry, elevated, well-drained land |
| House preparation | Clean, disinfect, seal holes, add 2 to 3 inches of litter |
| Types of brooding | Natural (hen-based) and Artificial (brooder-based) |
| Natural brooding capacity | 15 to 20 chicks per hen |
| First day care | Lights on, feed on egg trays, Terramycin water |
| Heat source options | Electric bulbs, gas, stove, coal pot |
| Key management practices | Temperature control, clean water, vaccination, daily inspection |
| Common mistakes to avoid | Overcrowding, damp housing, dirty feeders, poor ventilation |
Frequently Asked Questions About Preparing a Brooder House and Rearing of Chicks
1. What is brooding in poultry farming?
Brooding is the process of providing heat and care to day-old chicks for the first 6 to 8 weeks of their lives until they can regulate their own body temperature.
2. What temperature should a brooder house be?
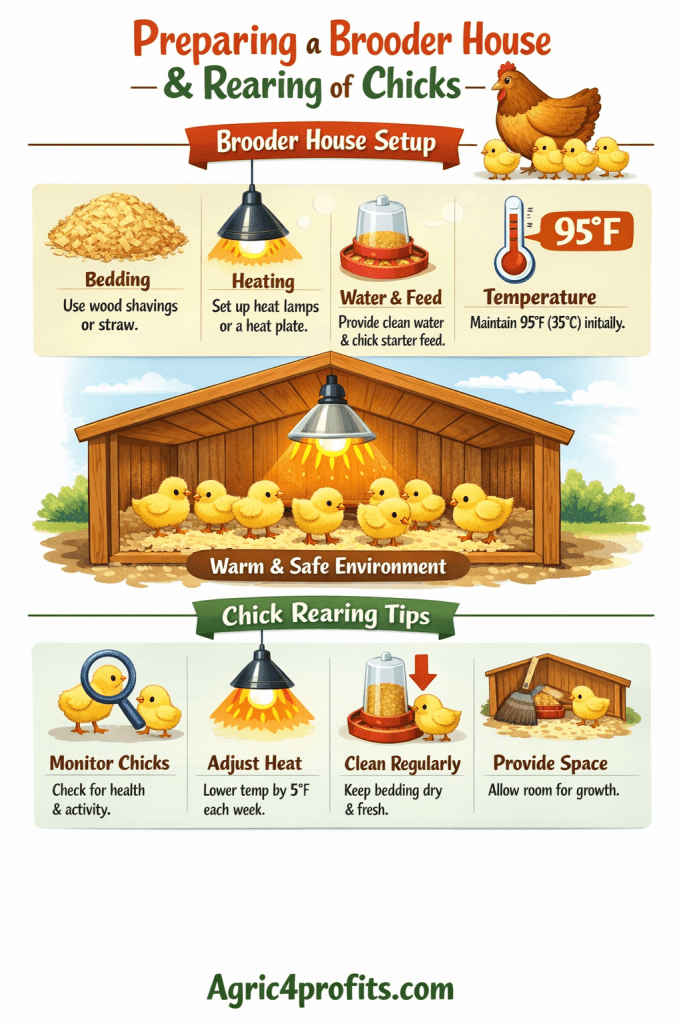
In the first week, the temperature should be around 35 degrees Celsius (95 degrees Fahrenheit). It is reduced by about 3 degrees each week until the chicks no longer need supplementary heat.
3. How do I know if my brooder is too hot or too cold?
If chicks huddle under the heat source, the brooder is too cold. If they move far away from it and pant, it is too hot. A comfortable flock spreads evenly across the brooder floor.
4. What litter material is best for a brooder house?
Dry wood shavings, rice husks, or sawdust are commonly used. The litter should be at least 2 to 3 inches deep and kept dry at all times.
5. How many chicks can one brooder unit hold?
This depends on the size of the brooder, but overcrowding must be avoided. As a general rule, each chick needs about 0.05 to 0.1 square meters of floor space in the first few weeks.
6. What is Terramycin and why is it given to chicks?
Terramycin is an antibiotic used to reduce stress and prevent bacterial infections in newly arrived chicks. Two teaspoons are dissolved in a gallon of water and given in the first few days.
7. When should chicks be vaccinated?
Vaccination should start in the first week of life. A vet or poultry extension officer can provide a schedule suited to your location and the diseases common in your area.
8. How often should waterers and feeders be cleaned?
Waterers should be washed and refilled at least twice daily. Feeders should be cleaned every day to prevent mold and bacterial buildup.
9. What is the difference between natural and artificial brooding?
Natural brooding uses a hen to keep chicks warm. Artificial brooding uses a temperature-controlled device called a brooder. Artificial brooding is preferred for large-scale farming because it is more flexible and scalable.
10. How do I disinfect a brooder house before use?
Remove all old litter, sweep and wash all surfaces, block holes, then apply a disinfectant such as Dettol or Izal to every corner. Leave the house open for 2 days to dry before adding fresh litter and setting up equipment.
Do you have any questions, suggestions, or contributions? If so, please feel free to use the comment box below to share your thoughts. We also encourage you to kindly share this information with others who might benefit from it. Since we can’t reach everyone at once, we truly appreciate your help in spreading the word. Thank you very much for your support and for sharing!
Read Also: 12 Management Tips for better Poultry Performance Potential