
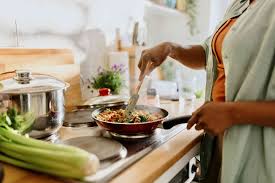
Cooking methods are categorized into dry-heat, moist-heat, and combination techniques. This article focuses on dry-heat methods, essential for processing agricultural products effectively.
Understanding Dry-Heat Cooking Methods
Dry-heat cooking involves methods that do not use moisture as a cooking medium. These include broiling, grilling, roasting, baking, sautéing, stir-frying, pan-frying, and deep-frying.
Techniques of Grilling and Broiling
Grilling involves cooking with heat from below, while broiling uses heat from above. Both methods utilize very hot radiant heat, making them suitable only for tender cuts.
1. Fuels Used for Grilling and Broiling:
- Broilers and salamanders: Gas and electric
- Grills: Electric (closed), gas with metal heat deflectors, gas with lava rock, charcoal (compressed and natural), hardwood
2. Grilling Methods:
- Over heat: Using charcoal, barbecues, or gas/electric-heated grills/griddles
- Under heat: Using gas or electric salamanders or over-heated grills
- Between heat: Using electrically heated grill bars or plates for small cuts of meat
3. Grilling Procedures:
- Preheat the grill.
- Clean the grill with a wire brush.
- Brush the item to be grilled with oil or clarified butter.
- Place the item on a hot area of the grill to form grill marks.
- Turn the product 90° to create cross marks.
- Flip the product and finish cooking over moderate heat. After searing the second side, larger pieces or those requiring further cooking may be finished in the oven.
- For delicate products like fish, sear on one side and finish in the oven.
4. Effects of Grilling:
Grilling retains most nutrients and flavor due to quick cooking. The fierce heat seals the meat’s surface, retaining juices, provided the meat is not pierced during cooking. Only high-quality cuts are suitable, as inferior meat becomes tough and inedible.
5. Advantages of Grilling:
- Speed allows cooking to order.
- Charring enhances appearance and flavor.
- Visible cooking process offers good control and can entertain restaurant customers.
6. General Grilling Rules:
- Cook smaller, thinner items quickly.
- Sear food on the hot part of the grill, then move to a cooler part to finish.
- Avoid slow cooking to prevent drying out. Baste foods and oil bars to prevent sticking and drying.
7. Grilling Fish:
The texture of fish is critical when grilling.
Read Also: Cold Weather Poultry Diseases and How to Manage them
Techniques for Broiling Fish
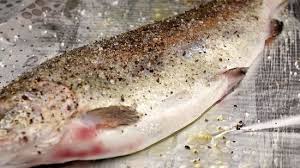
Any fish, regardless of texture, can be broiled. Place a fish fillet on a buttered sizzle plate, season, brush with butter, and cook under a broiler until flaky. Oilier fish hold up best in the dry heat of broiling.
Fundamentals of Roasting
Roasting involves cooking in dry heat in an oven or on a spit, aided by fat or oil, using convection heat transfer.
1. Purpose of Roasting:
Roasting creates a distinctive taste and adds variety to the menu.
Roasting Methods:
1. Searing Method:
Sear red meats to seal juices and add color by browning in fat on the stove or starting at a high oven temperature (450–500°F), then finishing at a lower temperature.
i. Advantage: Well-caramelized meat with good appearance.
ii. Disadvantage: Higher shrinkage, less yield.
2. Low-Temperature or Constant Heat Method:
Cook at a moderate temperature throughout.
i. Advantage: Better yield, less shrinkage.
ii. Disadvantage: Longer cooking time; caramelization may be less pronounced.
Roasting Procedures:
- Preheat the oven.
- Roast on a spit using radiated heat or in an oven using forced-air convection or convection combined with microwave energy.
- Baste regularly with fat, oil, or juices to keep food moist and enhance flavor and appearance through caramelization.
Effects of Roasting:
Initial oven heat seals the food, preventing excessive juice loss. Once lightly browned, reduce the temperature to cook the interior without hardening the surface.
Advantages of Roasting:
- Produces tender, succulent meat and poultry.
- Meat juices can be used for gravy, enhancing flavor.
- Energy and oven temperature are easily controlled, allowing multiple foods to cook together.
- Transparent oven doors and spit roasting allow easy monitoring and access.
- Thermostats minimize fire risk by controlling temperature.
Temperature and Time Control for Roasting:
- Preheat ovens to the required temperature.
- Follow recipe-specified oven temperature and shelf settings.
- Cooking time depends on food shape, size, type, bone proportion, and quality.
- Use meat thermometers or probes to check internal temperature.
i. Determining Doneness:
- Touch (requires experience)
- Time/weight/temperature
- Insert a metal skewer and check its temperature or the color of juices
- Use a thermometer
ii. Carry-Over Cooking: Residual heat continues cooking after removal from the heat source, with larger pieces experiencing more carry-over (up to 20°F).
iii. Resting: Allow roasted meats to rest for 20 minutes before carving to complete carry-over cooking, relax meat fibers, and redistribute juices. Early carving causes loss of color, moisture, and flavor.
Preparing Pan Gravies:
- Dissolve drippings (fond) in the roasting pan to make a sauce.
- Apply low heat to clarify fat, removing meat drippings.
- Degrease the pan and deglaze with stock to prepare:
- Jus Clair (natural juice, “au jus”)
- Jus Lié (thickened with cornstarch or arrowroot)
- Gravy (thickened with roux, sometimes using degreased fat from the roast).
Deglazing Process:
- Remove excess fat from the pan.
- Add liquid to wash drippings, using them to make a sauce.
Read Also: Layers or Broilers which One is More Profitable in Poultry Farming? Find Out!
Techniques for Sautéing Proteins
Sautéing (from French, meaning “to jump”) involves searing proteins to create color and preserve moisture.
i. Sautéing Procedures:
- Heat a small amount of fat in a pan to coat the bottom.
- Dredge white meats in flour; do not flour dark meats. Use only tender cuts.
- Cook to order; do not hold.
- Avoid moisture accumulation, which causes boiling and toughening, by:
- Heating the pan and fat before adding meat.
- Ensuring meat is dry.
- Avoiding overloading the pan.
- Do not stir or shake until the pan’s heat recovers.
- If making a sauce from deglazing, add meat back to the pan but avoid boiling to prevent toughening.
Methods of Shallow Frying
Shallow frying involves cooking food in a small amount of preheated fat or oil in a frying pan, sauté pan, or griddle plate.
i. Purpose of Shallow Frying:
To brown food, altering its color and enhancing flavor.
1. Shallow Frying Methods:
i. Shallow Frying: Cook food in a frying pan or sauté pan, frying the presentation side first for better appearance, then turning to cook the other side.
ii. Sautéing: Cook tender cuts of meat or poultry in a sauté pan or frying pan similarly to shallow frying.
iii. Griddling: Cook foods like hamburgers, sausages, or sliced onions on a lightly oiled, preheated griddle, turning frequently. Pancakes are turned once.
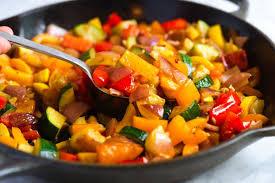
iv. Stir-Frying: Fast-fry vegetables, fish, meat, or poultry strips in a wok or frying pan with minimal fat or oil.
2. Using Clarified Butter:
Use clarified butter for shallow frying, as it has a higher burning point than unclarified butter, preventing burning.
3. Effects of Shallow Frying:
High temperatures seal the food’s surface, preventing juice loss. Some fat or oil is absorbed, increasing the food’s fat content.
4. Advantages of Shallow Frying:
- Quick cooking for prime cuts, as fats or oils can be heated to high temperatures without burning.
- Direct contact with fat ensures rapid cooking.
5. Temperature and Time Control for Shallow Frying:
- Achieve a golden-brown color by initially using high heat, then reducing it and turning the food as needed.
- During busy periods, prepare and cook systematically, cleaning pans after each use.
6. Stir-Frying Specifics:
- Use high heat in a wok or sauté pan.
- Cut products into small pieces.
- Some products may be partially or fully pre-cooked.
- Similar moisture concerns as sautéing apply.
Techniques for Pan-Frying
Pan-frying uses larger or portion-sized pieces (e.g., chops, steaks, fillets) with enough fat to cover the product halfway. Items cook longer than sautéed items, sometimes finished in the oven. Typically, no drippings remain for sauce.
Smoke Points of Cooking Fats
- Whole butter: 250°F
- Clarified butter: 270–280°F
- Animal fats: 290–320°F
- Lard: 400°F
- Goose fat: 430°F
- Coconut oil: 480°F
- Vegetable oil: 520°F
- Olive oil: 550°F
Fundamentals of Deep-Frying
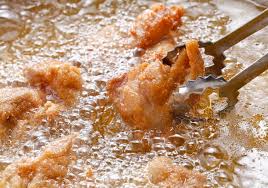
Deep-frying involves cooking small, tender pieces of food fully immersed in hot fat or oil, classified as a dry method due to its drying effect.
1. Deep-Frying Methods:
i. Basket Method: Place food in a basket and lower it into the fat.
ii. Double Basket Method: Use a second basket to prevent floating.
iii. Swimming Method: Drop battered food directly into the fat to float freely, avoiding sticking to the basket.
2. Deep-Frying Procedures:
- Preheat the oil or fat.
- Place food carefully into the hot fat.
- Fry until cooked and golden brown.
- Drain well before serving.
3. Blanching for Deep-Frying:
Partially cook foods (e.g., chipped potatoes) by boiling, then finish by deep-frying to achieve a floury interior and crisp exterior.
4. Purpose of Deep-Frying:
To produce appetizing, golden-brown, crisp food.
5. Effects of Deep-Frying:
Coatings (milk, egg, batter) seal the surface, minimizing fat absorption.
6. Advantages of Deep-Frying:
- Blanching enables advance preparation, saving time during busy service.
- Coatings allow a variety of foods to be cooked.
- Quick cooking and easy handling for service.
- Coated foods are sealed, preventing greasiness.
7. Temperature and Time Control for Deep-Frying:
- Maintain fat at the correct temperature, allowing recovery between batches to avoid pale, soggy food.
- Adjust temperature based on food thickness: lower for thicker pieces to cook thoroughly without burning, higher for smaller pieces with shorter cooking times.
8. Coating Methods for Deep-Frying:
- À la Française: Dredged in flour
- À l’Anglaise: Standard breading (flour, egg wash, breadcrumbs)
- À l’Orly: Battered (beer batter, tempura, egg batter)
- Purpose of Coating: Retain moisture and prevent fat absorption.
9. Oils for Deep-Frying:
- Modern shortenings are vegetable-based (soybean, canola).
- Varieties include sunflower, corn, maize, rapeseed, and olive oil, often mixed.
- Goose fat is popular for added flavor, especially for chips.
10. General Deep-Frying Rules:
- Avoid overfilling fryers with fat, oil, or food.
- Maintain frying temperatures between 175°C and 195°C (visible heat haze).
- Do not fry too much food at once.
- Allow fat to reheat between batches.
- Use the correct fat-to-food ratio to maintain temperature.
- Reduce temperatures during slack periods to conserve fuel.
- Avoid frying too far in advance to maintain crispness.
- Strain oil after use to remove particles, preventing burning and flavor spoilage.
- Cover oil when not in use to prevent rancidity.
11. Smoke Point for Deep-Frying:
- Canola oil: 425°F
- Hydrogenated commercial shortenings resist oxidation and breakdown.
Do you have any questions, suggestions, or contributions? If so, please feel free to use the comment box below to share your thoughts. We also encourage you to kindly share this information with others who might benefit from it. Since we can’t reach everyone at once, we truly appreciate your help in spreading the word. Thank you so much for your support and for sharing!