
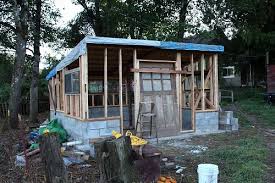
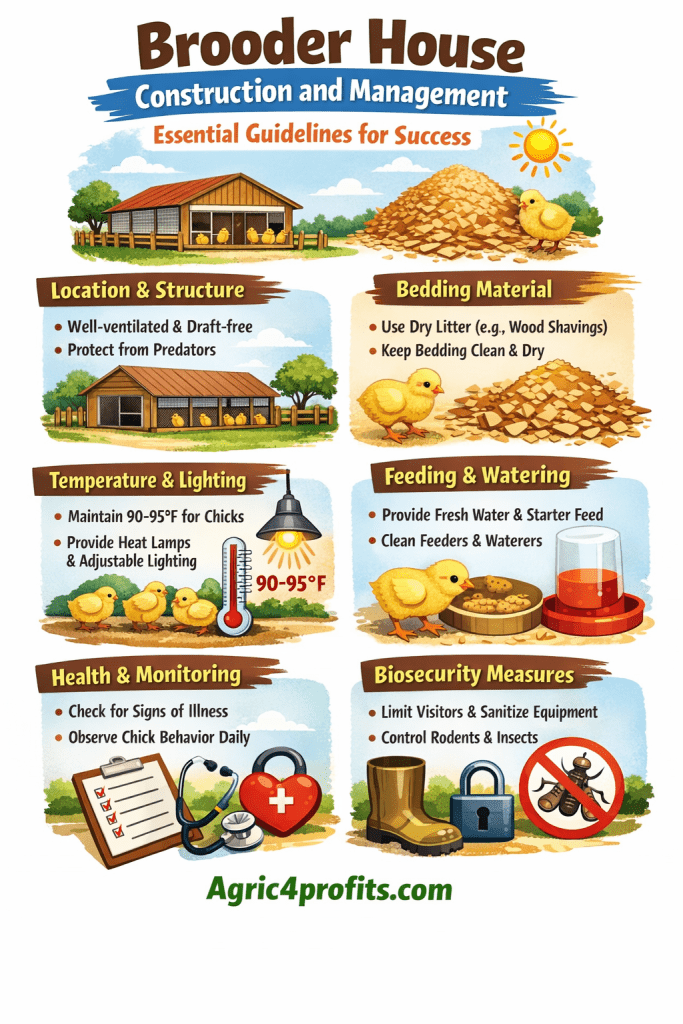
Building a brooder house right from the start makes everything else easier. The design needs to provide adequate warmth while managing ventilation carefully. This is why brooder houses use more courses of blocks than grower pens. The extra wall height helps retain heat while still allowing controlled air exchange.
Space matters when planning your layout. Keep at least 100 meters between the brooder house and the grower’s pen. This distance serves multiple purposes. It reduces disease transmission between age groups. It prevents older birds from stressing younger ones through sight or sound. It also gives you flexibility in managing biosecurity protocols for each area separately.
The flow of your farm layout affects daily operations. Position the brooder house so you reach it first before getting to the grower’s pen, especially if they’re on the same plot of land. This arrangement supports biosecurity because you interact with the youngest, most vulnerable birds before you potentially carry pathogens from older birds.
You don’t necessarily need to build a specialized structure from scratch. Regular pens can be converted into brooder houses. Hang a polythene curtain (nylon) around the pen to create a warmer, more protected environment. This flexible approach lets you start small and expand as your operation grows.
The construction details matter, but the management practices determine whether your birds thrive. You can have the best-built brooder house in the world, but poor management of temperature, ventilation, water, feed, or lighting will still result in poor performance. The structure creates the potential for success. Your daily management delivers the actual results.
This guide covers both the construction specifications and the seven fundamental management practices for successful brooding. The construction section explains what makes a good brooder house. The management section details the critical factors you need to control from the moment chicks arrive through their first weeks of life.
Modern poultry production demands precision. Temperature differences of half a degree affect growth rates. Humidity variations change ammonia levels. Ventilation adjustments impact bird comfort. You’re managing by the hour, not by the day. The first 72 hours are especially critical because mistakes during this period can’t be corrected later.
These aren’t theoretical guidelines. They’re proven practices from commercial operations that consistently produce top-performing flocks. Whether you’re raising 100 chicks or 100,000, the principles remain the same. Scale up or down based on your operation size, but don’t skip any of the fundamentals.
See also: Find out What a Brooder House is
1. Brooder House Construction Specifications
The physical structure creates the foundation for good brooding management. Get the construction right and you make daily operations easier. Build it wrong and you fight problems constantly.
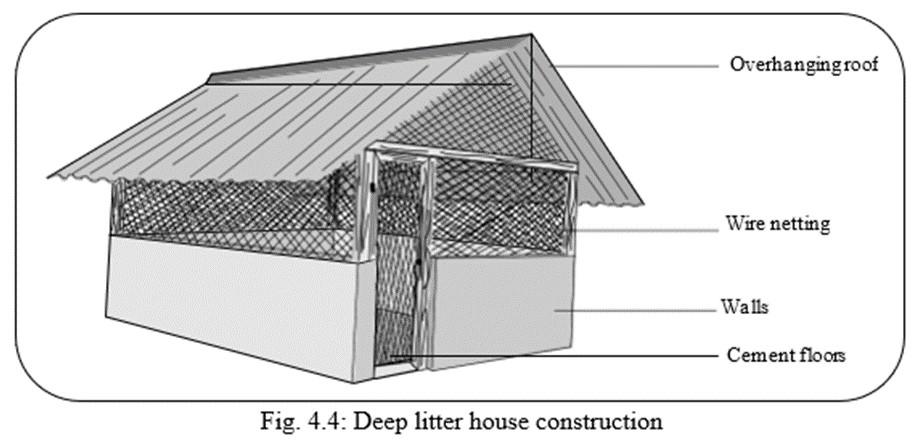
A. Wall Height and Ventilation Control
Brooder houses need more courses of blocks than grower pens. The taller walls help retain heat, which is essential for young chicks. But this doesn’t mean sealing the house completely. You still need controlled ventilation to remove moisture and maintain air quality.
The key is balance. Walls should be high enough to prevent heat loss but not so enclosed that air quality suffers. Most successful brooder houses have solid walls at the base with controlled openings above for ventilation management.
B. Distance from Grower Facilities
Maintain at least 100 meters between your brooder house and grower’s pen. This separation provides several benefits that directly affect bird health and farm efficiency.
Disease control is the primary reason. Older birds carry pathogens that don’t affect them much but can devastate young chicks. The physical distance reduces the chance of disease transmission through aerosols, dust, or equipment movement.
The separation also makes biosecurity protocols easier to enforce. You can require workers to change boots or wash their hands between buildings. Equipment stays dedicated to each area. Feed delivery and manure removal happen independently.
C. Farm Layout and Traffic Flow
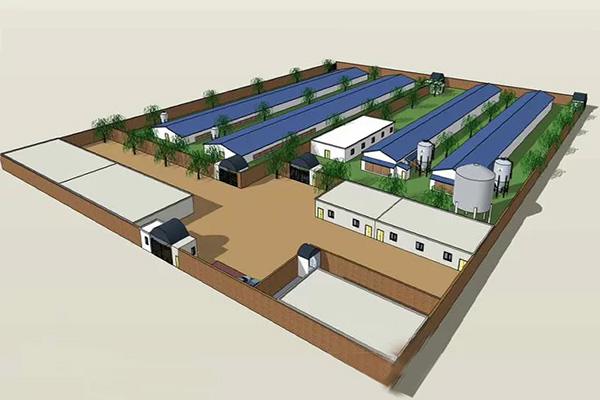
Position the brooder house as the first building workers reach when entering the farm. This arrangement protects your youngest birds by ensuring workers interact with them before potentially picking up pathogens from older birds in the grower area.
Good traffic flow reduces cross-contamination risk. Workers, visitors, and vehicles follow a path that goes from youngest birds to oldest. This one-way traffic pattern is a simple but effective biosecurity measure.
D. Converting Existing Structures
You don’t need a purpose-built brooder house to get started. Regular pens work fine with some modifications. The main addition is a polythene curtain (nylon) around the perimeter.
The curtain serves multiple functions. It reduces drafts that can chill chicks. It helps retain heat from your brooding stoves or lamps. It allows you to control ventilation by adjusting how much of the curtain you roll up or down. This flexibility makes it easier to maintain proper temperature and air quality.
Many successful small-scale operations use this approach. It keeps startup costs down while still providing adequate conditions for chicks. As the operation grows and revenue increases, you can invest in dedicated brooder facilities.
Read Also: Vent Pecking in Poultry and How to Control Them
2. Basic Brooding Management
Once your brooder house is built, success depends on managing seven critical factors. Each one affects bird health, growth, and survival. Skip one and you compromise the entire operation.
A. Litter Management
Litter conditions determine flock performance before chicks even arrive. This foundation affects everything else you do during brooding.
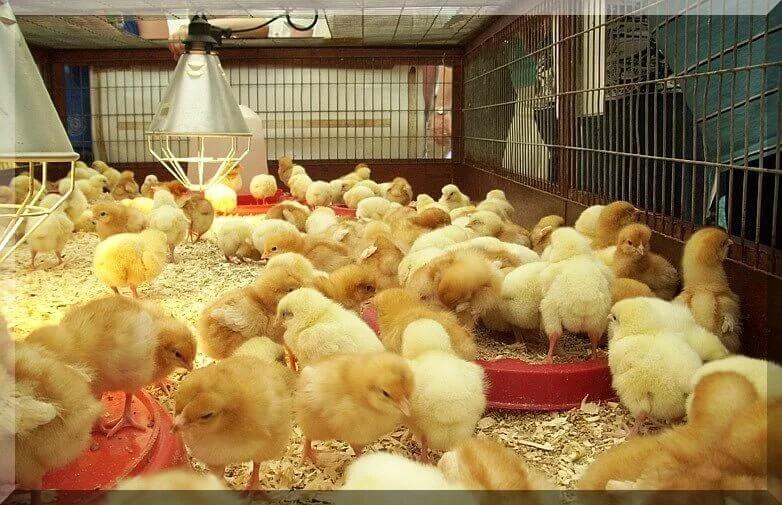
Place chicks on a consistent minimum of four inches of dry bedding at 88-92°F. Anything less causes performance losses proportional to how far you miss these targets. An inch short on bedding or five degrees low on temperature means slower growth and worse feed conversion.
If you’re starting chicks on used litter, preparation is essential. Remove caked litter immediately after the previous flock leaves. Use windrowing or litter conditioning equipment to break it up and expose it to air. Heat the house and ventilate to dry the litter and release ammonia buildup.
Top-dress the brooding chamber with fresh material. Apply company-approved ammonia-controlling amendments at the manufacturer’s recommended rate. These preparations make the difference between good and poor performance.
The goals are straightforward. Provide comfortable bedding for chicks. Reduce the effects of litter moisture and ammonia on your environmental control systems. When you manage heating and ventilation to compensate for poor litter, everything becomes more difficult and expensive.
Litter condition sets the tone for air quality, heating, and ventilation through the entire flock’s life. Good litter creates the foundation for success.
B. Temperature
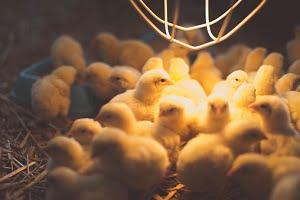
Temperature differences as small as 0.5 to 1.0°F impact chick health, behavior, and growth. This level of precision matters more than most people realize.
Electronic controller technology gives you the ability to monitor and manage temperature automatically around the clock. This is a huge advantage over manual thermostat control. But controllers only work as well as the sensor information they receive. The old saying “garbage in equals garbage out” applies here.
Sensor placement is critical. If the ideal starting temperature is 90°F, that means 90°F at the feed and water lines where chicks spend their time. The temperature at the ceiling or in corners doesn’t matter. What counts is the temperature where the birds are.
Proper placement depends on your heating system type and inlet vent spacing. Ideal temperatures also vary according to individual flock requirements. A good manager monitors chicks constantly and adjusts based on bird behavior.
Watch how birds distribute themselves. Huddling tightly under the heat source means they’re cold. Panting and moving away from the heat means they’re too hot. The birds tell you what they need if you pay attention.
Don’t expect temperature adjustments to solve every problem though. Temperature gets the most attention because it’s easy to monitor and control. But the other brooding basics can be just as important to flock performance.
C. Air Quality
Excess ammonia or carbon dioxide, combined with incorrect relative humidity, become serious problems esp,ecially during winter flocks. Once these issues develop, the only solution is to increase ventilation. But ventilation decisions require an accurate assessment of conditions.
Neither controller systems nor growers are naturally equipped to monitor air quality factors accurately. You need additional tools.
For relative humidity, buy inexpensive sensors from local hardware stores. Place them near mid-house away from heaters and air inlets. Some controllers can be fitted with humidity sensors too. The goal is to maintain relative humidity at 50 to 65 percent during brooding as long as possible.
If relative humidity drops below 50 percent, deduct 15 seconds from the minimum ventilation run-time. If it rises above 65 percent, add 15 seconds. Small adjustments make real differences.
Early morning is an excellent time to judge air quality and make ventilation adjustments if needed. If you’re unsure, adjust one house and compare conditions the next day.
Ammonia and carbon dioxide levels impact bird health and growth but are harder to measure accurately. Growers become accustomed to the ammonia smell, so the nose test fails. Birds can suffer and even go blind before you realize there’s a serious problem.
Carbon dioxide is odorless. It takes a while for humans to experience symptoms like headaches, nausea, and sleepiness. You typically must judge based on observing bird behavior.
If you have accurate monitoring equipment, keep ammonia below 25ppm. Add a minimum of 15 seconds of additional ventilation run-time to houses testing above 25ppm. Add 30 seconds for levels over 100ppm.
Carbon dioxide should stay below 3,000ppm. High levels usually occur when pre-heating and brooding chicks in tight houses during cold weather. Heating systems run constantly while ventilation run time is at its lowest.
Most ammonia and carbon dioxide problems can be minimized through proper litter management and adequate minimum ventilation, including humidity control.
D. Ventilation
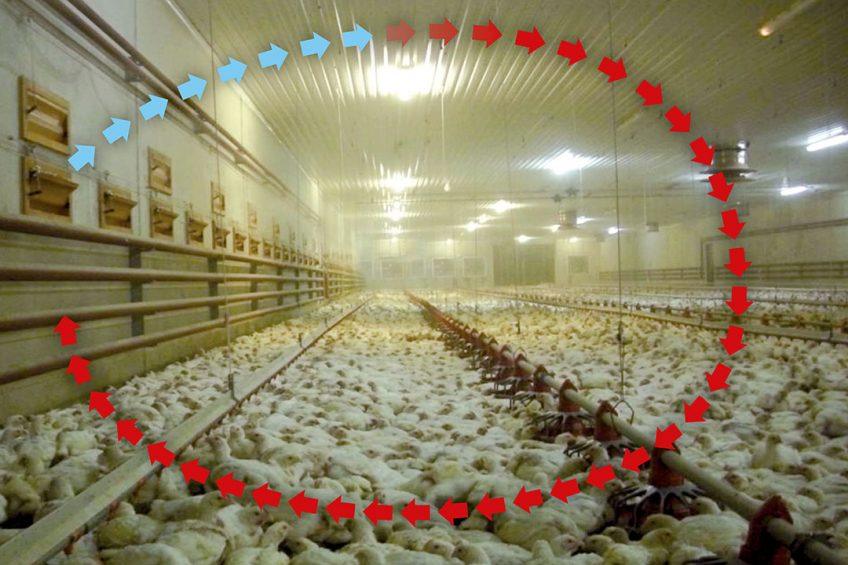
Good environmental control during brooding requires properly executing the minimum ventilation basics. Three factors work together.
I. Pressure: A good rule of thumb is that for every 0.01 inches of static pressure measured in water column, air travels about two feet. Getting air to the middle of a 40-foot-wide house near the ceiling requires about 0.10 inches of pressure. This means your house must pull 0.15 inches or more during a tightness test with a fan power of 1cfm per square foot of floor space.
ii. Inlet Door Opening: Required air pressure must combine with the proper perimeter inlet door opening to throw air to the center of the house. Too little or too wide an opening results in outside air blowing directly onto feed and water lines and onto chicks. Start by manually latching-closed all or most vents not located in the brood area. Then you may need to latch additional vents inside the brood area to achieve proper airflow with desired fan power (typically 1.0 to 1.5cfm per square foot). You need correct inlet door opening and static pressure to achieve desithe red air throw and mixing. Use a smoke emitter to show exactly where the air is going. Do whatever it takes to get air to the peak of the ceiling for good mixing. The importance of adjusting vent door openings properly to achieve good moisture removal cannot be overstated.
iii. Fan Run Time: Calculate the correct amount of minimum ventilation fan run time. This varies based on house size, bird age, and environmental conditions.
E. Water Quality and Availability
Having high-quality water freely available makes a huge difference in getting chicks off to a good start. One of the first things you should do when performance is inconsistent is have a water sample analyzed.
Contact your company or local County Extension Office for help with water sampling and analysis. If substantial water quality problems show up, consult a respected water quality expert.
Water quantity problems can be difficult to diagnose. A common-sense approach is doing a good job of routine drinker system maintenance. Getting water into chicks as soon as possible cannot be overstated in importance. Clean water systems and activate nipple drinkers before every flock arrives.
Pay close attention to initial drinker height. Make adjustments that reflect bird growth on a routine basis. Chicks consume much less water than older birds, so flush drinker lines are often in the beginning to keep water fresh and promote greater consumption. Monitor water filters, regulators, and any possible restriction points before and during each flock.
Don’t assume water quality and availability are adequate. Verify them.
F. Feed Availability
Feed availability runs hand in hand with water availability and is equally important. The quicker chicks access and consume quality feed, the better start they have.
The actual amount an individual chick consumes in the first seven days is very small. The tonnage of feed in the house on day one matters less than providing access for every chick to easily get to feed. Feeding space and opportunity are most important.
Chicks having sufficient feed access is more than just feeder pan, chick tray, and supplemental feed lid management. Environmental factors play a huge role. If a chick is uncomfortable near feed trays or lines because it’s too hot, cold, or in a draft, it won’t eat or drink sufficiently. This is a severe problem that must be corrected.
Many companies look for about 95 percent of chicks with feed and water in their crops after 24 hours. Remember, if a chick must choose between comfort and feed or water, it will choose comfort. Make sure every chick gets feed and water quickly and easily.
G. Lighting
Chicks grow, gain, and perform better the quicker they access feed and water. Light stimulation encourages feed and water consumption.
Specific lighting programs are under constant revision and vary from one integrator to another. However, the most common recommendation for light intensity when lighting is on calls for a minimum average of three or more foot-candles for the first seven to 10 days, measured along the feed lines between grow lights.
Large shadows, blown bulbs, and insufficient lighting intensity and uniformity are problems that can be identified and corrected with a simple digital light meter costing $150-200. Don’t assume your light intensity is adequate. Verify it. Buy a meter and calibrate the dimmer in each house. Many growers are surprised at how far off their settings are after they measure them with a meter.
Each of these brooding basics has evolved into what the industry considers standard procedures for brooding chicks today. Using the tools and equipment available to follow these procedures is not just the best but the only way to give your chicks the start they need to become a top-performing flock.
Growing chickens today is not a matter of managing by the day but by the hour. Mistakes made in the first 72 hours cannot be made up later in the flock. Taking the time to do brooding right pays off at catch time.
Summary on Brooder House Construction and Management
| Aspect | Key Points |
|---|---|
| Wall Construction | More courses of blocks than grower pens to retain heat while managing ventilation |
| Separation Distance | Minimum 100 meters between brooder and grower facilities for disease control |
| Layout Flow | Position brooder first in traffic pattern before grower pen for biosecurity |
| Conversion Option | Regular pens work with polythene curtain (nylon) for heat retention and draft control |
| Litter Requirements | Minimum 4 inches dry bedding at 88-92°F; remove caked litter between flocks |
| Temperature Precision | 0.5-1.0°F differences impact health and growth; sensor placement at feed/water lines critical |
| Humidity Target | Maintain 50-65% relative humidity; adjust ventilation run-time accordingly |
| Ammonia Control | Keep below 25ppm; use litter amendments and proper ventilation |
| Carbon Dioxide Limit | Below 3,000ppm; highest during pre-heating in tight houses during cold weather |
| Ventilation Pressure | 0.15+ inches static pressure; 1cfm per square foot floor space |
| Water Management | Clean systems before flock; activate drinkers; verify quality through testing |
| Feed Access | 95% of chicks should have feed/water in their crops after 24 hours |
| Lighting Intensity | Minimum 3 foot-candles for first 7-10 days along feed lines; verify with meter |
| Critical Period | First 72 hours determine flock performance; mistakes cannot be corrected later |
Frequently Asked Questions About Brooder House Construction and Management
1. Why does the brooder house need more courses of blocks than the grower pen?
Young chicks need much higher temperatures than older birds. The extra wall height helps retain heat inside the brooder house, reducing heating costs and creating more stable temperature conditions. However, this doesn’t mean sealing the house completely. You still need controlled ventilation openings above the walls to manage air quality. The solid lower walls prevent drafts at chick level while allowing air exchange higher up where it won’t chill the birds.
2. How far apart should the brooder and grower facilities really be?
At least 100 meters minimum. This distance significantly reduces disease transmission between age groups. Older birds carry pathogens that might not affect them much but can devastate young chicks with undeveloped immune systems. The physical separation also makes biosecurity protocols easier to enforce. You can dedicate equipment to each area, require boot changes between buildings, and manage traffic flow to minimize cross-contamination.
3. Can I really use a regular pen as a brooder house?
Yes, with proper modifications. Hang a polythene curtain (nylon) around the perimeter to create a warmer, more protected environment. The curtain reduces drafts, helps retain heat, and allows you to control ventilation by rolling it up or down as needed. Many successful operations start this way to keep costs down. As revenue increases, you can invest in purpose-built brooder facilities. The key is managing the seven brooding basics properly regardless of building type.
4. What happens if I place the grower pen before the brooder in my farm layout?
You increase disease risk to your most vulnerable birds. When workers or visitors reach the grower pen first, they potentially pick up pathogens from older birds and carry them to the brooder house. Young chicks have weak immune systems and are highly susceptible to infections. Position the brooder as the first building in your traffic flow. This simple layout choice protects your youngest birds by ensuring clean entry.
5. How do I prepare used litter for the next flock?
Remove all caked litter immediately after birds leave. Use windrowing or litter conditioning equipment to break up remaining litter and expose it to air. Heat the house and ventilate to dry the litter thoroughly. This process also releases ammonia buildup. Top-dress with fresh material and apply ammonia-controlling amendments at recommended rates. The prepared litter should be dry, have low ammonia levels, and be at the proper temperature when chicks arrive.
6. What’s the most common temperature mistake in brooder houses?
Measuring temperature in the wrong location. Many farmers check the temperature at their own height or near the ceiling. What matters is the temperature at the feed and water lines where chicks actually spend their time. Place sensors at chick level, not at human eye level. A house that feels warm to you might be too cold for chicks at floor level. Always verify temperatures where the birds are, not where it’s convenient to check.
7. How do I know if my ventilation is working properly?
Use a smoke emitter to visualize airflow patterns. Smoke should travel from the inlet vents up to the ceiling peak, then spread across and down. If smoke drops immediately or blows directly onto birds, your inlet opening or static pressure is wrong. Measure static pressure with a manometer during minimum ventilation. You should achieve 0.15 inches or more. If you can’t, your house is too leaky or the fans are undersized.
8. Why are the first 72 hours so critical for chick success?
Chicks that don’t eat and drink adequately in the first three days never fully recover. Their digestive systems don’t develop properly and they grow slower for their entire lives. Early access to feed and water stimulates immune system development too. Poor early starts lead to higher mortality, worse feed conversion, and uneven flock performance throughout the grow-out period. You simply cannot make up for a bad start later.
9. Should I invest in air quality monitoring equipment?
If you’re running a commercial operation, yes. Accurate ammonia and carbon dioxide monitoring prevents problems before they damage bird health. Your nose becomes accustomed to the ammonia smell, making it an unreliable indicator. Carbon dioxide is odorless. By the time you notice effects, birds have already suffered. Quality monitoring equipment costs money upfront but pays for itself through better performance and lower mortality. For small operations, focus on proper litter management and humidity control first.
10. What’s the single most important factor in brooding success?
There isn’t one single factor. Success requires managing all seven basics simultaneously. Temperature control gets the most attention because it’s easy to measure, but poor litter, inadequate ventilation, low light intensity, or limited water access will ruin performance even with perfect temperature. The seven factors work together as a system. Neglect any one of them and you compromise the entire operation. This is why brooding requires constant attention, especially during the first 72 hours.
Do you have any questions, suggestions, or contributions? If so, please feel free to use the comment box below to share your thoughts. We also encourage you to kindly share this information with others who might benefit from it. Since we can’t reach everyone at once, we truly appreciate your help in spreading the word. Thank you very much for your support and for sharing!
Read Also: Anatomy of Fishes: Female Fish and their Reproductive Strategies