
Amaranth is a versatile and nutritious crop valued for its leaves and grains. This hardy plant thrives in diverse conditions, making it ideal for home gardeners and farmers. Its leaves are rich in vitamins and minerals, surpassing many common greens. This article explores two effective techniques for cultivating amaranth.
The surface composting technique is a low-maintenance method that mimics natural processes, ensuring healthy growth with minimal soil disruption. Meanwhile, the manure/low-volume compost technique enhances soil fertility for robust yields. Both methods prioritize sustainable practices for optimal results.
This guide provides step-by-step instructions for growing leafy and grain amaranth. It covers planting layouts, soil preparation, and harvesting methods. By following these techniques, you can achieve a bountiful amaranth harvest with ease.
Whether you’re a beginner or experienced grower, this article offers practical insights. It emphasizes simple, eco-friendly methods to cultivate amaranth successfully in various climates.
Read Also: How to Make Money in Poultry Farming
Surface Composting Technique
This section outlines the surface composting technique, a natural approach to growing amaranth. It focuses on minimal soil disturbance, efficient nutrient delivery, and sustainable practices. The method is ideal for leafy amaranth, ensuring healthy growth and easy harvesting.
A. Plant Characteristics and Growing Conditions
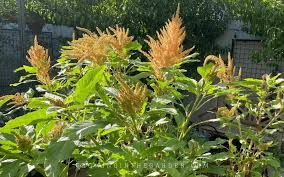
Amaranth is a hardy plant, thriving in poor soil, high temperatures, and dry conditions. Its leaves are rich in vitamins A, B, and C, with more calcium and iron than spinach. It’s perfect for spring through summer planting, needing 15°C for germination.
Optimal growing temperatures range from 23-35°C, making amaranth a better summer leafy green than spinach or kale. Most cultivars are suited for either leaf or grain production. This adaptability makes it a valuable crop for diverse climates.
Leafy amaranth requires careful spacing to ensure canopy closure and easy access. The surface composting method supports its medium feeding needs. By mimicking natural processes, it promotes healthy growth without excessive soil disturbance.
B. Planting Layout and Preparation
1. Triple Row Layout: Leafy amaranth uses a 37.5cm triple-row system, with 30cm between plants. Split 75cm rows into three at 0, 37.5, and 75cm. This allows a 75cm walkway for easy leaf harvesting. Grain amaranth needs wider spacing, with 30cm between plants and 75cm rows.
This layout ensures efficient space use and accessibility. The triple-row system supports canopy closure, reducing weed growth. It also simplifies harvesting, making it practical for small and large gardens.
2. Setting Up Strings: Place a taut string from one 75cm permanent peg to its opposite. Add temporary pegs 10cm downslope, securing another string to mark the composting band. Ensure ropes are straight by lifting and dropping them.
This step creates a precise planting guide. Accurate string placement ensures consistent row spacing. It also helps maintain the composting band’s position for effective nutrient delivery.
3. Soil Fracturing: Push a fork 30cm deep and pull back slightly to loosen soil without turning it. Remove stones or rocks felt with the fork. Repeat every 10cm along the row to fracture the soil evenly.
Soil fracturing improves root penetration without disrupting soil structure. This technique enhances water retention and nutrient availability. It prepares the ground for healthy amaranth growth.
C. Soil Management and Planting
1. Removing God’s Blanket: Move undecomposed organic matter (God’s Blanket) downslope of the 10cm planting band. This prevents burying it, which could cause a nitrogen deficiency and reduce yields. Ensure no organic matter is buried during preparation.
This step maintains soil fertility by avoiding negative nitrogen periods. It ensures the planting band remains clear for effective seed germination. Proper management of organic matter supports sustainable growth.
2. Correcting Soil Acidity: Evenly sprinkle 1 tablespoon of wood ash or 1 teaspoon of lime every 60cm along the planting line. This corrects acidic soils, making nutrients more available to amaranth plants.
Soil correction is crucial for optimal nutrient uptake. Amaranth thrives in balanced soil conditions. This simple step enhances plant health and supports vigorous growth throughout the season.
3. Surface Composting: Apply a 3cm layer of compost over the 10cm-wide planting band. Do not mix it into the soil, as amaranth feeds from the surface. Repeat for each 37.5cm row to support canopy closure.
Surface composting mimics natural nutrient cycling, as designed by nature. It provides steady nutrition for medium-feeding amaranth. This method reduces labor while ensuring robust plant development.
D. Planting and Harvesting
1. Furrowing and Seeding: Press lightly with a hoe to create a 1cm-deep furrow in the compost band. Plant seeds 15cm apart, cover by pinching compost closed, and firm gently. Thin to 30cm after germination.
Shallow planting ensures high germination rates. Proper spacing supports healthy growth and canopy closure. Thinning after germination optimizes plant vigor and yield potential.
2. Applying God’s Blanket: After germination, bring the blanket against plant bases, ensuring 100% cover at 2.5cm thick. This suppresses weeds and conserves moisture, supporting plant health throughout the growing season.
The blanket mimics natural mulch, reducing competition and water loss. It creates a stable environment for amaranth. Proper application ensures long-term productivity and ease of maintenance.
3. Harvesting Leaves: Trim the two lowest leaves during harvest, allowing upper leaves to fill out. Plants will produce leafy greens for months, providing a steady supply of nutritious foliage.
Selective harvesting promotes continuous growth. This method maximizes yield over time. It ensures a consistent supply of fresh, nutrient-rich amaranth leaves for consumption.
Read Also: The Historical Development of Crop Production
Manure/Low-Volume Compost Technique
This section details the manure/low-volume compost technique, which enhances soil fertility for amaranth cultivation. It uses deeper soil preparation and organic inputs to support robust growth. The method is effective for both leafy and grain amaranth.
A. Plant Characteristics and Suitability
Amaranth excels in poor soil, high temperatures, and dry conditions, making it ideal for summer planting. Its leaves contain high levels of vitamins A, B, and C, plus more calcium and iron than spinach. It requires 15°C for germination.
With optimal temperatures of 23-35°C, amaranth outperforms spinach and kale as a summer green. Cultivars are typically specialized for leaf or grain production. This technique leverages manure to boost yields in diverse conditions.
The method suits gardeners seeking higher nutrient inputs. It ensures strong plant growth through targeted soil enrichment. Amaranth’s hardiness makes it adaptable to this intensive approach.
B. Layout and Initial Setup
1. Triple Row System: Use a 37.5cm triple-row layout for leafy amaranth, with 30cm between plants. Divide 75cm rows into three at 0, 37.5, and 75cm. Grain amaranth requires 30cm plant spacing and 75cm rows.
This layout supports efficient land use and easy harvesting. The triple-row design promotes canopy closure, reducing weeds. Walkways ensure accessibility for maintenance and leaf collection.
2. String Placement: Secure a taut string between 75cm permanent pegs across the planting area. Lift and drop the rope to ensure it’s straight, marking the planting line accurately.
Precise string placement guides furrow digging and planting. It ensures consistent row alignment for optimal growth. This step simplifies the setup process for large-scale planting.
3. Removing God’s Blanket: Move organic matter 20cm downslope from the planting string. Avoid moving it too far to prevent interference with adjacent rows. This exposes soil for furrow preparation.
Clearing the blanket ensures a clean planting surface. It prevents organic matter from affecting germination. Proper placement supports efficient row preparation and plant establishment.
C. Soil Preparation and Nutrient Application
1. Soil Fracturing: Insert a fork 30cm deep and pull back slightly to fracture the soil. Remove stones or rocks without turning the soil. Repeat every 10cm along the row for consistent loosening.
Fracturing enhances root access to nutrients and water. It maintains soil structure while improving aeration. This step prepares the ground for effective furrow digging and planting.
2. Digging Furrows: Dig a 10cm-deep furrow, moving soil downslope neatly for reuse. Repeat every 37.5cm for leafy amaranth, leaving a 75cm walkway after each triple row for access.
Deep furrows accommodate manure and ensure proper seed depth. The layout supports canopy closure and accessibility. This method maximizes space while facilitating easy harvesting.
3. Correcting Acidity: Sprinkle 1 tablespoon of wood ash or 1 teaspoon of lime every 60cm along the furrow. This balances soil pH, improving nutrient availability for amaranth.
Correcting acidity enhances plant uptake of essential nutrients. It ensures optimal growing conditions. This simple adjustment supports healthy development and higher yields.
D. Planting and Maintenance
1. Adding Manure/Compost: Spread 500ml of manure or compost per meter in the furrow. Cover with a 3cm soil layer to separate seeds from manure, preventing seed burn and ensuring a 1cm planting depth.
This step provides rich nutrition while protecting seeds. The soil layer ensures high germination rates. Proper application supports vigorous growth and long-term productivity.
2. Planting Seeds: Plant seeds 1cm deep, 15cm apart, and cover with fine soil. Ensure a slightly raised furrow surface for optimal germination. Thin to 30cm intervals after seedlings emerge.
Shallow planting and thinning promote healthy development. A raised surface aids germination by improving drainage. This method ensures strong, evenly spaced plants for maximum yield.
3. Applying God’s Blanket: After germination, place the blanket close to plant stems, ensuring 100% cover at 2.5cm thick. This suppresses weeds and retains moisture, supporting plant health.
The blanket reduces maintenance by controlling weeds. It conserves water, crucial for dry conditions. Proper application enhances amaranth’s resilience and productivity over time.
E. Harvesting
1. Leaf Harvesting: Trim the two lowest leaves, allowing upper leaves to grow. Plants will produce greens for months, offering a continuous supply of nutritious foliage for consumption.
Selective harvesting extends the plant’s productive life. It ensures a steady yield of fresh leaves. This method maximizes the crop’s value for home and market use.
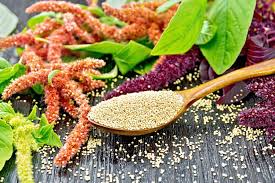
2. Grain Harvesting Considerations: For grain amaranth, allow plants to mature fully before harvesting. Wider spacing accommodates their height, up to 2m. Harvest when grains are dry and firm.
Grain harvesting requires patience for full maturity. Proper spacing supports tall plants. This approach ensures high-quality grain yields for culinary or planting purposes.
3. Sustainable Practices: Both techniques emphasize minimal soil disturbance and organic inputs. Reusing God’s Blanket and applying compost or manure sustainably enhances soil health for future crops.
Sustainable practices reduce environmental impact. They improve soil fertility over time. These methods ensure long-term productivity and eco-friendly amaranth cultivation.
Frequently Asked Questions
1. What makes amaranth a good choice for summer planting?
Amaranth thrives in high temperatures (23-35°C) and dry conditions, outperforming spinach and kale. It requires 15°C for germination, making it ideal for spring through summer planting.
2. How does surface composting benefit amaranth growth?
Surface composting mimics natural nutrient cycling, providing steady nutrition without soil disruption. It supports medium-feeding amaranth, promotes canopy closure, and reduces maintenance.
3. Why is God’s Blanket important in these techniques?
God’s Blanket suppresses weeds and conserves moisture. Applied after germination, it ensures 100% cover at 2.5cm thick, supporting plant health and reducing labor.
4. Can I use the same layout for leafy and grain amaranth?
Leafy amaranth uses a 37.5cm triple-row layout with 30cm plant spacing. Grain amaranth requires wider 75cm rows due to its 2m height, but plant spacing remains 30cm.
5. How do I prevent poor germination in amaranth?
Plant seeds 1cm deep and avoid direct contact with manure to prevent seed burn. In the manure technique, a 3cm soil layer ensures proper seed depth and germination.
6. What is the purpose of soil fracturing?
Soil fracturing loosens the ground 30cm deep without turning it, improving root penetration and water retention. It enhances nutrient availability while maintaining soil structure.
7. How often should I harvest amaranth leaves?
Harvest the two lowest leaves regularly, allowing upper leaves to fill out. This promotes continuous growth, providing leafy greens for several months.
8. Can these techniques be used in poor soil conditions?
Yes, amaranth is hardy and tolerates poor soil. Both techniques enhance fertility with compost, manure, or soil amendments like wood ash or lime, ensuring successful growth.
Do you have any questions, suggestions, or contributions? If so, please feel free to use the comment box below to share your thoughts. We also encourage you to kindly share this information with others who might benefit from it. Since we can’t reach everyone at once, we truly appreciate your help in spreading the word. Thank you very much for your support and for sharing!