
Brassica vegetables, including cabbage, cauliflower, broccoli, kale, rape, and collard greens, are nutrient-rich crops valued for their high vitamin content. This article provides detailed techniques for cultivating these vegetables using compost and manure methods.
It emphasizes proper soil preparation, planting, and pest management. The guide is structured to help beginners and experienced gardeners achieve successful yields.
These vegetables thrive in specific conditions, requiring careful attention to soil fertility and climate. The following sections outline two primary cultivation methods: the compost/manure technique for cabbage, cauliflower, and broccoli, and the surface composting technique for kale, rape, and collard greens. Each method is tailored to the crops’ unique needs.
Understanding the optimal growing conditions is key to success. Brassicas prefer cooler climates, and their cultivation involves precise spacing, soil preparation, and nutrient management. This guide ensures you have the tools to grow these crops effectively.
By following these techniques, gardeners can maximize yields while maintaining healthy plants. The article covers everything from soil fracturing to harvesting, ensuring a bountiful and sustainable harvest.
Read Also: How to determine if your Housing is Conducive for your Fishes
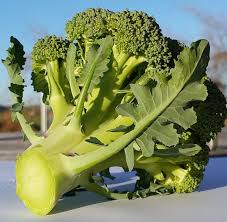
Cabbage, Cauliflower, and Broccoli Cultivation
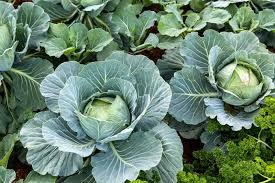
This section focuses on growing cabbage, cauliflower, and broccoli using the compost/manure technique. These crops demand fertile soils, high nutrient inputs, and effective pest control. The process involves careful spacing, soil preparation, and seedling management to ensure healthy growth.
A. Understanding Brassica Characteristics
Cabbage, cauliflower, and broccoli belong to the Brassica family, known for high vitamin C and K content. These leafy vegetables are popular globally, with cabbage offering double the nutritional value of broccoli and cauliflower. They require good management and fertile soils.
These crops thrive in cool, humid climates with optimal growing temperatures of 15-24°C. They can tolerate a range of 0-30°C, preferring cold over hot conditions. Certain cultivars can even withstand frost, making them versatile for various regions.
Due to their high input needs, these crops are best suited for gardeners with experience. Beginners should gain expertise with other crops before attempting Brassicas. Proper pest control and soil fertility are critical for success.
B. Preparing the Soil
1. Layout and Spacing: For medium-sized heads, space plants 45 cm apart with 75 cm between rows. For larger heads, use 60 cm by 75 cm spacing. This ensures adequate room for growth and nutrient absorption.
Proper spacing is essential for healthy Brassica growth. Use a 45 cm measuring rope stretched between 75 cm permanent pegs to mark planting stations. Ensure the rope is taut and straight by lifting and dropping it.
2. Soil Fracturing and Digging: Fracture the soil 30 cm deep along each 75 cm line to promote root growth. Dig planting stations 15 cm deep, 12 cm wide, and 15 cm long at 45 cm intervals, heaping soil downslope for reuse.
Soil preparation enhances root penetration and nutrient availability. Move God’s Blanket (mulch) 30 cm downslope from each planting station to expose soil. This prevents burying undecomposed material, which can reduce yields.
3. Correcting Soil Acidity: Apply 1 tablespoon of wood ash or bonemeal, or 1 teaspoon of lime, to each planting station to correct acidic soils. This ensures readily available nutrients for the plants.
After adding amendments, apply 500 ml of compost or manure to each station. Cover with soil from the downslope heap until level, then replace a 2.5 cm thick mulch blanket to conserve moisture.
C. Planting and Nutrient Management
1. Planting Seedlings: Transplant seedlings when they are 10-12 cm tall. Use a dibble stick to create a hole through the mulch into the planting station center, ensuring the hole depth matches the seedling roots.
Carefully plant seedlings to avoid J-shaped roots, which hinder growth. Press soil gently around roots at an angle to eliminate air spaces. This promotes healthy root establishment and plant vigor.
2. Top Dressing: Brassicas require high nutrients. If yellowing occurs, top dress with 350 ml of diluted manure tea per plant or apply a teaspoon of urea in a 3 cm deep hole, three finger widths upslope, every second week until 6 weeks old.
Regular observation ensures nutrient deficiencies are addressed promptly. Top dressing supports vigorous growth, especially during early development, helping plants reach their full potential.
D. Pest Control and Harvesting
1. Pest Management: Brassicas are prone to pests and diseases. Maintain healthy soils, thick mulch, and ample nutrients to keep plants stress-free. Use organic pest control focused on prevention, with a 12-month crop rotation break.
If diseased plants appear, remove and dispose of them far from the garden. Regular monitoring is crucial to catch issues early and maintain crop health.
2. Harvesting: Monitor crops to prevent bolting, which causes cabbages to split and cauliflower or broccoli to flower. Harvest heads at the right stage to ensure quality and maximize yield.
Effective pest control and timely harvesting are vital for a successful Brassica crop. These steps ensure the plants remain healthy and productive throughout their growth cycle.
Read Also: How many plots of land do I need to start fish farming?
Kale, Rape, and Collard Greens Cultivation
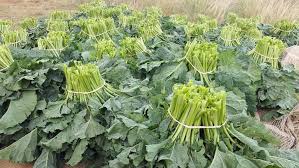
This section covers the surface composting technique for growing kale, rape, and collard greens. These Brassica oleracea variants are easier to grow than cabbage and offer continuous leaf harvests, making them ideal for home gardens.
A. Characteristics of Kale, Rape, and Collard Greens
Kale, rape, and collard greens are popular in Africa, with variants like Sukuma wiki in Kenya. High in vitamins C, K, and antioxidants, they are similar to spinach, producing leaves for extended periods. Rape grows taller over time.
These crops thrive at 7-24°C and are best planted in spring or autumn, avoiding high temperatures during the seedling stage. Their ease of cultivation makes them suitable for beginners and small gardens.
Their ability to produce leaves for months makes them a valuable addition to any garden. Proper spacing and composting techniques ensure robust growth and consistent harvests.
B. Soil Preparation and Layout
1. Layout and Spacing: Use triple rows spaced 37.5 cm apart, with plants 30 cm apart within rows. Split 75 cm rows at 0, 37.5, and 75 cm for easy harvesting access. For small gardens, use 37.5 cm spacing throughout.
Mark rows with a taut measuring rope between 75 cm permanent pegs. Place temporary pegs 10 cm downslope to establish a 10 cm wide composting band, ensuring straight rows for uniform planting.
2. Soil Fracturing: Fracture soil 30 cm deep every 10 cm along the row using a fork, loosening it without turning. Remove stones to improve root growth and ensure a healthy foundation for the crop.
Move God’s Blanket downslope of the 10 cm planting band to avoid burying undecomposed material. This prevents nitrogen loss and supports optimal crop yield during growth.
3. Correcting Soil Acidity: Sprinkle 1 tablespoon of wood ash or bonemeal, or 1 teaspoon of lime, every 60 cm along the planting line to correct acidic soils and provide accessible nutrients.
Apply 5 cm deep compost evenly across the 10 cm wide band without working it into the soil. This surface composting mimics natural nutrient delivery, supporting kale’s medium feeding needs.
C. Planting Techniques
1. Planting Seeds: Create a 2 cm deep furrow in the compost band using a hoe edge. Plant kale seeds 2 cm deep, 15 cm apart, and cover by pinching compost closed. Thin to 30 cm intervals after germination.
Do not cover the band with mulch until germination occurs. Afterward, apply a 2.5 cm thick blanket to suppress weeds and retain moisture, ensuring healthy seedling development.
2. Planting Seedlings: For better results, plant kale seedlings instead of seeds. Twist a dibble stick through the mulch into the center of the 10 cm compost band at 30 cm intervals, using a diamond arrangement for the middle row.
Ensure seedling roots are straight, avoiding J-shapes or air spaces. Press compost gently around roots to secure them, promoting strong establishment and long-term growth.
D. Harvesting and Maintenance
1. Harvesting Leaves: Harvest the two lowest leaves to encourage inner leaf growth. Remove older or diseased leaves to promote plant health. Kale can yield 6-8 harvests in a 6-month rotation.
Regular harvesting extends the productive life of the plants. By removing only the lowest leaves, the plant continues to produce, ensuring a steady supply of fresh greens.
2. Maintenance Practices: Maintain a 100% mulch cover, 2.5 cm thick, to suppress weeds and conserve moisture. Monitor plants regularly to ensure they remain healthy and productive throughout the growing season.
Consistent maintenance and careful harvesting maximize the yield and quality of kale, rape, and collard greens, making them a reliable crop for any gardener.
Frequently Asked Questions
1. What are the best growing conditions for Brassicas?
Brassicas thrive in cool, humid climates with temperatures between 7-24°C for kale and 15-24°C for cabbage, cauliflower, and broccoli. They prefer fertile soils and can tolerate a range of 0-30°C, with some cultivars frost-resistant.
2. Why is soil fracturing important for Brassica crops?
Soil fracturing to 30 cm deep loosens the soil, promoting root growth and nutrient absorption. It ensures healthy plant development without turning the soil, which could disrupt its structure and reduce yields.
3. How often should I top dress Brassica crops?
Top dress cabbage, cauliflower, and broccoli with urea or manure tea every second week if yellowing occurs, until 6 weeks old. Kale requires less frequent feeding due to its medium nutrient demands.
4. What is God’s Blanket, and why is it moved?
God’s Blanket refers to mulch covering the soil. It is moved downslope during planting to expose soil and prevent burying undecomposed material, which could cause nitrogen loss and reduce crop yield.
5. How can I prevent pests in Brassica crops?
Use healthy soils, thick mulch, and ample nutrients to keep plants stress-free. Implement organic pest control, maintain a 12-month crop rotation, and remove diseased plants promptly to prevent pest and disease spread.
6. Why should I avoid J-shaped roots when planting seedlings?
J-shaped roots hinder growth by restricting root development. Proper hole depth and gentle soil pressing around seedling roots ensure straight roots and no air spaces, promoting healthy plant growth.
7. How do I know when to harvest Brassica crops?
Harvest cabbage, cauliflower, and broccoli before they bolt, which causes splitting or flowering. For kale, rape, and collard greens, harvest the lowest leaves regularly to encourage continuous production.
8. Can I grow kale in a small garden?
Yes, kale is ideal for small gardens. Use 37.5 cm spacing for triple rows to maximize space. The surface composting technique and regular harvesting make it easy to grow in limited areas.
Do you have any questions, suggestions, or contributions? If so, please feel free to use the comment box below to share your thoughts. We also encourage you to kindly share this information with others who might benefit from it. Since we can’t reach everyone at once, we truly appreciate your help in spreading the word. Thank you very much for your support and for sharing!