
Every successful poultry operation starts with proper management at the very beginning. The first few days and weeks of a bird’s life are absolutely critical. Get these early stages right, and you set your birds up for strong growth, good health, and high productivity throughout their lives. Get them wrong, and you’ll pay for those mistakes through excessive mortality, disease outbreaks, poor growth rates, and reduced egg production that haunts your operation for months.
This isn’t an exaggeration. The management of day-old chicks is genuinely one of the most delicate operations in poultry farming. These tiny birds are vulnerable to temperature fluctuations, dehydration, disease, and stress. Their immune systems are still developing, and they depend entirely on you to provide exactly the right conditions for survival and growth. Any mismanagement at this stage shows up later as heavy financial losses that are difficult or impossible to recover from.
But here’s what many new poultry farmers don’t realize: proper chick management actually begins before the birds even arrive at your farm. The preparation work you do in the two weeks leading up to their arrival matters just as much as what you do on the day they hatch. Cleaning, disinfection, equipment setup, and temperature testing all need to happen ahead of time. Trying to prepare a brooding pen on the same day chicks arrive is a recipe for disaster.
Beyond the critical first few weeks, different types of birds require different management approaches as they mature. Broilers follow a fast track from hatch to market weight in just 8 to 12 weeks. Their management focuses on rapid, efficient growth with careful attention to feed conversion ratios and marketing timing. Growers, which are pullets between 9 and 20 weeks of age, need a different feeding strategy that prevents excessive fat buildup while preparing them for the laying period ahead. Layers require yet another management approach once they reach 18 weeks and begin their productive lives as egg producers.
Understanding these different life stages and their specific requirements is essential for any poultry farmer. Whether you’re raising broilers for meat, layers for eggs, or both, each stage demands particular attention to housing, feeding, temperature, space allocation, and health management. Skip steps or cut corners at any stage, and productivity suffers across your entire operation.
The good news is that poultry management, while demanding, follows predictable patterns. Once you understand the principles and develop solid routines, the work becomes manageable and even satisfying. Seeing healthy chicks grow into productive birds under your care is genuinely rewarding, both personally and financially.
In this comprehensive guide, we’ll walk through every stage of poultry management from day-old chicks through to productive layers. We’ll cover the specific requirements for broilers, growers, and layers, including housing, feeding, temperature management, health protocols, and how to identify high-quality birds at each stage. We’ll also explain how to calculate productivity in laying flocks so you can measure and improve your results over time.
1. Management of Day-Old Chicks
The management of day-old chicks represents the foundation of your entire poultry operation. Any problems that develop during this critical period will affect bird performance for their entire lives. High early mortality, disease susceptibility, and poor growth all trace back to inadequate chick management in the first few weeks.
A. Pre-Arrival Preparation
Your preparation work begins at least two weeks before chicks arrive at your farm. This preparation gives you time to do things properly without rushing, and it ensures the brooding environment is fully ready when delicate day-old chicks need it.
i. Clean and disinfect the brooding pen: Start by removing all old litter and debris from the pen. Sweep thoroughly, then wash all surfaces with detergent and water. After washing, apply an effective poultry disinfectant according to the manufacturer’s instructions. Allow the pen to dry completely before moving to the next step.
ii. Spread fresh litter material: Add new litter to a depth of 6 to 8 centimeters across the entire floor. Common litter materials include wood shavings, rice husks, or chopped straw. The litter should be dry, absorbent, and free from mold or dust.
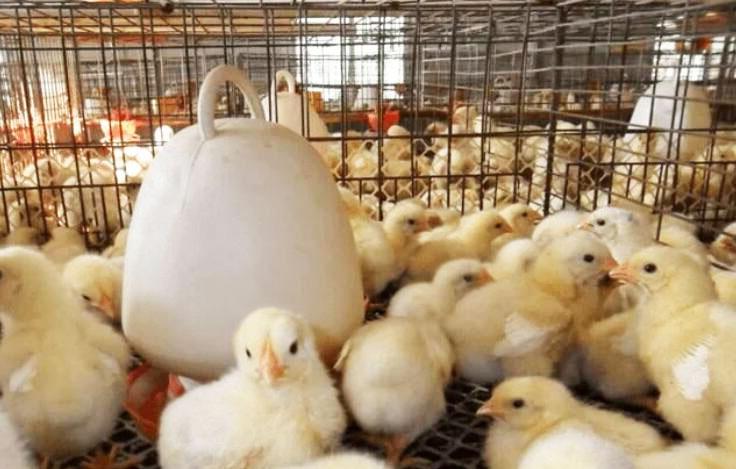
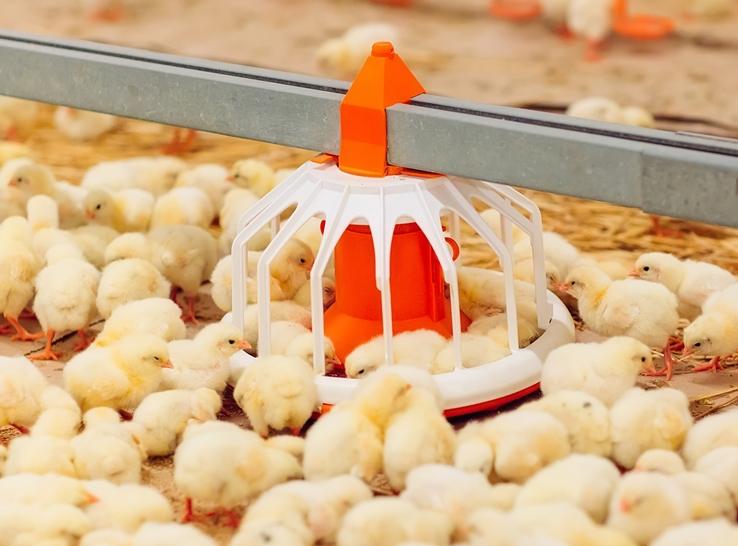
iii. Set up feeding and watering equipment: Install small chick-sized feeders and drinkers appropriate for day-old birds. Position them so chicks can easily access both feed and water from anywhere in the brooding area. Use one feeder per 50 chicks and one drinker per 100 chicks as a general guideline.
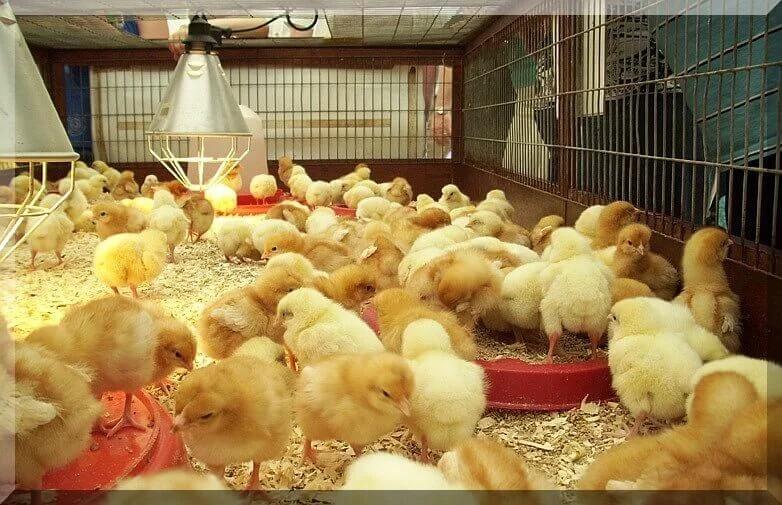
iv. Install and test the brooder: Set up your heating source (brooder) and test it for at least 24 hours before chick arrival. The target temperature directly under the brooder should be 35°C (95°F) for day-old chicks. Verify that the brooder maintains this temperature consistently.
v. Prepare feed and water: Have chick starter mash and clean, fresh water ready before birds arrive. Don’t wait until after unloading to prepare these essentials. Chicks need immediate access to both upon arrival to prevent dehydration and energy depletion.
B. Arrival Day Management
i. Inspect chicks immediately: As soon as chicks arrive, open the boxes and inspect them carefully. Remove any dead chicks promptly. Also, remove obviously weak or deformed chicks that are unlikely to thrive. These steps prevent contamination and reduce disease risk.
ii. Provide correct feed: Chicks destined to become layers should receive chick starter mash formulated for layers (typically 20 to 22% protein). Broiler chicks should get broiler starter mash (typically 22 to 24% protein). Using the wrong feed formulation from the start affects growth and development throughout the birds’ lives.
iii. Encourage eating and drinking: Gently dip the beaks of a few chicks in water to show them where it is. Once some birds start drinking, others will follow by observing. The same applies to feed. Make sure the feed is easily visible and accessible.
C. Temperature Management
Maintaining correct temperature is absolutely critical for chick survival and growth. Chicks cannot regulate their own body temperature effectively for the first few weeks of life, so they depend entirely on external heat sources.
Table: Temperature requirement of chicks
| Age of chick | Temperature |
|---|---|
| Day old – 1 week | 35°C |
| 1 – 2 weeks | 30°C |
| 2 – 3 weeks | 26°C |
| 3 – 4 weeks | 23°C |
i. Monitor chick behavior: The best way to know if your temperature is correct is by watching how chicks behave. If they huddle directly under the brooder, they’re too cold. If they move far from the heat source and pant, they’re too hot. When comfortable, chicks spread evenly throughout the brooding area.
ii. Adjust gradually: Reduce temperature by approximately 3 to 5°C per week following the schedule above. Make temperature reductions gradually rather than suddenly to avoid shocking the birds.
D. Space and Density Management
i. Brooder space requirement: Provide 40 to 60 cm² of brooder space per chick. This gives birds enough room to move comfortably between the heat source and feeding areas without overcrowding.
ii. Consequences of overcrowding: Cramming too many chicks into too small a space leads to slow growth rates, disease buildup, stress, and behavioral problems including feather pecking and toe pecking. These vices can escalate into serious cannibalism problems that devastate your flock.
iii. Prevention through debeaking: If pecking problems develop despite proper space allocation, debeaking (also called beak trimming) may be necessary to prevent injuries and cannibalism.
2. Broiler Management
Broilers are young chickens of either sex raised specifically for meat production. With good genetics, proper nutrition, and sound management, modern broiler strains reach market weight of 1.5 to 2 kilograms live weight in just 8 to 12 weeks. At this age, their meat is tender, juicy, and well-flavored, making them ideal for the market.
A. Broiler Starter Phase (0 to 5-6 Weeks)
i. Initial setup: Prepare the broiler pen exactly as described above for day-old chicks. All the same principles apply: thorough cleaning, fresh litter, correct temperature, and ready access to feed and water.
ii. Broiler starter ration: Feed a high-protein, moderate-energy diet during this phase. Broiler starter rations typically contain 22 to 24% crude protein and are formulated to support rapid early growth. This phase establishes the growth pattern for the rest of the production cycle.
iii. Temperature and ventilation: Follow the same temperature schedule as for regular chicks. However, broilers generate more body heat as they grow rapidly, so pay particular attention to ventilation after the third week to prevent heat stress.
Read Also: Recommended Management Practices for Broilers
B. Broiler Finisher Phase (5-6 Weeks to Market)
i. Transfer to finisher pen: At 5 to 6 weeks of age, broilers should be moved to a finisher pen with excellent air movement. By this age, birds are generating significant body heat, and good ventilation becomes critical for continued growth and welfare.
ii. Change to finisher ration: Switch from broiler starter to broiler finisher ration at this stage. The finisher ration is a high-energy, moderate-protein feed (typically 19 to 21% protein) designed to maximize weight gain in the final growth period while maintaining feed efficiency.
iii. Weight and feed consumption targets: At 5 to 6 weeks, birds should average 500 to 900 grams in body weight and consume approximately 58 grams of feed per day per bird. If birds fall significantly below these targets, investigate potential problems with feed quality, disease, or environmental conditions.
iv. Space requirements: Provide adequate floor space of approximately 0.25 m² (2,500 cm²) per bird during the finisher phase. Overcrowding larger birds leads to heat stress, poor air quality, increased aggression, and cannibalism.
v. Vaccination schedule: Ensure all vaccinations are administered at the correct ages. Broilers need protection against common diseases even though their production cycle is short. Work with a veterinarian to develop an appropriate vaccination schedule for your region.
vi. Sanitation: Maintain strict sanitary conditions throughout the broiler cycle. Remove dead birds immediately, keep litter as dry as possible, and ensure feeding and watering equipment stays clean.
vii. Coccidiostat management: Include coccidiostats in the feed to prevent coccidiosis, a parasitic disease that causes significant growth setbacks and mortality in broilers. However, withdraw coccidiostats at least two weeks before processing to allow drug residues to clear from the birds’ tissues. This withdrawal period is essential for food safety.
viii. Free access to feed and water: Broilers should have unrestricted access to both feed and clean water at all times. Any limitation on access reduces growth rates and undermines your feed conversion efficiency.
C. Marketing Timing
i. Optimal market age: Broilers reach their best economic return between 8 and 12 weeks of age. During this window, they gain weight efficiently and produce meat with excellent quality characteristics.
ii. Why timing matters: Beyond 12 weeks, broilers eat increasingly more feed relative to the weight they gain. This declining feed efficiency reduces profitability rapidly. Market your birds during the optimal window to maximize returns.
iii. Plan: Arrange buyers and transport before your birds reach market weight. Don’t keep birds past their optimal age simply because you haven’t organized marketing logistics.
D. Signs of a Good Broiler
When selecting breeding stock or evaluating your broiler flock, look for these characteristics:
i. Constricted pelvic bone: Good meat birds have narrow pelvic bones because their bodies direct energy toward muscle development rather than reproductive development.
ii. Dry and constricted vent: A tight, dry vent indicates the bird is a meat-type rather than a layer type.
iii. Not very bright comb: Broilers have relatively small, pale combs compared to layers because they aren’t hormonally geared toward egg production.
3. Management of Growers
Growers refer to growing pullets between 9 and 20 weeks of age. This phase bridges the gap between the rapid growth of the chick phase and the onset of egg production in the laying phase. Management during this period prepares birds physically and physiologically for their productive lives as layers.
A. Housing and Space Requirements
i. Continue in the same pen: Birds can remain in the same housing used during the initial rearing phase, though you may need to expand space as they grow. The key requirement is ensuring adequate floor space and feeding area for the larger birds.
ii. Space allocation: Provide sufficient floor space to prevent overcrowding. Growers need approximately 0.15 to 0.20 m² per bird depending on breed size and housing type.
B. Feeding Management
i. Change to grower mash: At approximately 9 weeks of age, transition birds from chick mash to grower mash. Make this change gradually over several days by mixing increasing proportions of grower mash with decreasing proportions of chick mash.
ii. Grower ration composition: Grower mash is lower in both protein (15 to 16%) and energy compared to chick and broiler feeds. This reduced nutrient density is intentional.
iii. Purpose of reduced nutrition: The lower protein and energy content prevents excessive fat deposition in developing pullets. Birds that become too fat during the growing phase often experience a delayed onset of lay, reduced egg production, and increased health problems once they begin laying.
iv. No coccidiostat needed: Grower rations typically don’t contain coccidiostats because birds at this age have developed natural immunity to coccidia through gradual exposure during the chick phase.
C. Feed Wastage Control
i. Serious economic impact: Feed wastage during the growing phase represents a high unnecessary cost. Since growers consume feed for 11 to 12 weeks during this phase, even small daily wastage adds up to substantial losses.
ii. Use proper feeder designs: Modern feeder designs with rolled edges or anti-waste features can significantly reduce spillage. The investment in better feeders pays back quickly through reduced feed costs.
iii. Proper feeder height: Adjust feeder height as birds grow so the top edge sits at approximately back height for the birds. This positioning minimizes billing out and spillage.
D. Health Management
i. Deworming: Deworm pullets starting at the 16th week of age. Internal parasites accumulated during the growing phase reduce feed efficiency and overall health if not addressed before the laying period begins.
ii. Continued vaccination: Complete any remaining vaccinations according to your regional schedule. Layers need full protection before they enter their productive period.
4. Management of Layers
Layers are mature female chickens raised specifically for egg production. Proper layer management directly affects both the number of eggs produced and the profitability of your egg operation.
A. Transfer to Laying Quarters
i. Age of transfer: Move pullets to the laying quarters at 18 weeks of age. This timing allows birds to settle into their new environment before they begin laying, which typically starts around 20 to 22 weeks depending on breed and management.
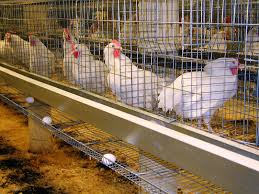
ii. Housing options: Layers can be kept in either battery cage systems or deep litter systems. Both can be successful when managed properly, though each has different advantages and requirements.
B. Feeding Management
i. Change to layer mash: Transition birds from grower mash to layer mash at 18 weeks. Layer mash has significantly higher levels of calcium, energy, and protein compared to grower feed.
ii. Layer ration composition: A standard layer ration contains 16 to 18% protein, adequate energy for maintenance plus egg production, and critically, 3 to 4% calcium for strong eggshell formation.
iii. Pre-lay calcium boost: Two weeks before expected laying begins (around 16 to 17 weeks), increase dietary calcium to 3 to 4%. This allows birds to build calcium reserves in their bones, which they’ll draw upon for eggshell formation once laying starts.
iv. Ad libitum feeding: Provide laying birds with unlimited access to feed at all times. Any form of feed rationing or restriction immediately reduces egg production. Layers consume approximately 110 to 120 grams of feed per day depending on body size and production level.
C. Water Management
i. Critical importance: Water is essential for egg production. Hens need water for metabolism, temperature regulation, and egg formation. A laying hen drinks approximately 250 to 300 milliliters of water per day, more during hot weather.
ii. Consequences of water shortage: Any interruption in water supply, even for a few hours, causes an immediate drop in egg production. Prolonged water deprivation can cause death. Ensure constant access to clean, fresh water.
D. Housing Equipment for Deep Litter Systems
i. Perches: Provide adequate perching space for all birds. Perches allow hens to roost at night, which is a natural behavior that reduces stress and improves welfare. Allocate approximately 15 to 20 centimeters of perch space per bird.
ii. Nest boxes: Install nest boxes at a ratio of one box for every four to five hens. Position boxes in a slightly darker, quieter area of the house to encourage laying. Line boxes with clean nesting material like straw or wood shavings.
E. Lighting Management
i. Stimulate egg production: Increase the length of the light period to 16 to 18 hours per day to stimulate and maintain high egg production. Layers respond strongly to day length, and consistent long days keep them producing steadily.
ii. Artificial supplementation: Use artificial lighting to supplement natural daylight and maintain the target day length year-round. Sudden reductions in day length cause production drops.
iii. Consistency is critical: Maintain a consistent lighting schedule. Irregular light patterns stress birds and reduce production. Use timers to ensure lights turn on and off at the same times every day.
F. Egg Collection and Recording
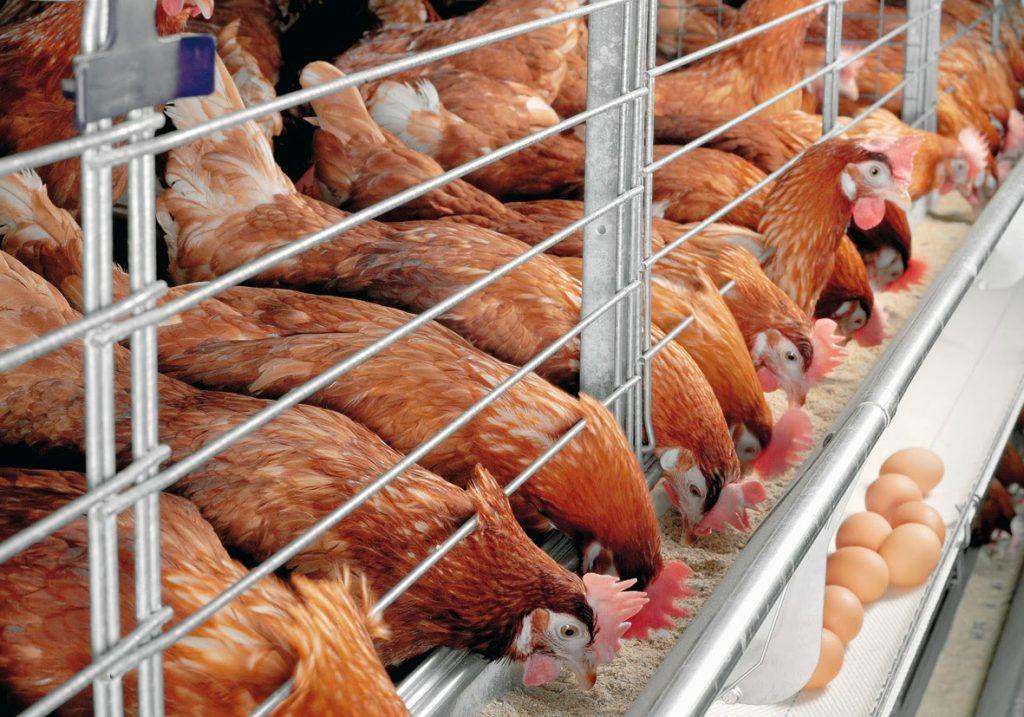
i. Collection frequency: Collect eggs at least twice daily, preferably more often during peak laying periods. Frequent collection reduces egg breakage, prevents egg-eating behavior, and keeps eggs cleaner.
ii. Record keeping: Maintain detailed records of daily egg production, mortality, feed consumption, and any health problems. These records help you identify trends, troubleshoot problems, and measure flock performance accurately.
G. Common Management Problems
i. Broodiness: Some hens become broody, meaning they stop laying and try to incubate eggs instead. Broody hens reduce overall flock production and take up nest box space. Remove broody hens from nest boxes promptly and house them separately if necessary to break the broody cycle.
ii. Molting: Birds undergo molting, which is a natural process where they shed old feathers and grow new ones. During molt, egg production stops or declines significantly. Proper nutrition during molt helps birds complete it quickly and return to production sooner.
H. Characteristics of Good Layers
When selecting breeding stock or culling poor layers from your flock, look for these characteristics in productive hens:
i. Bright red comb: An active layer has a large, bright red comb that indicates high metabolic activity and good circulation.
ii. Bright eyes: Healthy, productive birds have clear, bright, alert eyes. Dull eyes suggest health problems or low productivity.
iii. Wide pelvic bone: Good layers have wide pelvic bones that accommodate egg passage. Check by feeling the distance between the pelvic bones. Four fingers’ width (approximately 6 to 8 centimeters) indicates a good layer.
iv. Large, soft, moist vent: Active layers have large, soft, moist, oval-shaped vents. A small, dry, constricted vent indicates a bird that isn’t laying.
v. Active and alert behavior: Good layers are active, alert, and constantly busy. They move around the pen, feed regularly, and interact with other birds. Lethargic birds are usually poor producers.
vi. Prominent, soft, smooth wattles: Well-developed, soft wattles indicate good hormonal activity associated with egg production.
vii. Worn, soiled plumage close to the body: Birds in heavy production don’t waste energy on pristine feather condition. Their plumage becomes somewhat worn and may be dusty or soiled, particularly on the back and tail area.
viii. Bright red face: Like the comb, the face should be bright red in color, indicating active circulation and good metabolic function.

Fig: A simple means of distinguishing laying birds from non-laying birds (Courtesy of ATB).
Calculating Productivity of Laying Flocks
Measuring productivity accurately helps you evaluate flock performance, identify problems, and make informed management decisions. Two common metrics used in the egg industry are Hen Day Egg Production (HDEP) and Hen Housed Egg Production (HHEP).
A. Hen Day Egg Production (HDEP)
i. Definition: HDEP represents the number of eggs laid expressed as a percentage of the number of layers currently present in your flock on a given day.
ii. Formula:
HDEP = (Total number of eggs laid / Total number of layers on hand) x 100
iii. Example calculation: If you have 500 layers on hand and collect 425 eggs in one day, your HDEP is:
HDEP = (425 / 500) x 100 = 85%
iv. What it tells you: HDEP gives you a snapshot of current flock productivity. It’s useful for tracking day-to-day performance and identifying sudden changes that might indicate health problems or management issues.
B. Hen Housed Egg Production (HHEP)
i. Definition: HHEP represents the number of eggs laid expressed as a percentage of the number of layers housed at the beginning of the laying period.
ii. Formula:
HHEP = (Total number of eggs laid / Total number of layers housed at the beginning of lay) x 100
iii. Why it differs from HDEP: HHEP accounts for mortality over time. The denominator stays constant (initial number housed) even as some birds die. This makes HHEP lower than HDEP but more reflective of true flock economics.
iv. Example calculation: If you started with 1,000 pullets and collected 800 eggs today (even though you now only have 950 birds alive), your HHEP is:
HHEP = (800 / 1,000) x 100 = 80%
v. Long-term perspective: HHEP is particularly useful for evaluating overall flock performance across an entire laying cycle because it includes the economic impact of mortality.
In conclusion, successful poultry production depends on proper management at every life stage from day-old chicks through productive layers. Chicks require careful temperature management, starting at 35°C and reducing gradually over four weeks, along with an appropriate brooder space of 40 to 60 cm² per bird. Preparation must begin two weeks before chick arrival with thorough cleaning, disinfection, and equipment setup.
Broilers follow a fast growth trajectory, reaching market weight of 1.5 to 2 kilograms in just 8 to 12 weeks. They require high-protein starter rations initially, transitioning to high-energy finisher rations at 5 to 6 weeks. Marketing timing is critical because feed efficiency declines sharply after 12 weeks. Good broilers show constricted pelvic bones, dry vents, and pale combs.
Growers (9 to 20 weeks) need lower protein and energy diets (15 to 16% protein) to prevent excessive fat deposition that impairs future laying performance. Feed wastage control during this phase significantly affects profitability.
Layers are moved to laying quarters at 18 weeks and require high-calcium layer mash (3 to 4% calcium), 16 to 18 hours of light daily, unlimited feed access, and constant water availability. Good layers display bright red combs, wide pelvic bones (four fingers wide), large,e moist vents, and alert, active behavior. Both HDEP and HHEP calculations help track flock productivity and identify management improvements.
Read Also: Proper Layers Management Practices for Better Performance
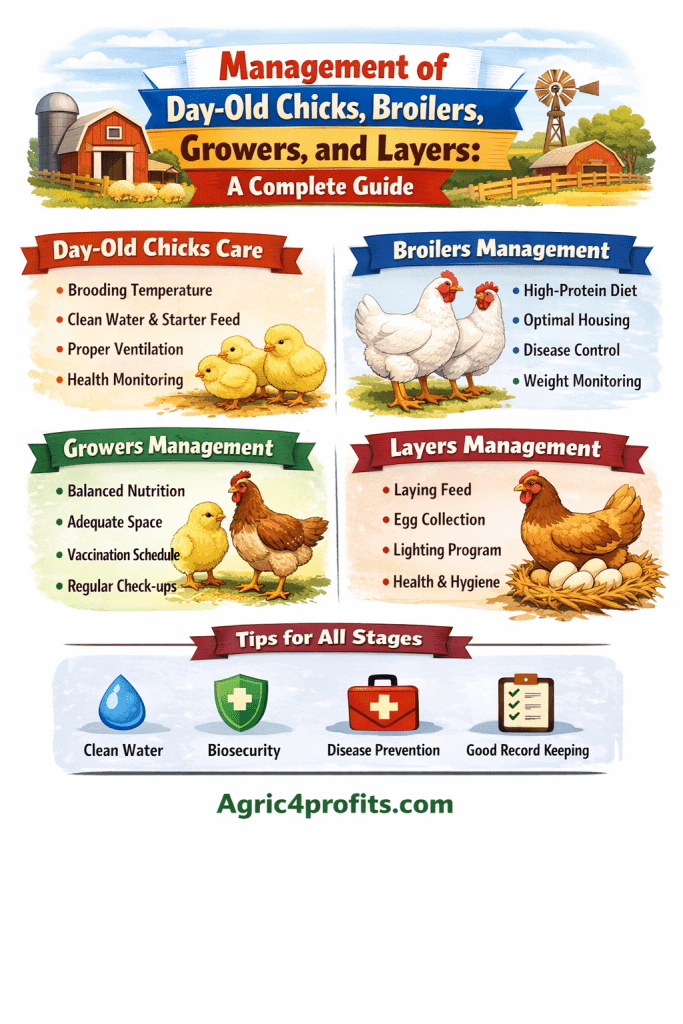
Summary on Management of Day-Old Chicks, Broilers, Growers, and Layers
| Topic | Key Points |
|---|---|
| Day-Old Chick Prep | Begin 2 weeks before arrival; clean, disinfect, spread 6-8 cm litter, test brooder at 35°C |
| Chick Temperature | 35°C week 1; 30°C week 2; 26°C week 3; 23°C week 4; reduce gradually |
| Brooder Space | 40-60 cm² per chick; overcrowding causes disease, slow growth, pecking |
| Broiler Phases | Starter (0-6 weeks): 22-24% protein; Finisher (6-12 weeks): 19-21% protein, high energy |
| Broiler Market Age | 8-12 weeks at 1.5-2 kg; beyond 12 weeks feed efficiency declines rapidly |
| Good Broiler Signs | Constricted pelvic bone, dry constricted vent, pale comb |
| Grower Age | 9-20 weeks; transition from chick mash to grower mash (15-16% protein) |
| Grower Management | Lower protein/energy prevents fat deposition; deworm at 16 weeks |
| Layer Transfer | Move to laying quarters at 18 weeks; start layer mash with 3-4% calcium |
| Layer Requirements | 16-18 hours light, unlimited feed and water, perches and nest boxes |
| Good Layer Signs | Bright red comb, 4-finger pelvic width, large moist vent, active behavior |
| Productivity Metrics | HDEP = eggs laid / current birds; HHEP = eggs laid / initial birds housed |
Frequently Asked Questions About Management of Day-Old Chicks, Broilers, Growers, and Layers
1. How early should I prepare my brooding pen before day-old chicks arrive?
Start preparation at least two weeks before chick arrival. This gives you time to thoroughly clean and disinfect the pen, allow it to dry completely, spread fresh litter to 6-8 cm depth, install equipment, and test the brooder for at least 24 hours to ensure it maintains 35°C consistently. Rushing this preparation increases the risk of disease and mortality in your new chicks.
2. What happens if the brooder temperature is too high or too low for chicks?
If temperature is too low, chicks huddle directly under the heat source, chirp loudly, and may pile on top of each other lea, ding to suffocation. Growth slows and mortality increases. If the temperature is too high, chicks move far from the brooder, pant, spread their wings, and become lethargic. Both extremes stress birds and increase disease susceptibility. Watch chick behavior and adjust the temperature accordingly.
3. When should I move broilers from starter to finisher feed?
Make the transition at 5 to 6 weeks of age when birds weigh approximately 500 to 900 grams. Change gradually over several days by mixing increasing proportions of finisher feed with decreasing proportions of starter feed. The finisher ration is higher in energy and lower in protein, which is appropriate for the final growth phase before market.
4. Why is it important to market broilers between 8 and 12 weeks rather than keeping them longer?
Feed efficiency declines dramatically after 12 weeks. Birds continue eating but gain weight more slowly, meaning your feed costs increase relative to weight gain. This declining efficiency quickly erodes profitability. Market during the optimal 8 to 12-week window when birds are converting feed efficiently and meat quality is at its peak.
5. Why do growers need lower protein feed than chicks even though they’re still growing?
The reduced protein and energy content (15 to 16%) prevents excessive fat deposition in developing pullets. Birds that become overly fat during the growing phase often experience a delayed onset of laying, reduced egg production, and increased health problems once they mature. The controlled growth during this phase prepares them for optimal laying performance.
6. How can I tell the difference between a good layer and a poor layer in my flock?
Good layers have bright red combs and faces, wide pelvic bones (4 finger widths), large soft moist vents, alert active behavior, and bright eyes. Poor layers show small pale combs, narrow pelvic bones (1-2 finger widths), small dry constricted vents, lethargic behavior, and dull eyes. Use these visual assessments to cull poor performers and improve overall flock productivity.
7. What does it mean when my layers go broody and how do I handle it?
Broodiness is when a hen stops laying and tries to incubate eggs instead. Broody hens sit continuously on nest boxes, ruffle their feathers when disturbed, and refuse to leave the nest. This behavior stops egg production and blocks nest boxes for other hens. Remove broody hens from nests several times daily or house them separately in a well-lit, cool area to break the cycle quickly.
8. Why do laying hens need so much calcium in their diet?
Each eggshell requires approximately 2 to 2.5 grams of calcium. A hen laying one egg per day needs far more calcium than she would for just body maintenance. The 3 to 4% calcium content in layer feed provides enough for both daily shell formation and building bone reserves. Insufficient calcium leads to soft-shelled or shell-less eggs and can cause skeletal problems in hens.
9. What is the difference between HDEP and HHEP and which should I use?
HDEP (Hen Day Egg Production) divides eggs collected by the current number of birds alive, giving you a snapshot of daily productivity. HHEP (Hen Housed Egg Production) divides eggs by the initial number of birds housed, accounting for cumulative mortality. HHEP better reflects true flock economics over time, while HDEP is useful for monitoring day-to-day performance and detecting sudden problems.
10. Can I use the same housing for broilers and layers, or do they need different facilities?
While the basic structure can be similar, management requirements differ significantly. Broilers need higher protein feed, no nest boxes or perches, and are marketed after 8 to 12 weeks. Layers need nest boxes, perches, 16 to 18 hours of light, and stay in production for 12 to 18 months or more. Most commercial operations use separate dedicated facilities for each type because trying to accommodate both in the same space creates management complications and reduces efficiency for both.
Do you have any questions, suggestions, or contributions? If so, please feel free to use the comment box below to share your thoughts. We also encourage you to kindly share this information with others who might benefit from it. Since we can’t reach everyone at once, we truly appreciate your help in spreading the word. Thank you very much for your support and for sharing!
Related: 12 Management Tips for Better Poultry Performance Potential