
Cakes are distinguished from breads in that they are usually sweet, with many other ingredients besides flour. Flour, fat, raising agents, eggs, sugar, and fruit are the most common ingredients, but other ingredients are limited only by the ingenuity of the baker.
Cake is a form of bread or bread-like food. In its modern forms, it is typically a sweet and enriched baked dessert. In its oldest forms, cakes were normally fried breads or cheesecakes and normally had a disk shape. Determining whether a given food should be classified as bread, cake, or pastry can be difficult.
Cake is often the dessert of choice for meals at ceremonial occasions, particularly weddings, anniversaries, and birthdays. There are countless cake recipes; some are bread-like, some rich and elaborate, and many are centuries old.
Varieties of Cakes in Baking
Cakes are broadly divided into several categories, based primarily on ingredients and cooking techniques:
- Yeast Cakes: These are the oldest and are very similar to yeast breads. Such cakes are often very traditional in form and include such pastries as babka and stollen.
- Cheesecakes: Despite their name, cheesecakes aren’t really cakes at all. Cheesecakes are in fact custard pies, with a filling made mostly of some form of cheese (often cream cheese, mascarpone, ricotta, or the like), and have very little flour added, although a flour-based or graham cracker crust may be used. Cheesecakes are also very old, with evidence of honey-sweetened cakes dating back to ancient Greece.
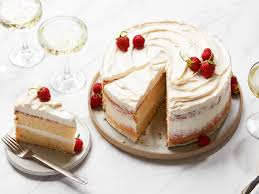
- Sponge Cakes: These are thought to be the first of the non-yeast-based cakes and rely primarily on trapped air in a protein matrix (generally of beaten eggs) to provide leavening, sometimes with a bit of baking powder or other chemical leaven added as insurance. Such cakes include the Italian/Jewish pan di Spagna and the French Génoise. Highly decorated sponge cakes with lavish toppings are sometimes called gateau, the French word for cake.
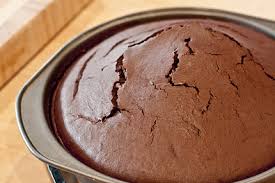
- Butter Cakes: These, including the pound cake and devil’s food cake, rely on the combination of butter, eggs, and sometimes baking powder or bicarbonate of soda to provide both lift and a moist texture.
Beyond these classifications, cakes can be classified based on their appropriate accompaniment (such as coffee cake) and contents (e.g., fruitcake or flourless chocolate cake).
Some varieties of cake are widely available in the form of cake mixes, wherein some of the ingredients (usually flour, sugar, flavoring, baking powder, and sometimes some form of fat) are premixed, and the cook needs to add only a few extra ingredients, usually eggs, water, and sometimes vegetable oil or butter.
While the diversity of represented styles is limited, cake mixes do provide an easy and readily available homemade option for cooks who are not accomplished bakers.
Special-Purpose Cakes for Occasions
Cakes may be classified according to the occasion for which they are intended. For example, wedding cakes, birthday cakes, Christmas cakes, and Passover plava (a type of sponge cake sometimes made with matzo meal) are all identified primarily according to the celebration they are intended to accompany.
The cutting of a wedding cake constitutes a social ceremony in some cultures. The Ancient Roman marriage ritual of confarreatio originated from the sharing of a cake.
Particular types of cake may be associated with particular festivals, such as stollen or chocolate log (at Christmas), babka and simnel cake (at Easter), or mooncake.
There has been a long tradition of decorating an iced cake at Christmas time; other cakes associated with Christmas include chocolate log and mince pies.
Read Also: Sowing Guide for Different Kind of Crops
Shapes of Cakes
Cakes are frequently described according to their physical form. Cakes may be small and intended for individual consumption. Larger cakes may be made with the intention of being sliced and served as part of a meal or social function. Common shapes include:
- Bundt cakes
- Cake balls
- Conical, such as the Kransekake
- Cupcakes and madeleines, which are both sized for a single person
- Layer cakes, frequently baked in a springform pan and decorated
- Sheet cakes, simple, flat, rectangular cakes baked in sheet pans
- Swiss roll cakes
Role of Cake Flour in Baking
Special cake flour with a high starch-to-gluten ratio is made from fine-textured, soft, low-protein wheat. It is strongly bleached, and compared to all-purpose flour, cake flour tends to result in cakes with a lighter, less dense texture.
Therefore, it is frequently specified or preferred in cakes meant to be soft, light, and/or bright white, such as angel food cake.
However, if cake flour is called for, a substitute can be made by replacing a small percentage of all-purpose flour with cornstarch or removing two tablespoons from each cup of all-purpose flour. Some recipes explicitly specify or permit all-purpose flour, notably where a firmer or denser cake texture is desired.
Cake Mixing Methods
Cakes fall into two basic categories: those made with fat, and the sponge types made without fat. The exception of the sponge type is the Genoese sponge, which combines both types.
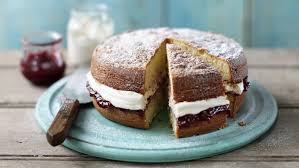
In fat-type cakes, the fat is creamed, melted, or rubbed in. Rub-in mixtures are generally used for plain, everyday cakes such as Tyrol cake, while creamed cakes are rich and soft with a fairly close, even grain and soft crumb as in a Victoria sandwich.
In melted cakes, for example, gingerbread, the fat, often with liquid, sugar, syrup, or treacle added, is poured into the dry ingredients to give a batter-like consistency.
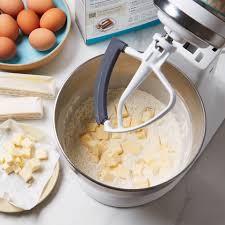
The majority of cakes are mixed using an electric mixer; however, mixing by hand or with a food processor is also acceptable for many methods.
Mixing is a very important aspect of successful cake making. There are several methods, and all have the same aims:
- To blend the ingredients into a smooth, even batter
- To beat the maximum amount of air into the batter
- To form a batter that will hold the air until it is baked, i.e., be stable
- To develop a desirable visual texture, volume, and mouth-feel texture in the baked product
Some of the most commonly used mixing methods include ‘whisking’ or ‘whipping’, ‘creaming’, and the ‘all in’ method. Overall, for anyone baking cakes, experience is the best teacher. The problem of under or over mixing is always present, and understanding mixing is the key to successful cake making.
Butter or Shortened Cakes Recipe
Key Points to Ensure Successful Cake-Making
- Always use the correct size tin, or ensure that the cake batter fills the tin to half its depth so that the cake will rise, but not over the top.
- Test the cake frequently near the recommended baking time to see if it is baked.
- Prepare the tin ahead of mixing by lining or greasing with butter and sprinkling with flour.
- Set the oven to the correct temperature before mixing.
- Assemble all the necessary ingredients. Remember that butter, margarine, and eggs should be at room temperature (20°C) before use.
Butter cakes consist of taking the most basic of ingredients—butter, sugar, eggs, flour, and a leavening agent (baking powder or baking soda)—and transforming them into a baked good with a wonderful taste and texture.
There are three methods used in making butter cakes, and the goal of each method is to incorporate the maximum amount of air into the batter (produces the volume and texture of the cake), to restrict the development of gluten in the flour (provides tenderness, texture, and volume), and to have a uniform batter.
- Creaming Method
- One Bowl, Quick, or Blending Method
- Combination Method
Creaming Method for Butter Cakes
Of the three methods, the creaming method is the most common and produces the lightest cake with the greatest volume. To start, the butter should be unsalted, of good quality, and at room temperature (65 – 70 degrees F) (18 – 21 degrees C).
Butter that has high butterfat content produces more air bubbles and tends to produce less curdling. The type of sugar used can vary by recipe from regular granulated white sugar to superfine (castor) white sugar.
To begin, place the butter and sugar in a mixing bowl and start beating these two ingredients on low speed. The creaming of the butter and sugar produces air bubbles in the fat created by the rubbing of the sugar crystals against the fat.
These holes will get larger and multiply as beating continues. Starting on low speed and then gradually increasing the speed allows the air bubbles to form and strengthen. Starting at too high a speed could damage or break the fragile air bubbles, which will cause the finished cake to be heavy with a compact texture.
The goal is to have maximum aeration, that is, lots of air bubbles in the fat. A well-aerated batter means a cake with good volume and a soft crumb. Beating time can range anywhere from 5 to 10 minutes, so be sure to follow the recipe.
Butter and sugar have different jobs in cake making. Butter provides flavor, tenderizes the batter, and provides volume. Sugar, on the other hand, helps to tenderize the batter (slows down the gluten development in the flour), sweetens the batter, moistens the batter, which helps keep the cake fresh, and helps with browning.
At the point where the butter and sugar mixture is light and fluffy, room temperature eggs are added. (The use of cold eggs will reduce the volume of the finished cake.).
There may be curdling of the butter at this stage. This is particularly so when the recipe is for a high-ratio cake. This is caused by the addition of more liquid (eggs) than the butter can handle at one time. Once the flour has been added, it will smooth out the batter, so there is no need to worry.
One solution is to add the eggs to the batter more slowly as opposed to one egg at a time as most recipes state. Lightly beating each egg first and then slowly adding the egg down the side of the bowl as the mixer is running will help. If curdling is observed, stop adding the egg and beat the butter a little to smooth it out before continuing the addition of more egg.
Eggs play a major role in cake making. Not only do they add needed aeration to the butter, they also provide structure to the cake, help to bind the ingredients together, keep the cake moist, and add flavor and tenderness.
Once the eggs have been combined and a smooth butter is achieved, flavorings, such as extracts, are added. The flour is then sifted with a leavening agent (baking powder/baking soda) and salt. This is done not only to aerate the flour and remove any lumps, but to evenly distribute the leavening agent and salt throughout the flour.
If the leavening agent is not evenly distributed throughout the cake batter, holes in the baked cake can occur. Baking powder’s role is to enlarge the bubbles created in the fat during the creaming of the fat and sugar.
The flour mixture and room temperature liquid (milk, water, etc.) are added alternately, beginning and ending with the flour mixture to ensure a smooth and light batter. It is very important not to overmix the batter at this point.
Overmixing will develop too much gluten in the flour, and the result will be a tough cake. Mix only to incorporate the ingredients. The first addition of flour will be fully coated with the fat and does not form gluten, so it is a good idea to add the largest amount of flour in the first addition.
When liquid is added, any uncoated flour will combine with the liquid and form gluten. Continue adding the flour and liquid alternately, making sure to mix on low speed just until blended. This will enable enough gluten to develop to provide structure but not enough to make a heavy and compact cake.
Liquids are used in butter cakes to dissolve the salt and sugar, to add color and richness, and to not only moisten and therefore activate the baking powder/baking soda in the batter, but to also create steam when the cake batter is placed in the oven so the cake will rise and reach its full volume.
One Bowl or Quick Method for Butter Cakes
The one bowl or quick method produces a cake that is very moist, dense, with a fine and velvety texture. As the name implies, this method is faster and easier than the creaming method as the creaming step of the butter and sugar is eliminated.
All the dry ingredients are first put into a mixing bowl, and then soft butter and a little liquid are added. This is thoroughly beaten together, and then the eggs, flavoring, and remaining liquid are added.
Since the liquid is added after the butter and flour are combined, it reduces the gluten formation in the flour because the fat has had a chance to coat all the flour before the toughening action from the liquid can take place. This is why this method produces a melt-in-your-mouth cake (less gluten is formed).
However, using the one bowl method does not produce a cake with as much volume as the creaming method. This is because the butter tends to melt into the batter, so it doesn’t form as many air bubbles needed for maximum volume as in the creaming method. The temperature of the ingredients plus the mixing speed is very important with this method, so be sure to follow the recipe’s instructions.
Combination Method for Butter Cakes
The combination method is when whipped egg whites are added to the creamed ingredients. This method gives additional volume and light texture to the cake.
Some recipes that call for the creaming method can be changed to this method by simply separating the eggs, beating the whites separately with a little of the recipe’s sugar, and then adding the whites to the finished batter.
With all three methods, once the batter is mixed, it is then placed in greased and floured pan(s) (sometimes lined with parchment paper). The batter should fill approximately 1/2 to 2/3 of the cake pan(s) to allow room for the batter to expand.
If there is a problem with over-browning of the edges of the cake, reusable Bake-Even Strips (available at most cake supply stores) can be placed around the outside of the cake pans.
Dark and/or dull-colored pans absorb more heat than aluminum and/or shiny pans, and therefore the batter will bake faster. Lower the oven temperature by 25 degrees F if using a glass pan to prevent over-browning.
The oven temperature affects both the texture and look of the cake. How hot the oven temperature determines how long it takes for the batter to set. The longer it takes for the eggs, milk, and flour to coagulate, the more time the air cells in the batter have to grow larger and produce volume in the cake.
Too hot, and the outer edges of the cake will set before the middle has a chance to fully bake. This is why it is important to have an accurate oven temperature. Having a freestanding oven thermometer in the oven will give a proper reading on temperature, as some ovens are not calibrated properly.
The oven should always be preheated about 15 minutes before placing the pans in the oven. If baking more than one layer at a time, arrange the cake pans so they are about 2 inches (5 cm) apart and 2 inches (5 cm) from the sides of the oven.
This ensures adequate air circulation and promotes even baking. Do not open the oven door, especially during the first 15 minutes of baking, as the oven temperature drops about 25 degrees F every time the oven door is opened.
Butter cakes are done when a toothpick inserted in the center of the cake comes out clean. Remove the baked cake from the oven and cool on a wire rack for about 10 minutes before releasing.
There are formulas for butter cakes that professionals follow, and deviations from these formulas of about 20% can be supported. This is why there are so many different recipes for one type of cake. Some alterations in using eggs can be made.
Egg whites and yolks play different roles in cake making, and changes in the balance of whites and yolks will affect the baked cake. For example, in layer cakes, one whole egg can be replaced with either 2 egg yolks or else 1 ½ of egg whites to change the texture.
Using yolks will produce a more flavorful cake with a darker color, but a cake with less structure. Using whites will produce a softer cake because egg whites do not firm up as much as egg yolks when baked. Types of fats (butter, margarine, shortening), sugars (regular, superfine, or brown), and flours (all-purpose or cake) used also affect the cake.
Formula for Regular Butter Cake
- Weight of sugar is equal to or less than the weight of flour
- Weight of eggs is equal to or greater than the weight of fat
- Weight of liquids (egg and milk) is equal to the weight of flour
Formula for High-Ratio Butter Cake
- Weight of sugar is equal to or greater than the weight of flour
- Weight of eggs is greater than the weight of fat
- Weight of liquid (egg and milk) is equal to or greater than the weight of sugar
Common Cake Faults
1.Symptom and Causes
i. Batter Overflowed the Pans
Wrong adjustments to recipes (too much liquid, flour, etc.)
Wrong size pan used. Mixture should fill 2/3 of pan.
ii. Poor Flavor
Improper mixing procedure.
Improper cleaning and greasing of the pans.
Faulty baking conditions.
Improper cleaning of the equipment.
iii. Cakes Too Tough
Excessive mixing
Batter too stiff (insufficient water).
Batter too thin (excessive water).
iv. Lacks Body/Structure
Excessive mixing
Insufficient liquid.
v. Dries Out Too Soon
Excessive baking time.
Insufficient liquid.
Improper mixing procedures.
Cooled in a drafty location.
External Cake Appearance Faults
1. Crust Too Dark
i. Oven too hot.
ii. Excessive top heat.
2. Cake Too Small
i. Scaling weight too low.
ii. Oven temperature too high.
iii. Batter temperature too high.
iv. Batter temperature too low.
v. Incorrect amount of water.
3. Cake Burned on Top
i. Oven temperature too hot.
ii. Incorrect amount of water.
4. Crust is Shiny and Sticky
i. Oven temperature too cool.
ii. Not baked long enough.
iii. Too much sugar in recipe.
5. Crust Too Thick
i. Excessive baking time.
6. Cake Falls During Baking
i. Excessive jarring or moving of the cake during baking.
ii. Oven temperature too low.
iii..Excessive mixing of the batter.
7. Top of Cake Peaks and Cracks
i. Oven temperature was too hot. (The outside of the cake baked to form a crust too quickly. As the mixture in the center of the cake continued to cook and rise, it burst up through the top of the cake.)
ii. Cake wasn’t baked on the center rack of the oven.
8. Cake Shrinks
i. Excessive liquid.
ii. Batter too cold.
iii. Oven too hot.
iv. Improper mixing procedure.
v. Baked too long.
9. Cake Rose Unevenly
i. Flour was not blended sufficiently into the main mixture.
ii. Temperature inside the oven was uneven.
iii. Oven temperature too high.
10. Cake Stuck to the Pan
i. Improper greasing/flouring of pan.
ii. Layers were cooled too long before trying to remove them.
Read Also: The Complete List of Indigenous Crops of Africa
Internal Cake Appearance Faults
1. Coarse and Irregular Grain
i. Improper mixing procedures.
ii. Stiff batter.
iii. Careless or poor depositing in the pans.
Oven too cool (baked too slowly).
2. Dense Grain
i. Excessive liquid in the batter.
ii. Improper mixing procedure.
3. Off-Color Cakes
i. Improper mixing procedure.
ii. Oven too cool (baked too slowly).
iii. Unclean equipment.
4. Raisins, Nuts, or Dried Fruit Sunk to the Bottom
i. Pieces of fruit were too large and too heavy.
ii. Sugary syrup on the outside of the fruit was not washed off, causing the pieces of fruit to slide through the mixture as it heated.
iii. Washed and dried fruit was not dusted with flour before being added to the mixture.
iv. Cake mixture was over-beaten or was too wet, so it could not hold the fruit in place.
v. Oven temperature was too low, causing the mixture to melt before it set to hold the fruit in place.
Baking Hints for Successful Cakes
1. Baking
i. set ovens about 20 minutes before baking. use an oven thermometer to test the temperature inside.
ii. when using a spray release agent on cake pans, ensure the spray contains flour, or if it doesn’t, lightly dust flour over the sprayed pan.
iii. bake cakes at 350 to 360 degrees in a regular oven.
iv. bake cakes at 330 to 335 degrees in a convection oven.
v. handle the cakes carefully when removing from the oven.
vi. place cakes on the center rack in the middle of the oven.
vii. pans should not touch the sides of the oven.
viii. if the oven bakes unevenly on one side, do not pick up the pan, but rotate it about 2/3 into the baking time.
ix. make sure the batter is level in the pans.
x. cakes will spring back when touched when they are done. the sides will shrink slightly away from the pan, and a cake tester or toothpick inserted into the center comes out clean.
xi. baking times will vary with pan size and batter weight.
2. Mixing
i. batter temperature should be 70 to 75 degrees.
ii. all equipment should be clean and grease-free.
iii. ensure measuring cups and spoons actually hold the same volume if using them from different sets.
iv. measure all ingredients as accurately as possible.
v. pans should be greased properly.
vi. when using a stand-up kitchen mixer, use a paddle (not a wire whip) to mix the batter.
vii. use a rubber or soft plastic spatula to scrape the sides of the mixing bowl after each addition of ingredients. (scraping ensures proper ingredient distribution.)
viii. follow the formula exactly as to mixing times.
ix. always use fresh, high-quality ingredients.
x. follow the formula exactly as to method. use precise mixing times. if not, disaster may result!
3. Handling
i. cool cake in pan 10–15 minutes before loosening the edge and turning it onto a wire rack.
ii. to easily remove a cake from the pan, place a double thickness paper towel over the wire rack. the towel prevents the wire bars from breaking the crust or leaving imprints on the top of the cake.
iii. turn hot cakes out gently.
iv. cool cake at least 1 hour before decorating.
v. when frosting a cake, chill the cake before spreading filling and/or frosting. (cake will be much easier to work with.) also, apply a thin layer of frosting to the cake and then refrigerate until it is set before applying the final, heavier layer of frosting. this will seal in the crumbs and ensure a clean final appearance.
vi. make only enough to last 3 or 4 days.
Do you have any questions, suggestions, or contributions? If so, please feel free to use the comment box below to share your thoughts. We also encourage you to kindly share this information with others who might benefit from it. Since we can’t reach everyone at once, we truly appreciate your help in spreading the word. Thank you so much for your support and for sharing!