
Debeaking is one of those farm tasks that sounds simple until you actually have to do it. You’re standing there with your birds, knowing you need to trim their beaks to prevent pecking problems. But what tool should you use? Should you invest in an expensive electric machine? Can you make do with a hot knife? What about scissors?
These questions matter because choosing the wrong tool can lead to serious problems. Poor debeaking causes birds pain and stress. They might struggle to eat or drink afterward. Some never fully recover. In worst cases, you’ll see increased mortality just because the job wasn’t done right.
The tool you pick depends on your flock size and budget. A farmer with 5,000 layers needs different equipment than someone raising 100 backyard chickens. Commercial operations demand precision and speed. Small farmers need something affordable that still gets the job done safely.
Debeaking itself is a delicate procedure. You’re removing part of the bird’s beak to prevent cannibalism, feather pecking, and feed wastage. When birds peck each other, things escalate quickly. Blood attracts more pecking. Before you know it, you have injured and dead birds. Debeaking stops this cycle.
But here’s the thing. The instrument you choose directly affects how well this procedure goes. A properly designed debeaking tool cauterizes as it cuts. This stops bleeding and speeds healing. The wrong tool just cuts without sealing. Birds bleed more, recover slower, and suffer unnecessarily.
Temperature control matters too. Too hot and you’ll burn the bird’s tongue or create blisters. Too cool and the cut won’t seal properly. The bleeding continues. Professional equipment handles this automatically. Cheaper options require more skill and attention.
This guide covers every debeaking instrument available to poultry farmers. We’ll look at electric machines, hot knives, handheld tools, and even kitchen knives. You’ll learn which situations call for which tools. We’ll also cover proper techniques and common mistakes to avoid.
1. Electric Debeaking Machines
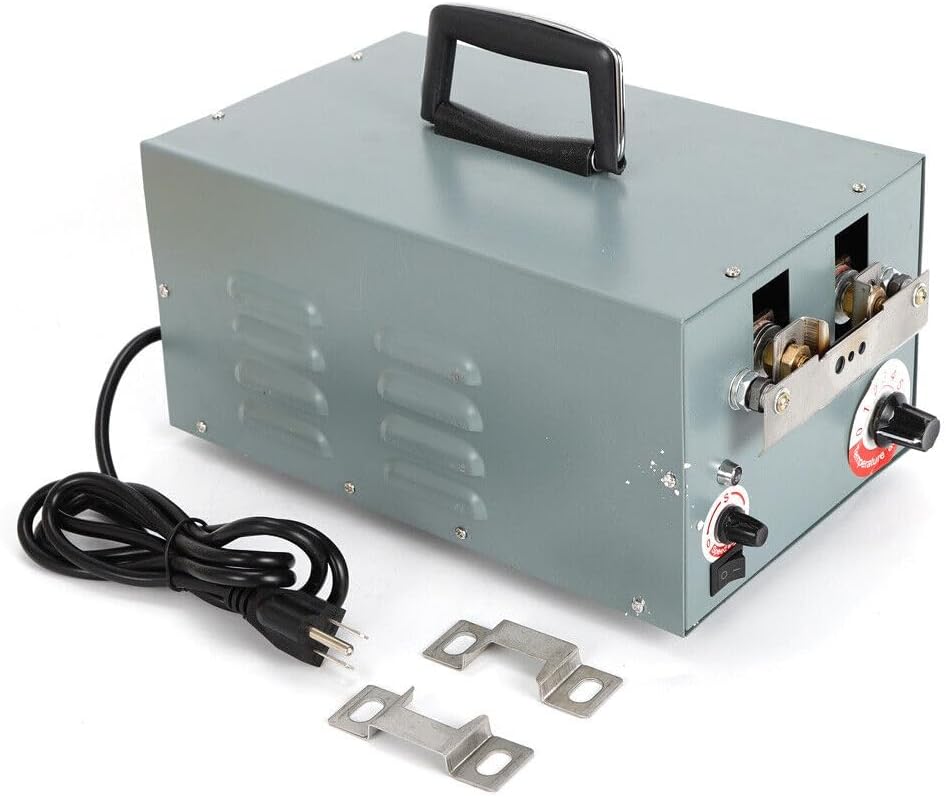
An electric debeaking machine is the professional choice. These machines heat a blade to the exact temperature needed. They cut and cauterize in one motion. Most have adjustable settings for different bird sizes and ages.
Commercial farms rely on these machines for good reason. You can debeak hundreds or thousands of birds efficiently. The process is standardized. Each bird gets the same treatment. This consistency matters when you’re managing large numbers.
The machine heats up quickly. Within minutes, you’re ready to work. The blade glows red when it reaches the right temperature. Some models have temperature gauges. Others use visual indicators. Both work fine once you learn your machine.
Most electric debeakers come in two types: automatic and semi-automatic. The automatic version does more of the work for you. The semi-automatic requires more manual control. Both are faster and more consistent than manual methods.
A. Automatic Debeaking Machines
These are the top-tier option. The machine controls blade temperature automatically. You position the bird’s beak in the aperture. Press a trigger or pedal. The blade drops, cuts, and cauterizes in seconds.
The bird is in and out quickly. Less handling time means less stress. The cut is uniform because the machine does it the same way every time. Operator fatigue is reduced because the machine does the heavy work.
Some automatic models can process a bird every 3-4 seconds. That’s 15-20 birds per minute if you have a good rhythm going. For large flocks, this speed is essential.
B. Semi-Automatic Debeaking Machines
These require more operator involvement. You control when the blade drops. You judge the cutting depth. The machine provides the heat and cutting action, but timing and positioning are on you.
Semi-automatic machines cost less than fully automatic ones. They’re still much faster than manual methods. Most farmers can process 8-10 birds per minute with practice.
The learning curve is steeper. You need to develop a feel for the right cutting depth. Too shallow and the beak grows back quickly. Too deep and you risk damaging the bird. Experience matters with these machines.
C. Operating an Automatic Debeaking Machine
Here’s how to use one properly:
i. Turn on the switch: the machine starts heating immediately.
ii. Adjust the temperature: wait until the movable blade glows reddish or bright red. This usually takes 3-5 minutes.
iii. Start the motor: once the blade is hot, activate the motor switch and boat-shaped switch.
iv. Adjust the aperture: set the micro cutter blade opening based on beak size. Younger birds need a smaller aperture. Older birds need it wider.
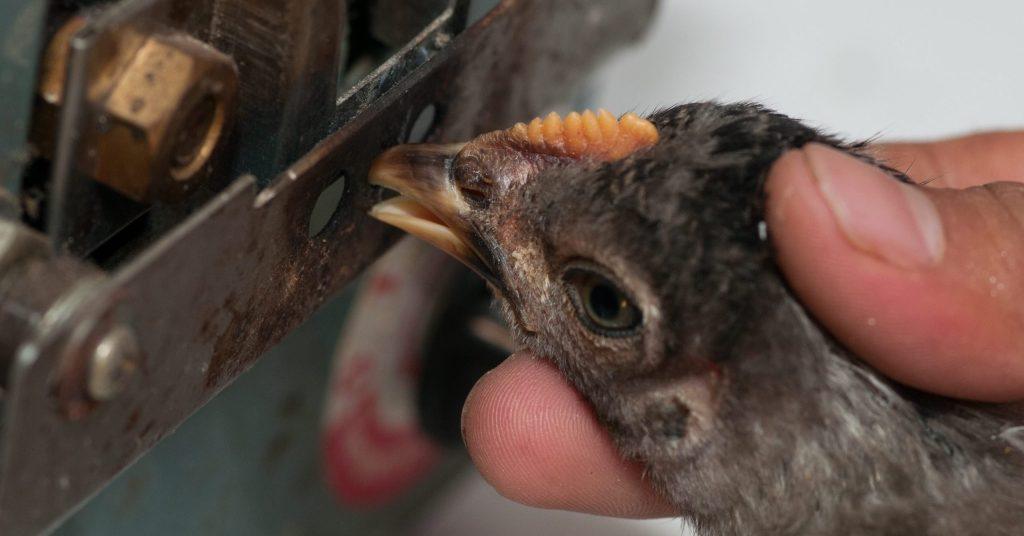
v. Hold the bird correctly: left hand grabs the feet. Right thumb holds the neck. Right forefinger pins the throat gently.
vi. Insert the beak: stick the beak into the aperture carefully. Make sure it’s positioned correctly.
vii. Release after cutting: bleeding stops in 2-4 seconds after the blade drops. Release the bird immediately.
The entire process takes about 5-6 seconds per bird once you get the hang of it. Speed comes with practice. Don’t rush when you’re learning. Accuracy matters more than speed initially.
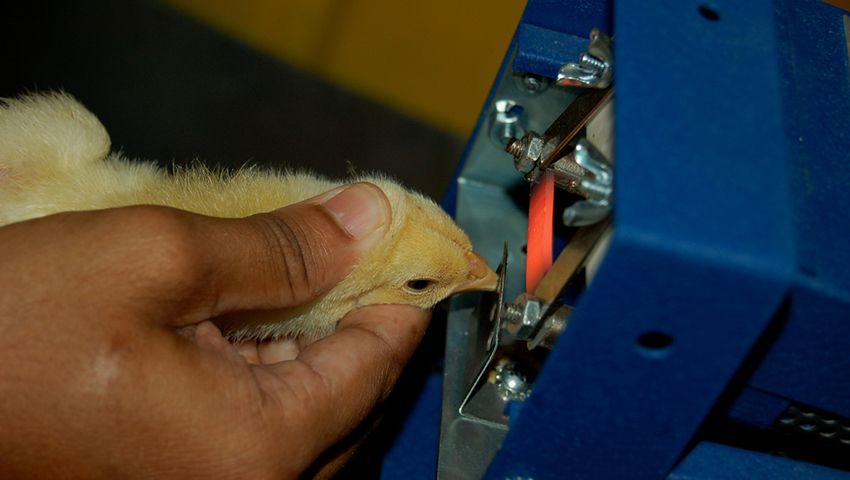
2. Hot Knife Method for Debeaking
A very hot knife works for small flocks. If you have fewer than 200 birds, this is a practical option. The knife needs to be extremely hot to cauterize as it cuts.
You heat the knife over a flame or on a hot plate. Gas stoves work well. Some farmers use blowtorches. The blade should glow red or orange. If it’s not hot enough, it won’t seal the cut properly.
This method requires steady hands and good timing. You hold the bird, position the beak, and cut in one smooth motion. The hot blade seals as it cuts. Done right, bleeding is minimal.
A. Heating the Knife Properly
Temperature is everything with this method. Too cool and you’re just cutting. The beak bleeds freely. Too hot and you risk burning the bird’s face or tongue.
Watch the blade color. A dull red glow isn’t hot enough. Bright orange to yellow-orange is ideal. The metal should be hot enough to instantly sear flesh.
Keep the heat source nearby. The knife cools quickly when you’re working. You’ll need to reheat between birds. Some farmers use two knives alternating to maintain workflow.
B. Making the Cut
Hold the bird firmly. One hand controls the head. Position the beak so you can see where you’re cutting. About one-third to one-half of the upper beak gets removed.
Bring the hot knife across quickly. Hesitation causes more burning. A swift cut minimizes pain and seals cleanly. The bird will struggle. Be ready for that.
Check the cut immediately. It should be sealed with a thin layer of seared tissue. If blood flows freely, the knife wasn’t hot enough. You’ll need to touch it with the hot blade again briefly to seal it.
C. Limitations of Hot Knives
This method is slow. You can maybe do 20-30 birds per hour if you’re experienced. For larger flocks, that’s impractical.
Consistency is hard to maintain. Each cut depends on your steadiness and timing. Some birds end up with more beak removed than others. This unevenness can cause problems later.
The risk of accidents is higher. A very hot knife is dangerous. One slip and you could burn yourself badly. Birds move unexpectedly. Things can go wrong fast.
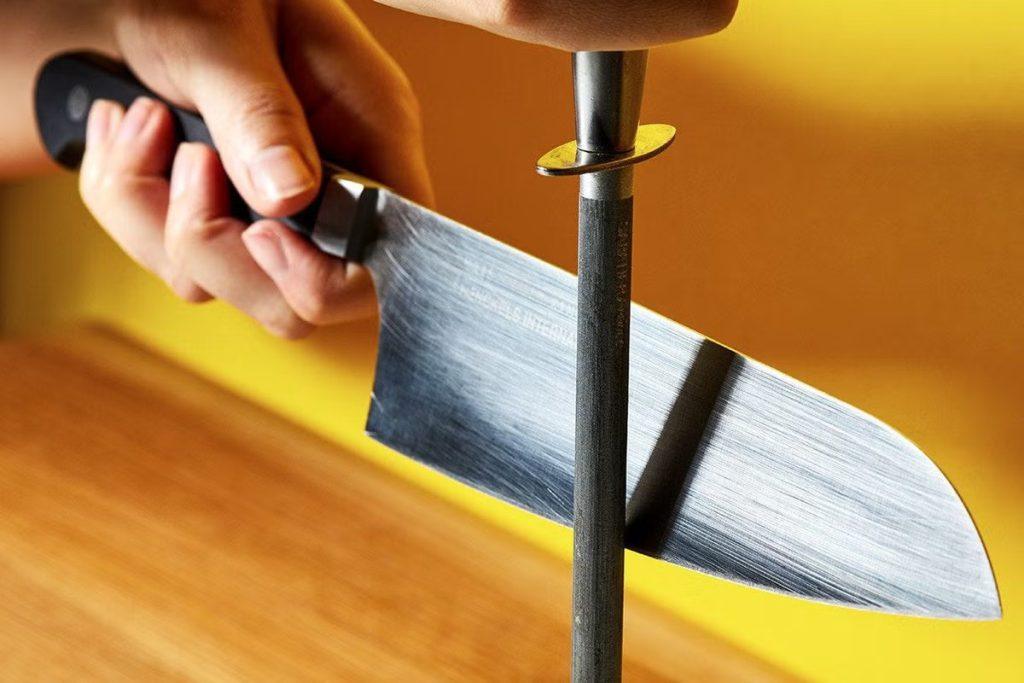
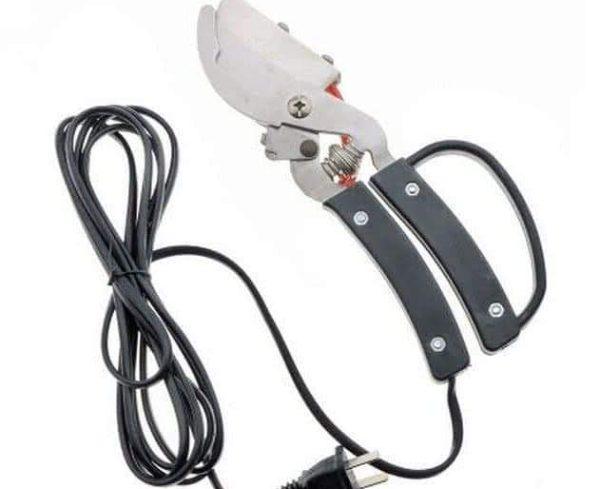
3. Scissors and Why They Don’t Work for Debeaking
Some farmers try using scissors or pruning shears. This is not recommended. Scissors cut but don’t cauterize. The beak bleeds more. Healing takes longer. Infection risk increases.
Worse yet, beaks trimmed with scissors often grow back quickly. The growth tissue wasn’t sealed properly. Within weeks, you’re back to square one. The bird went through stress for nothing.
There’s also the issue of crushing. Scissors crush as they cut. This damages more tissue than necessary. The bird feels more pain. Recovery is slower.
Professional sources consistently advise against scissors. If you can’t afford better equipment, use a hot knife instead. It’s not ideal, but it’s better than scissors.
Read Also: Ways to Prevent Vaccine Failure on Your Poultry Farm
4. Kitchen Knife as a Debeaking Tool
A regular kitchen knife can work in a pinch. You heat it the same way as the hot knife method described earlier. The principles are identical.
Choose a knife with a straight, smooth blade. Serrated edges don’t work well. A medium-sized blade gives you better control than a large one.
Heat it until it glows. Make quick, clean cuts. Seal any bleeding spots with the hot blade. Keep movements deliberate and controlled.
This is really only for emergency situations or extremely small backyard flocks. It’s not a professional solution. But if you have five chickens showing pecking problems, it’s better than doing nothing.
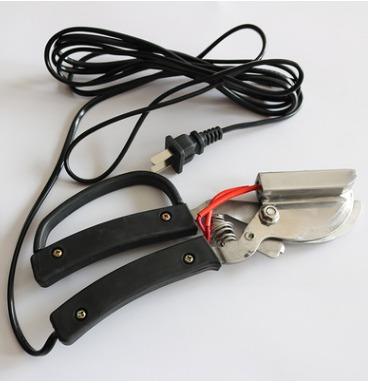
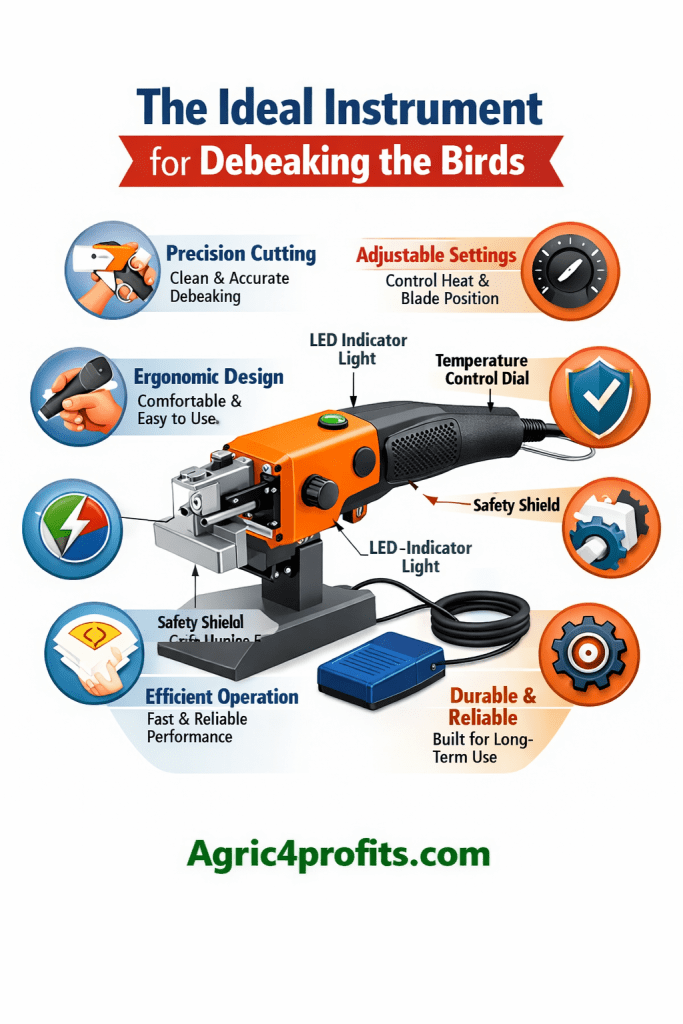
5. Handheld Electric Debeaking Knife
This is a middle ground option. Handheld electric debeakers are portable and easier to use than a hot knife. They’re more affordable than full debeaking machines.
The tool heats up when you press a button or trigger. You apply it to the beak. The hot element cuts and cauterizes together. It’s essentially an electric hot knife with temperature control.
These work well for flocks of 200-1,000 birds. The price point makes sense for that scale. You get better consistency than manual hot knives. The speed is decent. Not as fast as a machine, but faster than purely manual methods.
A. Using a Handheld Electric Debeaker
Plug it in and let it heat up. Most models have an indicator light. When it’s ready, the light changes or the unit beeps.
Hold the bird securely. Position the heated element against the beak where you want to cut. Press and hold for a second or two. The heat does the work.
Some models have adjustable temperature settings. Start with the manufacturer’s recommended setting. Adjust based on results. If birds bleed too much, increase heat slightly. If you see burning or blisters, reduce heat.
B. Advantages Over Hot Knives
Temperature stays constant. You’re not reheating between birds. This speeds up the process and improves consistency.
Safety is better. The heated element is designed for this purpose. There’s less risk of dropping a hot knife or burning yourself accidentally.
Fatigue is reduced. You’re not managing a heat source and a cutting tool separately. Everything is in one handheld unit.
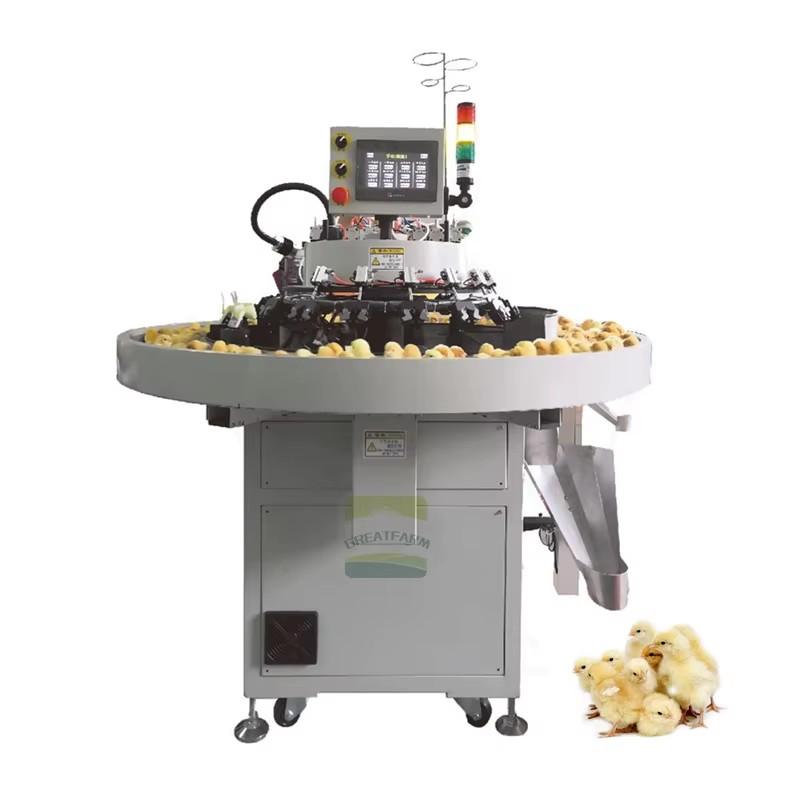
6. Infrared Beak Trimming Technology
This is the newest technology in commercial operations. Infrared doesn’t cut the beak immediately. Instead, it treats the beak tissue with high-intensity infrared energy.
The treatment happens at the hatchery when chicks are one day old. The beak looks normal for several weeks after treatment. Then the sharp hook gradually erodes and falls off naturally. The result is a shortened, blunted beak.
This method is less stressful for the bird. There’s no immediate pain from cutting. No bleeding. No cauterization needed. The beak naturally shapes itself over time.
A. How Infrared Systems Work
A machine applies infrared energy to specific areas of the beak. The energy damages tissue at a cellular level. This damaged tissue eventually dies and falls away.
The process is automated. Chicks pass through the machine on a conveyor. Each chick gets the same precise treatment. Human error is eliminated.
The equipment is expensive. That’s why it’s mainly found in commercial hatcheries. The machines are leased, not purchased. They’re monitored remotely by the supplier.
B. Benefits for Commercial Operations
Stress on day-old chicks is minimal. They recover quickly because there’s no wound. Early growth isn’t affected.
Labor costs drop significantly. One machine processes thousands of chicks per hour. No skilled labor required for the actual trimming.
Results are consistent across the entire flock. Every bird gets identical treatment. This uniformity helps with flock management later.
C. Limitations
The technology is only available through hatcheries. Individual farmers can’t do this on their farms. You have to purchase already-treated chicks.
Cost per chick is higher. The hatchery charges more for infrared-treated birds. For large operations, this premium pays for itself. For small farmers, it might not make economic sense.
You can’t treat older birds. Infrared only works on day-old chicks. If pecking problems develop later, you’ll need conventional debeaking anyway.
7. Laser Beak Trimming
Lasers are the cutting edge of debeaking technology. Research is ongoing. Some commercial operations use laser systems experimentally.
A laser beam precisely removes beak tissue. The precision is unmatched. The laser can target specific areas without affecting surrounding tissue. Cauterization is automatic because lasers seal as they cut.
Pain appears to be less than with traditional methods. The cut is so clean that nerve damage is minimized. Birds recover faster.
A. Current State of Laser Technology
This technology isn’t widespread yet. Equipment costs are extremely high. Maintenance requires specialized knowledge.
Most laser debeaking systems are still in trial phases. Large poultry research facilities test them. Some major commercial operations experiment with lasers.
For the average farmer, this isn’t an option now. But it might become more accessible in the future as technology develops and costs decrease.
8. Important Precautions for All Methods
Regardless of which tool you use, certain precautions apply universally. These rules protect both you and your birds.
Never debeak sick birds. If your flock has health issues, postpone debeaking until they recover. Stressed or diseased birds handle the procedure poorly.
Avoid debeaking during vaccine reactions. Birds are already stressed from vaccination. Adding debeaking stress on top can be fatal.
A. Vitamin K Supplementation
Add Vitamin K to drinking water 48 hours before debeaking. Continue for 48 hours after. This prevents excessive bleeding.
Vitamin K helps blood clot properly. Without it, some birds bleed more than they should. A few might bleed to death from what should be a minor procedure.
Most commercial poultry vitamin mixes include Vitamin K. If yours doesn’t, add it separately. The cost is minimal. The protection is significant.
B. Equipment Maintenance
Check your debeaking equipment before each session. Make sure the blade temperature is correct. Too hot causes blisters. Too cool fails to cauterize.
If you see birds developing blisters on their beaks later, your equipment was too hot. Adjust the temperature down next time.
Clean the blade regularly. After 5,000 birds, use sandpaper to clean it. Built-up residue affects cutting quality and heat transfer.
C. Operator Comfort and Setup
Sit comfortably. Position everything within easy reach. If you’re uncomfortable, your cutting consistency suffers.
Take breaks. Fatigue leads to mistakes. Rushed work causes uneven cuts. Birds end up with too much or too little beak removed.
Don’t aim for speed records. Focus on doing each bird correctly. Speed comes naturally with experience. Forcing it causes problems.
D. Protecting the Tongue
The bird’s tongue must not touch the hot blade. Position the beak so the tongue stays back inside the mouth.
Burned tongues are a serious problem. Birds can’t eat or drink properly. Some die from dehydration. Others never perform well again.
Take that extra second to check tongue position before cutting. It’s worth it.
E. Post-Debeaking Care
Give birds anti-stress supplements immediately after debeaking. Multivitamins work well. Continue for 5-7 days.
Watch for excessive bleeding. A little blood is normal. Heavy bleeding needs attention. Apply the hot blade briefly to seal persistent bleeding.
Monitor feed and water consumption. Debeaked birds are sore for a few days. Make sure they’re eating and drinking. Some might need extra encouragement.
Read Also: The Major Causes of Cannibalism among Poultry Birds
9. Age and Timing Considerations for Debeaking
When you debeak matters as much as how you debeak. Different ages present different challenges and benefits.
Very young chicks (7-9 days old) are easier to handle. The beak is smaller and softer. The procedure is faster. Recovery is quicker.
Older birds (8-10 weeks) give more precise results. You can see how the beak is developing. Corrections are easier to judge. But the birds are bigger and harder to handle.
A. First Week Debeaking
Some farmers debeak at 7-9 days old. The chicks are small and easy to handle. The procedure has minimal effect on body weight.
You won’t need to debeak again during rearing. This saves time and stress later. The birds grow up with shortened beaks. They adapt easily.
Equipment needs to be set for very small beaks. The aperture is tiny. Precision matters because you’re working with such small structures.
B. Eight to Ten Week Debeaking
This timing gives more precise control. The bird’s permanent beak structure is visible. You can judge exactly how much to remove.
Results are more uniform across the flock. Operator skill matters less because you can see what you’re doing better.
The birds are bigger though. Handling takes more strength. Processing speed is slower. Stress recovery takes longer.
C. Debeaking Layers vs Broilers
Broilers usually don’t need debeaking. They go to market in 6-8 weeks. There isn’t time for serious pecking problems to develop.
Cockerels and layers absolutely need debeaking. They’re kept for months or years. Without debeaking, pecking injuries and cannibalism become major problems.
Some farmers debeak broilers in crowded conditions or if they see pecking starting. But it’s not standard practice.
Making Your Equipment Choice
Your decision comes down to flock size and budget. Match the tool to your operation.
For fewer than 100 birds, a hot knife or kitchen knife works. It’s not ideal, but it’s practical for backyard operations.
For 100-500 birds, consider a handheld electric debeaker. The investment makes sense at this scale. You’ll save time and get better results.
For 500-2,000 birds, a semi-automatic debeaking machine becomes worthwhile. The initial cost is higher, but labor savings add up.
For more than 2,000 birds, invest in an automatic debeaking machine. Or contract with someone who owns one. The efficiency gains justify the expense.
1. Budget Considerations
Electric machines cost real money. A good automatic debeaker might run several thousand dollars. That’s a big expense for small farmers.
But calculate the labor cost of manual methods. If you’re paying workers to debeak by hand, those wages add up. An electric machine might pay for itself in a year or two.
Consider durability too. A quality electric machine lasts 10-15 years with proper maintenance. Cheap alternatives need frequent replacement.
2. Skill Level Required
Manual methods require more skill. You need steady hands and good judgment. Not everyone has this.
Electric machines standardize the process. Training is simpler. New workers can learn quickly. Results are more consistent regardless of operator experience.
If you have high worker turnover, equipment that’s easier to learn makes sense. The investment protects quality during transition periods.
Debeaking Benefits That Make It Worthwhile
Done properly with the right equipment, debeaking solves serious problems. The benefits justify the effort and expense.
Mortality from pecking drops dramatically. Birds that would have been killed by flockmates survive. This directly improves your bottom line.
Feed wastage decreases. Birds with full beaks scatter feed as they eat. Debeaked birds can’t do this as easily. You save money on every bag of feed.
Egg quality improves in layers. Pecked eggs are cracked or dirty. They can’t be sold. Debeaking means more sellable eggs.
Feather condition is better. Birds aren’t pulling each other’s feathers out. Better feathering means better insulation. Birds stay healthier.
Summary on The Ideal Instrument for Debeaking the Birds
| Instrument Type | Best For | Advantages | Disadvantages | Cost Level |
|---|---|---|---|---|
| Electric Debeaking Machine (Automatic) | Large flocks (2,000+ birds) | Fast, consistent, minimal bleeding, standardized results | Very expensive, requires electricity, needs maintenance | Very High |
| Electric Debeaking Machine (Semi-Automatic) | Medium to large flocks (500-2,000 birds) | Good speed, controlled process, cauterizes properly | Learning curve, operator skill matters, still expensive | High |
| Handheld Electric Debeaker | Small to medium flocks (200-1,000 birds) | Portable, affordable, consistent temperature, safer than hot knife | Slower than machines, hand fatigue, requires electricity | Medium |
| Hot Knife | Very small flocks (under 200 birds) | Low cost, no special equipment needed, works anywhere | Slow, inconsistent, dangerous, temperature hard to maintain | Very Low |
| Kitchen Knife | Emergency use only (under 50 birds) | Available immediately, no cost | Very slow, inconsistent, dangerous, requires constant reheating | None |
| Infrared Treatment | Commercial hatcheries only | No immediate pain, consistent results, minimal stress | Only available through hatcheries, expensive per chick, day-old only | Very High |
| Laser System | Research/experimental | Extremely precise, minimal pain, fast healing | Not commercially available, extremely expensive, experimental | Extremely High |
| Scissors/Pruning Shears | Not recommended | None | Doesn’t cauterize, beaks regrow quickly, crushing injury, painful | Low |
Frequently Asked Questions About The Ideal Instrument for Debeaking the Birds
1. What is the best instrument for debeaking poultry birds?
An electric debeaking machine is the best choice for most commercial operations. It provides consistent results, cauterizes as it cuts, and processes birds quickly. For small flocks under 200 birds, a very hot knife can work, though it requires more skill and time.
2. Can I use regular scissors to debeak my chickens?
No, scissors are not advisable for debeaking. They cut without cauterizing, which leads to excessive bleeding. Beaks trimmed with scissors also grow back very quickly, meaning the procedure was essentially wasted. The crushing action of scissors also causes unnecessary tissue damage and pain.
3. How hot should the knife or blade be for debeaking?
The blade should glow bright red or reddish-orange. This temperature is hot enough to cauterize and seal the cut immediately, stopping bleeding within 2-4 seconds. If the blade is too cool, it won’t seal properly and birds will bleed excessively. If too hot, it can cause blisters on the beak.
4. What is the difference between automatic and semi-automatic debeaking machines?
Automatic machines control temperature, blade movement, and timing with minimal operator input. You just position the bird and activate the machine. Semi-automatic machines require the operator to control timing and blade depth manually while the machine provides heat and cutting power. Automatic machines are faster and more consistent but cost more.
5. At what age should I debeak my birds?
Birds can be debeaked at 7-9 days old or at 8-10 weeks old. Debeaking at one week causes minimal effect on body weight and usually doesn’t need repeating. Debeaking at 8-10 weeks allows for more precise trimming but birds take longer to recover. Never debeak broilers unless absolutely necessary, but always debeak layers and cockerels.
6. Do I need to give birds vitamins before debeaking?
Yes, add Vitamin K to drinking water 48 hours before debeaking and continue for 48 hours after. This prevents excessive bleeding. After the procedure, give anti-stress supplements or multivitamins for 5-7 days to reduce stress and speed recovery.
7. How does infrared beak trimming work?
Infrared treatment uses high-intensity infrared energy to damage beak tissue at the cellular level in day-old chicks. The beak looks normal initially but the sharp hook gradually erodes and falls off over several weeks. This method causes less immediate stress and pain but is only available through commercial hatcheries.
8. What are the signs that I debeaked a bird incorrectly?
Signs of improper debeaking include excessive bleeding that doesn’t stop within a few minutes, blisters forming on the beak (blade was too hot), difficulty eating or drinking, burned tongue, or the bird appearing extremely distressed days after the procedure. The beak growing back quickly also indicates the cut wasn’t properly sealed.
9. Can I debeak birds when they are sick or stressed?
No, never debeak birds if the flock is not in good health or undergoing vaccine reactions. Sick or stressed birds cannot handle the additional stress of debeaking and may die. Wait until birds are healthy and recovered from any vaccinations or illnesses before proceeding.
10. How many birds can I debeak per hour with different methods?
With an automatic electric machine, experienced operators can debeak 900-1,200 birds per hour (15-20 per minute). Semi-automatic machines allow 480-600 birds per hour (8-10 per minute). Handheld electric debeakers process about 150-200 birds per hour. Hot knife methods are much slower at 20-30 birds per hour. Speed increases with experience but should never compromise accuracy.
Do you have any questions, suggestions, or contributions? If so, please feel free to use the comment box below to share your thoughts. We also encourage you to kindly share this information with others who might benefit from it. Since we can’t reach everyone at once, we truly appreciate your help in spreading the word. Thank you very much for your support and for sharing!