
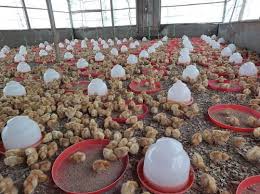
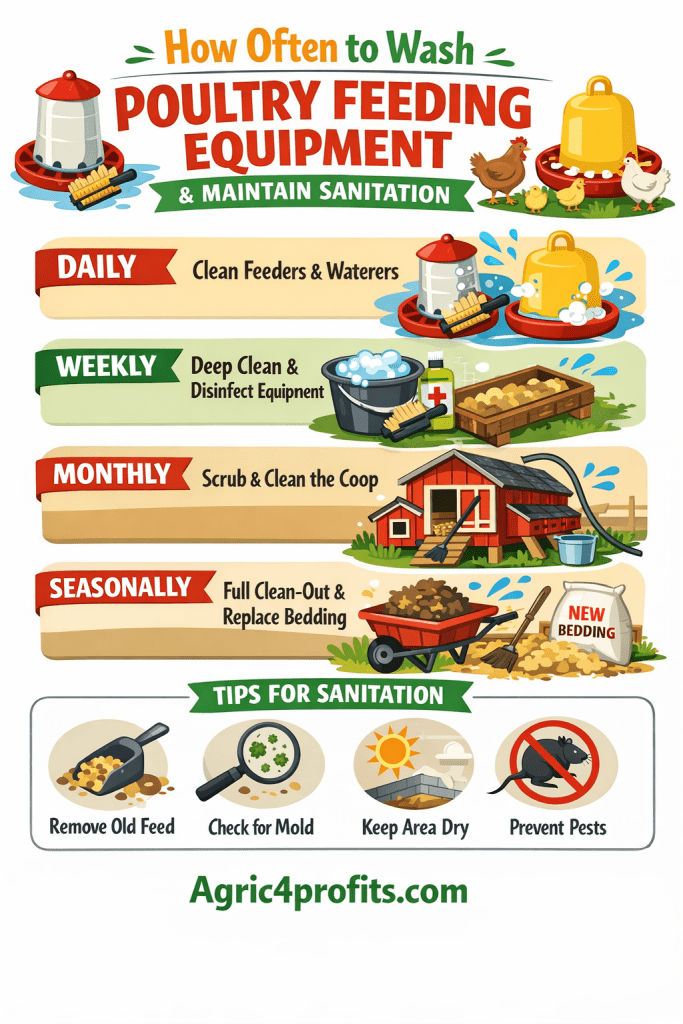
Washing poultry feeding troughs and drinkers is the first duty of every poultry farmer or attendant every morning. This isn’t optional or something you do when you have extra time. It’s a daily requirement that directly affects your birds’ health and your operation’s profitability. Equipment must be washed every day before fresh feed and water are served, using detergents and thorough rinsing.
Many diseases can spread through contaminated water. The list would be endless if we tried to name them all. Therefore, good water hygiene must be maintained to ensure the water given to birds doesn’t become the source of their diseases. Get your water tested regularly to confirm you’re working with a safe water source.
Biosecurity is a term frequently used in the poultry industry. Many people believe biosecurity means only implementing strict visitor control and farm cleaning programs. In reality, however, a comprehensive biosecurity program goes beyond these basics and includes many other components. In any commercial poultry operation, flock health must be excellent to achieve maximum profitability. Health status can often be directly correlated with how comprehensive your biosecurity program is.
Biosecurity is the efficient use of common sense hygiene procedures in preventing disease. It can be defined as a set of management practices that, when followed, reduce the potential for introduction or spread of disease agents onto and among sites. In other words, biosecurity is an essential component of any disease control program in the poultry industry.
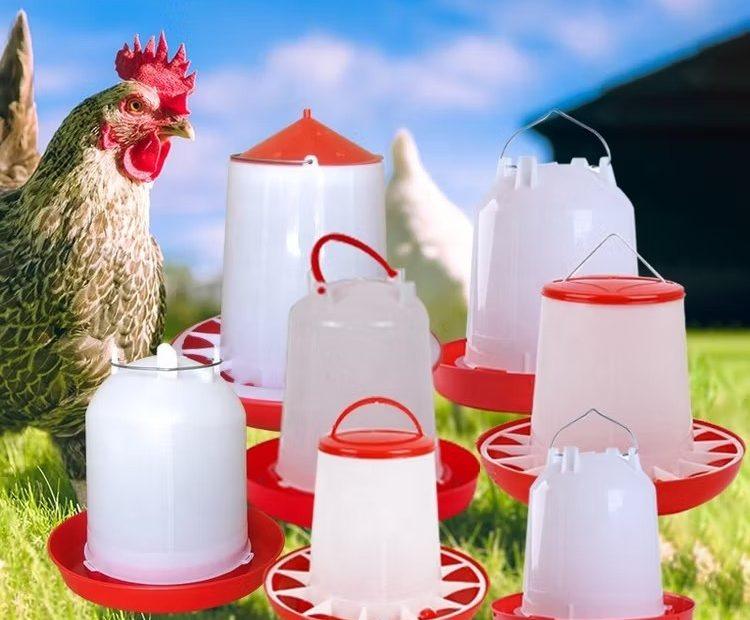
Read Also: Ideal poultry feeding troughs you need
1. Importance of Maintaining Good Sanitation in a Poultry House
Understanding key microbial control terms helps you implement effective sanitation practices. Three terms are commonly used:
i. Sterilization: Destroying all infective and reproductive forms of all microorganisms including bacteria, fungi, viruses, and spores. This is the highest level of microbial control but is rarely necessary or practical in poultry houses.
ii. Disinfection: Destroying all vegetative forms of microorganisms. Spores are not destroyed, but active disease-causing organisms are eliminated. This is the practical goal for most poultry house cleaning.
iii. Sanitation: Pathogenic organisms may be present but are not a threat to birds’ health because their numbers are kept below the infectious threshold through regular cleaning.
A. The Cleaning Before Disinfecting Principle
Proper cleaning removes most germs and must always be done before using disinfectants. This applies to all areas including floors, walls, equipment, and even personnel entering the facility.
It’s extremely important to remove as much organic matter as possible from surfaces before disinfecting. After removing dust, chick down, droppings, and tissue residues, thoroughly clean surfaces using warm water and appropriate cleaning aids. Disinfectants don’t work effectively on dirty surfaces because organic matter shields microorganisms from the disinfectant’s action.
Focus on selecting the proper detergent to produce the cleanest environment possible, accounting for variations in water hardness, salinity, and pH. A thorough rinsing with enough clean, sanitized water completes the cleaning process and removes lingering residues of detergents, organic matter, or microbial germs.
The most important thing to remember is that cleanliness is essential before disinfection can work.
B. Complete House Cleaning Schedule
To reduce disease risks including Salmonella enteritidis (SE) and other health threats, complete dry cleaning, washing, and disinfection of the poultry house after each flock or at minimum once per year is recommended.
Successful cleaning is hard work and requires systematic completion of several sequential steps. Every step is important. Skipping one step or doing an incomplete job at any point makes the next step harder and leads to failure. You can’t rush through this process and expect good results.
Read Also: Basics of Bio-Security in a Poultry Farm
2. Poultry Feeding Equipment and House Sanitation Processes
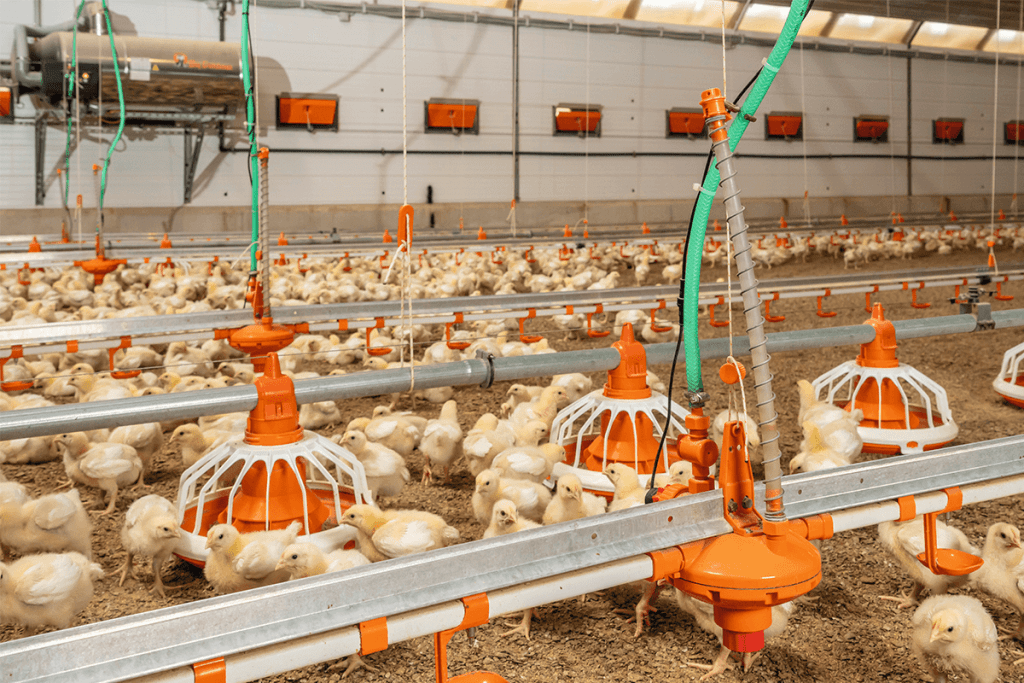
Start by removing all birds from the building to be cleaned, along with all equipment that can be cleaned elsewhere, such as feeders and waterers. Never attempt to clean a house while birds are present.
A. Dry Cleaning
i. Ceiling and overhead structures: Sweep or blow dust and loose dirt off ceilings, light fixtures, walls, cages, nest boxes, fans, and air inlets onto the floor. Work from top to bottom so debris falls to the floor for final removal.
ii. Feeders: Remove all feed from feeders. Don’t leave even small amounts because old feed can harbor bacteria and mold that contaminate fresh feed.
iii. Perches and roosts: Scrape manure and accumulated dust and dirt from perches and roosts. These areas typically have the heaviest buildup and require extra effort.
iv. Litter removal: Remove all litter from the floor. Litter can be added to a compost pile or disposed of according to local regulations. Sweep the floor to remove as much dry material as possible.
v. Small coop tip: With a small coop, a wet-dry shop vacuum does a good job removing fine material. However, clean the filter often as fine dust from the coop easily clogs filters and can burn out the motor.
B. Wet Cleaning
Turn the power off to the building before using any water for cleaning. Water and electricity don’t mix, and spraying water in a building with live electrical circuits is extremely dangerous.
Wet cleaning is done in three sequential steps: soaking, washing, and rinsing. Warm or hot water works much better at cutting through organic matter than cold water. You can use an inexpensive neutral detergent like dish soap for basic cleaning.
C. Soaking
i. Heavy soil areas: Soak heavily soiled areas (perches and roosting areas, floors, walls) thoroughly. Use a low-pressure sprayer to completely soak all surfaces.
ii. Timing: Soak until accumulated dirt and manure have softened to the point they’re easily removed. This may take 30 minutes to several hours depending on buildup severity. Don’t rush this step.
D. Washing
i. Complete coverage: Wash every surface in the building, especially window sills, ceiling trusses, wall sills, and any surface where dirt and dust accumulate. Areas you can’t see often harbor the most contamination.
ii. Detergent selection: The washing solution can be either a neutral detergent (pH between 6 and 8) or an alkaline detergent (pH above 8). Alkaline substances vary in strength, with the strongest causing burns and internal injuries if swallowed. Mild alkalis include baking soda, moderate alkalis include household ammonia and borax, and strong alkalis include washing soda and lye.
iii. Water temperature: Mix detergent in hot water. Water at 160°F or hotter works best for cutting grease and organic matter.
iv. Application method: A high-pressure sprayer is good for this step, but manual scrubbing with a moderately stiff brush is one of the best ways to ensure thorough cleaning. Inspect manually to confirm you’ve removed all dirt and manure from all surfaces.
v. Electrical parts: Carefully clean electrical parts. You may need to remove cover plates and vacuum those areas separately to avoid water damage.
vi. Hard water scale: If you have metal surfaces with hard water scale, use an acid detergent on those surfaces to remove the mineral deposits. Acid detergents dissolve calcium and magnesium precipitates or hard water deposits from equipment surfaces. Two main groups of acid detergents are inorganic (hydrochloric acid, sulfuric acid) and organic (vinegar, citric acid).
E. Rinsing
A final rinse immediately after washing is recommended to remove any harmful residues and obtain a spotless building. Use clean water under pressure to flush away all detergent and loosened contamination.
Mop up puddles as they can rapidly become breeding grounds for Salmonella and other bacteria. Standing water defeats the purpose of all your cleaning work.
F. Drying
Thoroughly air-dry the building if disinfection cannot immediately follow rinsing. Open all windows and ventilation openings. Use a blower or fan if available. Cleaning on a dry, sunny day helps significantly in the drying process.
Complete drying is important because many disinfectants don’t work well on wet surfaces, and dilution by standing water reduces their effectiveness.
G. Repairs
Make any repairs to the structure before the final disinfection step. Cracks, holes, and damaged areas harbor contamination and provide entry points for rodents and wild birds that carry disease.
Seal any rodent entry holes at the outside and inside of the building. Apply a small amount of spray foam insulation into the hole, then pack in fine steel wool, and top with more spray foam. This creates a barrier rodents can’t easily chew through.
H. Disinfecting
This is a crucial step that small flock owners often overlook. Disinfectants should be applied only after the building and equipment have been thoroughly cleaned, ideally right after rinsing.
i. Application methods: Disinfectants can be applied by sprays, aerosols, or fumigation. For most small flock facilities, using a garden-type sprayer is the easiest method.
ii. Common disinfectants: Types of disinfectants generally used include phenolic compounds (Pine-Sol, One Stroke, Osyl), iodine or iodophors (Betadine, Weladol), chlorine compounds (Clorox, generic bleach), quaternary ammonium compounds (Roccal D Plus), and oxidizing compounds (Virkon S, Oxy-Sept 333).
iii. Follow label directions: Always follow manufacturer’s instructions regarding dilution rates, contact time, and safety precautions. Using too little disinfectant is ineffective. Using too much wastes money and can leave harmful residues.
iv. Coverage: Apply disinfectant to all surfaces, paying particular attention to areas that had heavy contamination. Allow adequate contact time before introducing birds to the cleaned facility.
Summary on Poultry Feeding Equipment Sanitation
| Aspect | Key Points |
|---|---|
| Daily Equipment Washing | Wash feeders and drinkers every morning before serving fresh feed and water |
| Water Disease Risk | Many diseases spread through contaminated water; maintain good water hygiene |
| Biosecurity Definition | Set of management practices reducing disease introduction and spread |
| Sterilization | Destroys all microorganisms including spores; highest level of control |
| Disinfection | Destroys vegetative microorganisms but not spores; practical goal for poultry houses |
| Sanitation | Pathogenic organisms present but below infectious threshold |
| Cleaning Before Disinfecting | Must remove organic matter before disinfectants can work effectively |
| Complete Cleaning Schedule | After each flock or minimum once per year |
| Dry Cleaning Steps | Remove dust, feed, manure, and litter from all surfaces working top to bottom |
| Wet Cleaning Sequence | Soaking, washing, rinsing in that order; use warm/hot water |
| Detergent Types | Neutral (pH 6-8) or alkaline (pH above 8); acid detergents for mineral scale |
| Drying Importance | Complete drying before disinfection for maximum effectiveness |
| Repair Timing | Make structural repairs after cleaning but before disinfecting |
| Disinfectant Types | Phenolic, iodine, chlorine, quaternary ammonium, oxidizing compounds |
Frequently Asked Questions About Poultry Feeding Equipment Sanitation
1. Why must I wash feeders and drinkers every single day?
Bacteria multiply rapidly in the moist environment around feeders and drinkers, especially in feed residue and water. Within 24 hours, bacterial populations can reach levels that cause disease. Daily washing removes this contamination before it reaches dangerous levels. Skipping even one day allows bacteria to build up and increases disease risk significantly.
2. What’s the difference between cleaning and disinfecting?
Cleaning removes visible dirt, organic matter, and most microorganisms through physical and chemical action. Disinfecting kills remaining microorganisms after cleaning. You must clean first because disinfectants don’t work effectively on dirty surfaces. Organic matter shields bacteria from disinfectants, making cleaning the critical first step.
3. Can I use regular household bleach to disinfect my poultry house?
Yes, household bleach (sodium hypochlorite) is an effective disinfectant for poultry facilities. Dilute it according to label directions, typically 1 part bleach to 9 parts water for general disinfection. Apply only to pre-cleaned surfaces, allow adequate contact time (at least 10 minutes), and ensure good ventilation because chlorine fumes are harmful. Never mix bleach with other cleaning products as this can create toxic gases.
4. How long should I let the disinfectant sit before introducing birds?
Most disinfectants require 10 to 30 minutes of contact time to work effectively. After application, allow the building to air out and dry completely before introducing birds. This typically means at least 24 to 48 hours. Residual disinfectant fumes can irritate birds’ respiratory systems. The building should smell clean, not of strong chemicals, before birds enter.
5. Is hot water really necessary for effective cleaning?
Hot water (160°F or higher) is significantly more effective than cold water at dissolving fats, cutting through organic matter, and improving detergent performance. If hot water isn’t available, use the warmest water you can get and increase your scrubbing effort. Cold water still works but requires more physical effort and may not remove all contamination.
6. What should I do with old litter from the poultry house?
Old litter can be composted properly to kill pathogens, spread on fields as fertilizer (if allowed by local regulations), or disposed of according to local waste management rules. Never pile it near the poultry house where it can attract pests or contaminate the area. Proper composting requires achieving temperatures of 55-65°C for several weeks to kill disease organisms.
7. How often should I do a complete deep clean of my poultry house?
At minimum, do a complete deep clean (dry cleaning, washing, disinfecting) once per year. However, between each flock is better practice, especially for commercial operations. This breaks disease cycles and gives each new flock a fresh start. Small backyard operations should aim for deep cleaning at least twice per year.
8. Can I clean the poultry house while birds are still inside?
No, never attempt deep cleaning while birds are present. The stress, chemical exposure, and physical disturbance harm birds and reduce the effectiveness of your cleaning. Remove all birds first, then proceed with the eight-step cleaning process. Daily maintenance cleaning of feeders and drinkers is done with birds present, but house cleaning requires complete bird removal.
Do you have any questions, suggestions, or contributions? If so, please feel free to use the comment box below to share your thoughts. We also encourage you to kindly share this information with others who might benefit from it. Since we can’t reach everyone at once, we truly appreciate your help in spreading the word. Thank you very much for your support and for sharing!
Read Also: Comprehensive Guide on How to Prepare a Pineapple Juice
Nice one here admin, thanks for the post, it’s very educative.
Glad we could help Sir and Thanks for your feedback
Great article! You explained the topic so clearly, and I learned a lot from it. Thanks for sharing!
Thank you so much and we are glad that you find our article very helpful