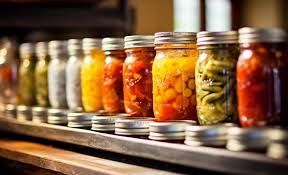
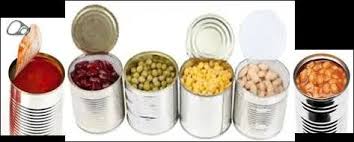
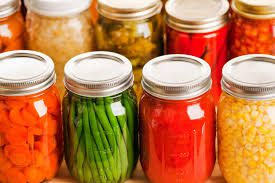
Canning is a method of preserving food in sealed containers, typically jars or cans, to extend its shelf life and maintain nutritional value. This process involves heating the food to kill bacteria and seal it in a sterile environment, preventing spoilage.
Canning is an effective way to store seasonal produce, ensuring that fruits, vegetables, and other foods are available year-round. It is a popular practice among home cooks and food manufacturers alike.
Benefits of Canning
Canning offers numerous benefits, making it a popular food preservation method:
1. Long Shelf Life: Canned foods can last for years when stored properly, providing a convenient food source for long periods.
2. Nutrient Retention: The canning process helps retain the nutritional value of foods, often preserving vitamins and minerals effectively.
3. Reduced Food Waste: Canning allows you to preserve excess harvests, reducing waste and making the most of seasonal produce.
4. Cost Savings: By canning your own food, you can save money compared to buying processed or pre-packaged foods.
5. Convenience: Canned foods are ready to eat and easy to use in meals, providing quick and nutritious options for busy lifestyles.
Types of Canning Methods

There are two primary canning methods, each suitable for different types of foods:
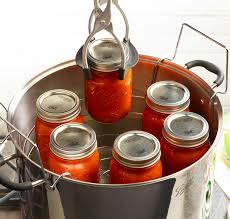
1. Water Bath Canning: This method is ideal for high-acid foods such as fruits, pickles, and tomatoes. In water bath canning, jars are submerged in boiling water for a specific period, ensuring that the contents are heated sufficiently to kill bacteria.
2. Pressure Canning: Pressure canning is necessary for low-acid foods like vegetables, meats, and poultry. This method uses a pressure cooker to achieve higher temperatures, which are essential for safely preserving low-acid foods. It effectively kills bacteria and prevents spoilage.
Essential Equipment for Canning
Having the right equipment is crucial for successful canning. Here’s a list of essential tools you will need:
1. Canning Jars: These come in various sizes and should be specifically designed for canning to withstand high temperatures.
2. Lids and Bands: Lids must create a proper seal on jars, while bands help hold the lids in place during processing.
3. Water Bath or Pressure Canner: Choose the appropriate canner based on the method you are using (water bath or pressure canning).
4. Jar Lifters: These tools help safely remove hot jars from the canner without burning your hands.
5. Funnel: A canning funnel makes it easier to fill jars without spilling.
6. Ladle: This is useful for transferring food into jars.
7. Timer: Keeping track of processing times is essential for safety.
Preparing Food for Canning
Proper preparation of food is crucial for successful canning. Follow these steps to prepare your food:
1. Select Fresh Produce: Choose ripe, high-quality fruits and vegetables. Avoid overripe or damaged items.
2. Wash Thoroughly: Clean all produce under running water to remove dirt, pesticides, and bacteria.
3. Cut and Trim: Remove any stems, cores, or blemishes. Cut the produce into uniform sizes for even processing.
4. Blanch if Necessary: Some vegetables, like green beans and carrots, should be blanched (briefly boiled and then cooled) to preserve color, flavor, and texture before canning.
5. Prepare Jars: Sterilize jars and lids by boiling them in water or running them through a dishwasher cycle before use.
6. Follow a Recipe: Always use trusted canning recipes to ensure proper ratios of ingredients and processing times for safety.
Read Also: Principles and Techniques in Livestock Breeding (Methods of Genetic Improvement)
Step-by-Step Guide to Water Bath Canning

Water bath canning is suitable for high-acid foods. Here’s a detailed guide:
1. Gather Your Supplies: Ensure you have canning jars, lids, bands, a water bath canner, jar lifter, canning funnel, ladle, and timer.
2. Prepare Your Food: Choose fresh fruits or high-acid foods, wash them thoroughly, and follow the recipe for specific preparation steps.
3. Sterilize Jars and Lids: Place jars in boiling water for 10 minutes to sterilize; this step is crucial to prevent bacteria growth. Keep lids in hot water to soften the sealing compound.
4. Fill Jars: Use the funnel to fill jars with prepared food, leaving the recommended headspace (usually 1/4 to 1/2 inch); leave enough space for food expansion during processing.
5. Remove Air Bubbles: After filling, run a clean knife around the inside of the jar to release any trapped air bubbles, which can interfere with sealing.
6. Wipe Jar Rims: Clean the rims with a damp cloth to ensure a proper seal; any food residue can prevent the lid from sealing correctly.
7. Seal the Jars: Place lids on jars and screw on bands until they are fingertip-tight; do not over-tighten, as this can prevent a proper seal.
8. Process in Water Bath: Fill the canner with enough water to cover the jars by at least 1 inch; bring the water to a rolling boil. Carefully lower the jars into the canner using the jar lifter. Start timing based on your recipe once the water returns to a boil.
9. Cool the Jars: After processing, turn off the heat and remove the jars using the jar lifter; place jars on a clean towel or cooling rack, allowing them to cool for 12-24 hours.
10. Check Seals: After cooling, check that the lids have sealed properly by pressing the center; if it doesn’t pop back, it’s sealed. Unsealed jars can be reprocessed within 24 hours.
11. Store Properly: Label the jars with the date and store them in a cool, dark place; proper storage is key to maintaining quality.
Step-by-Step Guide to Pressure Canning
Pressure canning is necessary for low-acid foods. Follow these steps:
1. Gather Your Supplies: Collect a pressure canner, canning jars, lids, bands, jar lifter, canning funnel, ladle, and timer.
2. Prepare Your Food: Select fresh, high-quality produce, wash and cut it into uniform sizes, and follow a reliable recipe for specific preparation.
3. Sterilize Jars and Lids: Sterilize jars by boiling them for 10 minutes or running them through a dishwasher cycle; keep lids in hot water.
4. Fill Jars: Fill jars with prepared food, leaving the required headspace (typically 1 inch for low-acid foods); remove air bubbles with a clean knife.
5. Wipe Jar Rims: Clean the rims with a damp cloth.
6. Seal the Jars: Place lids on jars and screw on the bands fingertip-tight.
7. Prepare the Pressure Canner: Add 2-3 inches of water to the pressure canner (check the manufacturer’s instructions); place the filled jars in the canner.
8. Lock the Canner Lid: Secure the lid on the pressure canner according to the manufacturer’s instructions.
9. Heat the Canner: Turn on the heat to build pressure; when steam begins to escape, allow it to vent for 10 minutes.
10. Adjust Pressure: Close the vent and bring the pressure to the level required by your recipe (usually 10-15 pounds).
11. Process the Jars: Start timing according to your recipe once the correct pressure is reached.
12. Cool Down: After processing, turn off the heat and let the pressure return to zero naturally; open the lid carefully, allowing steam to escape away from your face.
13. Remove Jars: Use the jar lifter to carefully remove jars and place them on a cooling rack.
14. Check Seals: After cooling, check that the lids are sealed properly.
15. Store Jars: Label and store jars in a cool, dark place.
Read Also: Digestive Anatomy of Ruminants
Common Canning Mistakes to Avoid

Here are some common mistakes to watch out for when canning:
1. Not Following Recipes: Always use tested recipes from reliable sources to ensure safety and proper preservation; skipping steps or altering ingredients can lead to spoilage.
2. Skipping Sterilization: Never skip sterilizing jars and lids, as this can lead to contamination; sterilizing is a critical step in preventing spoilage.
3. Overfilling Jars: Leave the recommended headspace to ensure proper sealing and prevent overflow during processing; too much food can prevent jars from sealing properly.
4. Forgetting to Wipe Jar Rims: Always clean the rims to ensure a proper seal; food residue can prevent the lid from sealing correctly, leading to spoilage.
5. Not Checking Seals After Cooling: Always check the seals after the
jars have cooled; unsealed jars can be reprocessed, but it’s best to catch them early.
Safety Tips for Canning
Canning is generally safe when done correctly, but it’s essential to keep these safety tips in mind:
1. Use Tested Recipes: Stick to reliable recipes that specify processing times and methods; following safe practices ensures food safety.
2. Don’t Modify Ingredients: Avoid changing the acid levels of recipes; low-acid foods require pressure canning to eliminate the risk of botulism.
3. Store Properly: Store canned goods in a cool, dark place to maintain quality; high temperatures or direct sunlight can degrade food quality.
4. Inspect Jars Before Use: Check jars for cracks or chips before use; damaged jars can break during processing.
5. Be Cautious with Seals: If a jar lid pops when pressed or shows signs of spoilage, do not consume the contents; discard the jar to avoid foodborne illnesses.
Canning is a rewarding way to preserve food, allowing you to enjoy seasonal flavors throughout the year. By understanding the processes, having the right equipment, and following safety guidelines, you can safely and effectively can your favorite foods. Enjoy the satisfaction of home-canned goods and the knowledge that you’re making the most of your harvest!
Canning is a valuable food preservation method that allows you to enjoy seasonal produce all year round. By understanding the benefits, methods, equipment, and preparation steps involved in canning, you can successfully preserve your favorite foods at home.
Do you have any questions, suggestions, or contributions? If so, please feel free to use the comment box below to share your thoughts. We also encourage you to kindly share this information with others who might benefit from it. Since we can’t reach everyone at once, we truly appreciate your help in spreading the word. Thank you so much for your support and for sharing!
Read Also: Digestive Anatomy of Ruminants

