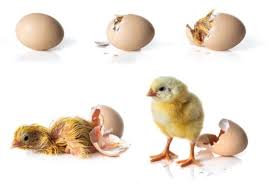
Egg incubation is a crucial process in the reproduction of many bird species and reptiles, playing a significant role in ensuring the survival of their young. It involves maintaining optimal environmental conditions for the eggs to develop and hatch successfully.
The incubation period varies among species, typically lasting from a few weeks to several months, depending on the type of egg and the species laying it. The primary factors that influence successful incubation include temperature, humidity, oxygen levels, and the turning of eggs.
In natural settings, parent birds or reptiles often regulate these conditions instinctively. However, in controlled environments, such as commercial hatcheries or laboratories, artificial incubators are used to simulate these optimal conditions.
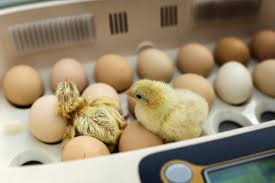
These incubators provide precise control over temperature and humidity, ensuring that the developing embryos receive the best chance of survival.
Egg incubation is not just vital for birds and reptiles; it has practical applications in various fields, including agriculture, conservation, and education.
In agriculture, incubation is essential for poultry farming, where farmers rely on controlled hatching to increase their flocks. Understanding the intricacies of egg incubation can enhance productivity and ensure the welfare of the chicks.
Furthermore, the principles of incubation extend beyond the avian world. Many fish species also exhibit parental care behaviors involving egg incubation, where the male or female guards the eggs until they hatch. This process, while less common than in birds and reptiles, highlights the diverse strategies animals employ to ensure the survival of their offspring.
As we explore the fascinating world of egg incubation, it is essential to consider related topics such as the processing of medicinal plants. Both subjects offer insights into the delicate balance of nature, where specific conditions must be met for success.
Types of Eggs Suitable for Incubation

1. Chicken Eggs: Chicken eggs are the most common type of egg used for incubation. They come in various breeds, each producing eggs with different characteristics. Fertilized eggs from reliable sources are essential for successful hatching.
2. Duck Eggs: Duck eggs are larger than chicken eggs and often have a thicker shell. They can be incubated successfully and usually have a longer incubation period, typically around 28 days.
3. Goose Eggs: Goose eggs are significantly larger and have a higher yolk-to-white ratio. They require a longer incubation period of approximately 30 to 35 days. They are often chosen for their meat and feathers.
4. Quail Eggs: Quail eggs are smaller and require a shorter incubation period, usually around 17 to 18 days. They are popular for both commercial and hobbyist purposes due to their rapid growth and early egg production.
5. Turkey Eggs: Turkey eggs are larger than chicken eggs and have a similar incubation period of about 28 days. They are commonly incubated for meat production and have specific requirements due to their size.
6. Guinea Fowl Eggs: Guinea fowl eggs are smaller than chicken eggs and have a unique flavor and texture. They require an incubation period of around 28 to 30 days. They are less common but valued for their hardiness and distinctive taste.
7. Exotic Bird Eggs: Eggs from exotic birds, such as parrots or finches, can also be incubated, though they require specialized knowledge and care. These eggs vary widely in size and incubation periods, depending on the species.
Understanding the Incubation Process
1. Fertilization: The incubation process begins with fertilized eggs, which must be collected and handled carefully to maintain viability. Ensure that eggs come from healthy, disease-free birds and are collected regularly to prevent deterioration.
2. Egg Positioning: Proper positioning is crucial for successful hatching. Eggs should be placed with the pointed end facing down in the incubator, allowing the embryo to develop correctly.
3. Temperature Regulation: Maintaining the correct temperature is vital for embryo development. The ideal incubation temperature for most poultry eggs is between 99.5°F to 101°F (37.5°C to 38.3°C). Consistency in temperature is crucial, as fluctuations can adversely affect the hatch rate.
4. Humidity Control: Humidity levels are also essential during incubation. Most poultry eggs require humidity levels of 40% to 50% for the first 18 days. Increasing humidity to around 65% during the final days before hatching helps facilitate the process and prevents dehydration of the chicks.
5. Turning the Eggs: Turning the eggs is necessary to prevent the embryo from sticking to the shell. For the best results, eggs should be turned at least three times a day until the last three days of incubation. Automatic turners can be used for convenience.
6. Candling: Candling involves shining a light through the egg to observe the development of the embryo. This process helps identify non-viable eggs and monitor growth stages, typically performed around days 7 and 14.
7. Hatching: The final stages of incubation involve preparing for hatching. Chicks usually begin pipping (breaking through the shell) around day 21 for chickens. It is essential not to open the incubator during this time, as it can disrupt humidity and temperature levels.
Read Also: How often you need to Change Water in your Fish Farm
Ideal Incubation Conditions

1. Temperature: The optimal incubation temperature for most poultry eggs is around 99.5°F (37.5°C). Using a reliable incubator with precise temperature controls is crucial for maintaining consistent heat throughout the incubation period.
2. Humidity Levels: Proper humidity is vital for embryo development. Maintaining humidity levels between 40% to 50% during the first 18 days and increasing it to 65% during the last three days is recommended. Utilizing hygrometers helps monitor and adjust humidity levels.
3. Ventilation: Adequate ventilation is necessary for providing oxygen and removing carbon dioxide. Incubators should have airflow systems to ensure a constant supply of fresh air without causing significant temperature fluctuations.
4. Egg Storage Conditions: Before incubation, eggs should be stored in a cool, stable environment, ideally at 55°F to 65°F (13°C to 18°C) with 70% to 80% humidity. Store eggs with the pointed end down and turn them gently every few days to maintain viability.
5. Monitoring Equipment: Regularly check and calibrate the incubator’s temperature and humidity gauges. Having a backup thermometer and hygrometer can help ensure accuracy and maintain ideal conditions.
6. Cleanliness: Maintaining a clean incubator is essential to prevent bacterial growth and contamination. Before starting a new incubation cycle, clean and disinfect the incubator thoroughly.
Setting Up an Incubator
1. Choosing the Right Incubator: Start by selecting an incubator that fits your needs. Consider factors like capacity, type (manual or automatic), and features such as built-in temperature and humidity controls. For beginners, a simple automatic incubator is recommended for ease of use.
2. Location: Place the incubator in a stable environment away from direct sunlight, drafts, and temperature fluctuations. Ensure it’s on a flat surface for balanced heating. A temperature range between 70°F to 80°F (21°C to 27°C) in the room will help the incubator maintain optimal conditions.
3. Preparing the Incubator: Before adding eggs, clean and disinfect the incubator thoroughly to prevent contamination. Follow the manufacturer’s instructions for setting up the incubator, including filling water reservoirs for humidity and adjusting air vents.
4. Preheating: Turn on the incubator at least 24 hours before placing the eggs to allow it to reach the desired temperature and stabilize humidity levels. The ideal temperature for incubating chicken eggs is around 99.5°F (37.5°C), while humidity should be maintained between 40% to 50% for the first 18 days.
5. Placing the Eggs: When the incubator is at the right temperature and humidity, place the eggs carefully. Ensure they are positioned with the pointed end facing down and avoid overcrowding. Leave enough space between eggs for airflow.
Monitoring Temperature and Humidity
1. Importance of Monitoring: Consistently maintaining the correct temperature and humidity is crucial for embryo development and successful hatching. Fluctuations can lead to poor hatch rates or deformed chicks.
2. Using Thermometers and Hygrometers: Invest in reliable thermometers and hygrometers for accurate readings. Digital devices often provide more precise measurements than analog ones. Place them inside the incubator to monitor conditions effectively.
3. Adjusting Temperature: If the temperature is too low, increase the heat setting. If it’s too high, reduce the heat. Allow some time for changes to take effect before making further adjustments. The ideal temperature should be between 99°F to 101°F (37.2°C to 38.3°C).
4. Managing Humidity: Fill the water reservoirs in the incubator to maintain humidity levels. Adding more water increases humidity, while reducing water levels lowers humidity. A hygrometer will help you keep track of these levels.
5. Ventilation: Ensure proper airflow within the incubator to provide oxygen to the developing embryos and remove carbon dioxide. Many incubators come with adjustable vents that can help regulate airflow without affecting temperature.
Turning Eggs: Why and How
1. Importance of Turning Eggs: Turning eggs prevents the embryo from sticking to the shell and ensures even heat distribution. This process is vital for proper development and increases the chances of successful hatching.
2. Frequency of Turning: Eggs should be turned at least three times a day until day 18 of the incubation period. If using a manual incubator, set reminders to ensure you do not forget to turn them.
3. Methods for Turning Eggs: When turning eggs manually, gently roll each egg from one side to the other, ensuring not to shake or drop them. Alternatively, consider using an automatic turner that rotates the eggs at set intervals, simplifying the process.
4. Marking Eggs: Marking one side of each egg with a pencil can help you keep track of which eggs have been turned. This method ensures that you turn them correctly and helps identify eggs that may need to be removed later.
5. Ceasing Turning: Stop turning the eggs three days before the expected hatch date (around day 18 for chickens). This allows the embryos to position themselves correctly for hatching.
Candling Eggs: Checking for Development
1. What is Candling?: Candling involves shining a light through the egg to check for embryo development. This process helps identify viable eggs and track growth stages during incubation.
2. When to Candle: Candling is typically done around days 7 and 14 of incubation. These intervals allow you to assess embryo development and remove non-viable eggs to prevent contamination.
3. How to Candle: In a dark room, hold the egg gently and place it over a bright flashlight or candling device. Observe the contents of the egg. A developing embryo will appear as a dark shadow with blood vessels, while a non-fertilized egg will look clear.
4. Identifying Viability: At day 7, look for the presence of blood vessels and a dark spot, indicating a developing embryo. By day 14, you should see more developed veins and the embryo occupying a larger portion of the egg.
5. Removing Non-Viable Eggs: If you identify an egg as non-viable, remove it carefully from the incubator to prevent any contamination and ensure the remaining eggs maintain the proper environment.
Read Also: Worm Infestation on Ruminant Animals: Symptoms and Treatment
Common Challenges in Egg Incubation

1. Temperature Fluctuations: Maintaining the correct temperature is crucial for embryo development. If the temperature is too low, it can delay hatching, while too high a temperature can lead to overheating and embryo death. Use reliable thermometers and regularly check the incubator settings to prevent fluctuations.
2. Humidity Issues: Insufficient humidity can cause the membranes inside the egg to dry out, making it difficult for chicks to hatch. Conversely, too much humidity can lead to a higher risk of bacterial infections. Monitoring humidity levels with a hygrometer and adjusting water levels in the incubator can help maintain the ideal range.
3. Ventilation Problems: Proper airflow is essential for providing oxygen to the developing embryos. Inadequate ventilation can lead to carbon dioxide buildup, which may harm the embryos. Ensure the incubator’s air vents are unobstructed and adjust them as needed for optimal airflow.
4. Egg Turning Errors: Not turning eggs regularly can lead to embryos sticking to the shell, affecting their development. If turning manually, set reminders to ensure you turn the eggs at least three times a day. Using an automatic egg turner can simplify this process and improve hatch rates.
5. Contamination Risks: Bacteria and mold can enter the incubator, leading to spoiled eggs. Clean and disinfect the incubator thoroughly before use and ensure that all tools and hands are clean when handling eggs. Avoid opening the incubator frequently to minimize contamination risks.
6. Handling Fertility Issues: Fertility problems can arise due to poor-quality eggs, inadequate mating conditions, or health issues with breeding stock. Ensure you source eggs from healthy, well-cared-for birds and check for any signs of infertility in your breeding flock.
Hatching Day: What to Expect
1. Preparation for Hatching: Around day 18 of incubation, stop turning the eggs and increase humidity levels to prepare for hatching. This allows the chicks to position themselves properly for their arrival.
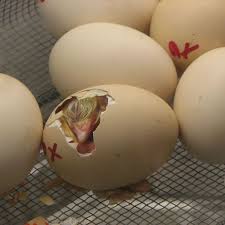
2. Watching for Pipping: Pipping is when the chick breaks through the eggshell. This process usually begins with a small hole on one end of the egg, where the chick will breathe air for the first time. It can take several hours to a day for the chick to fully emerge after the initial pip.
3. Expecting Delays: Hatching is not always a synchronized event; some chicks may take longer to hatch than others. Remain patient, as the timing can vary based on factors like breed, egg condition, and environmental conditions.
4. Monitoring Activity: Keep an eye on the eggs and be prepared to assist if a chick struggles to hatch. However, it’s essential to resist the urge to help too much, as this can harm the chick. Allow them time to complete the hatching process on their own.
5. First Signs of Life: Once the chicks begin to hatch, you’ll see them moving and making soft peeping sounds. They may take breaks between pipping and hatching to gather strength, so don’t be alarmed if they seem to pause.
Post-Hatching Care for Chicks
1. Immediate Post-Hatch Handling: Once chicks hatch, they will need a warm, safe environment. Remove them gently from the incubator once they’re dry, and place them in a brooder. Avoid handling them too much in the first few hours, allowing them to rest and adjust.
2. Providing Heat: Chicks require a warm environment to thrive. Set up a brooder with a heat source like a heat lamp to maintain a temperature of around 95°F (35°C) for the first week. Gradually reduce the temperature by 5°F (2-3°C) each week until they are fully feathered.
3. Access to Food and Water: Provide chicks with access to clean water and a starter feed designed for young poultry. Ensure that the food is placed in shallow containers to prevent drowning. Monitor their food and water intake, replenishing as needed.
4. Social Interaction: Chicks are social animals and thrive in groups. If possible, keep them in groups to promote social behavior and reduce stress. Monitor their interactions to ensure they are comfortable and not overly aggressive.
5. Monitoring Health: Keep an eye on the health of the chicks in the days following hatching. Watch for signs of distress, lethargy, or unusual behavior. If any chicks appear sick, separate them from the others and consult a veterinarian for advice.
6. Providing a Safe Environment: Ensure the brooder area is safe and free from hazards. Use bedding like straw or wood shavings to provide comfort and absorb waste. Regularly clean the brooder to maintain hygiene and prevent disease.
Do you have any questions, suggestions, or contributions? If so, please feel free to use the comment box below to share your thoughts. We also encourage you to kindly share this information with others who might benefit from it. Since we can’t reach everyone at once, we truly appreciate your help in spreading the word. Thank you so much for your support and for sharing!
Read Also: How to Choose the Right Trash Service for Your Needs

