Flower cultivation is an art and science that combines horticulture, botany, and aesthetic design. It involves the growing of flowering plants for decorative purposes, enhancing landscapes, gardens, and interiors.
Cultivating flowers not only adds beauty but also promotes biodiversity, supports local ecosystems, and can even contribute to economic stability through flower sales and floral businesses.
As the demand for vibrant and diverse floral arrangements continues to grow, understanding effective cultivation techniques becomes essential for both amateur and professional growers.
One of the fundamental aspects of flower cultivation is selecting the right type of flowers based on climate, soil conditions, and the intended purpose. Different flowers have specific requirements for sunlight, water, and nutrients, making it vital for growers to choose species that will thrive in their environment.
For instance, sunflowers and marigolds prefer full sun, while certain shade-loving plants like impatiens flourish in low-light conditions. Additionally, understanding the growth cycles of various flowers from annuals, which complete their life cycle in a year, to perennials that return season after season is crucial for planning a successful garden.
Soil preparation is another critical element of flower cultivation. Healthy, nutrient-rich soil provides the foundation for robust flower growth. Conducting a soil test to assess pH levels and nutrient content can help determine what amendments might be necessary.
Organic matter, such as compost or well-rotted manure, can enhance soil structure, improve drainage, and provide essential nutrients.
Proper drainage is especially important to prevent root rot and other diseases. Therefore, selecting the right location and preparing the soil appropriately can lead to a flourishing flower garden.
Watering techniques also play a significant role in flower cultivation. Consistent moisture is essential for the germination of seeds and the establishment of young plants. However, overwatering can lead to detrimental effects, such as root rot and fungal infections.
Employing efficient irrigation methods, such as drip irrigation or soaker hoses, can help deliver water directly to the plant roots, reducing waste and promoting healthier growth. Additionally, understanding the water requirements of different flower species allows growers to tailor their watering schedules accordingly.
Pest and disease management is another important consideration in flower cultivation. Various pests, such as aphids, caterpillars, and beetles, can threaten flower health.
Integrated Pest Management (IPM) strategies, which include monitoring for pests, using beneficial insects, and applying organic pesticides, can effectively control infestations while minimizing harm to beneficial organisms and the environment. Regular inspections and maintaining good garden hygiene removing dead foliage and debris can also help reduce the risk of diseases.
Finally, understanding proper planting techniques and timing is crucial for successful flower cultivation. Seedlings should be transplanted at the right time of year, taking into account local frost dates and seasonal weather patterns.
Spacing plants appropriately ensures adequate air circulation, reducing the risk of disease and allowing each plant to receive sufficient sunlight. Additionally, mulching around plants can help retain soil moisture and suppress weeds, further enhancing flower growth.
Understanding Different Types of Flowers

1. Annual Flowers: Annuals are plants that complete their life cycle within one growing season. They germinate, flower, produce seeds, and die all in one year. Popular annual flowers include marigolds, petunias, and zinnias. They are often used for vibrant summer displays and are available in a wide range of colors and forms.
2. Perennial Flowers: Perennials live for more than two years, blooming year after year. They typically have a dormant period in winter and come back in the spring. Examples include daisies, peonies, and lavender. Perennials are favored for their long-lasting beauty and lower maintenance compared to annuals.
3. Biennial Flowers: Biennials take two years to complete their life cycle. They typically grow vegetatively in the first year and flower in the second year. Examples include foxgloves and hollyhocks. After flowering, biennials usually die, but they can self-seed to produce new plants.
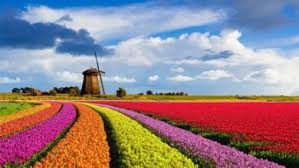
4. Bulb Flowers: Bulb flowers grow from underground storage organs, such as bulbs, corms, or tubers. These include tulips, daffodils, and lilies. Bulb flowers are planted in the fall or early spring and can provide early-season color in the garden.
5. Wildflowers: Wildflowers are native plants that grow naturally in the wild without cultivation. They often thrive in a variety of environments and can attract pollinators. Examples include daisies, bluebells, and poppies. Planting wildflowers can promote biodiversity and support local ecosystems.
Choosing the Right Location for Flower Growing
1. Sunlight Requirements: Most flowering plants thrive in full sun, requiring at least 6-8 hours of direct sunlight daily. Assess the sunlight patterns in your chosen location to ensure your flowers will receive adequate light.
2. Accessibility: Choose a location that is easily accessible for maintenance tasks such as watering, weeding, and harvesting. A convenient site can make flower care more manageable and enjoyable.
3. Drainage Considerations: Good drainage is vital for flower health. Avoid areas where water tends to pool after heavy rain. Elevated spots or well-drained soils are preferable for preventing root rot and other water-related issues.
4. Protection from Wind: Select a site that offers some protection from strong winds, which can damage delicate flowers. Consider planting near natural windbreaks, such as trees or fences, to shield the flowers.
5. Soil Quality: Assess the soil quality in your chosen location. Healthy soil is rich in organic matter, well-drained, and free from contaminants. Conducting a soil test can provide valuable insights into nutrient levels and pH.
Soil Preparation for Optimal Growth
1. Soil Testing: Begin by testing the soil to determine its pH and nutrient content. This information will help you amend the soil appropriately for optimal flower growth. Most flowering plants prefer slightly acidic to neutral soil (pH 6.0 to 7.0).
2. Adding Organic Matter: Incorporate organic matter, such as compost or well-rotted manure, into the soil. Organic matter improves soil structure, enhances nutrient retention, and promotes beneficial microbial activity.
3. Tilling the Soil: Loosen the soil by tilling or turning it over to a depth of about 12 inches. This process aerates the soil and allows for better root penetration. Remove any rocks, weeds, or debris during tilling.
4. Amending Nutrients: Based on soil test results, amend the soil with fertilizers or soil amendments as needed. Balanced fertilizers with nitrogen, phosphorus, and potassium (N-P-K) ratios suitable for flowering plants can help promote healthy growth.
5. Leveling the Area:After preparing the soil, level the planting area to prevent water pooling and ensure even growth. Create raised beds if necessary to improve drainage and manage soil moisture effectively.
Read Also: 12 Medicinal Health Benefits Of Renealmia alpinia (Pink cone ginger)
Selecting Flower Varieties for Your Garden

1. Climate Considerations: Choose flower varieties suited to your local climate to ensure successful growth. Understanding the climate zones can help you select flowers that thrive in your area, considering factors like temperature, humidity, and rainfall. For example, some flowers prefer warm, dry conditions, while others flourish in cooler, wetter environments.
2. Purpose of the Garden: Determine your garden’s purpose (e.g., visual appeal, attracting pollinators) to select appropriate flowers. If you aim to create a habitat for beneficial insects, consider planting nectar-rich flowers. Alternatively, if the goal is to enhance aesthetic appeal, choose flowers with vibrant colors and varying heights to create visual interest.
3. Bloom Time: Select a mix of flowers that bloom at different times for continuous color and interest. By planning for a succession of blooms, you can ensure that your garden is vibrant throughout the growing season. Early bloomers like crocuses can be planted alongside late bloomers like asters to maintain a colorful display.
4. Growth Habit: Consider the growth habits of flowers to avoid overcrowding and ensure proper light access. Some flowers spread aggressively, while others grow tall and upright. Understanding these habits can help you plan your garden layout, placing taller flowers in the back and shorter varieties in front to maximize light exposure.
5. Color Palette: Create a harmonious color palette by selecting flowers with complementary colors. Think about color theory when planning your garden; contrasting colors can create a vibrant, dynamic display, while analogous colors can provide a softer, more cohesive look. Combining various shades can enhance the overall beauty of your garden.
Planting Techniques for Successful Flower Cultivation
1. Timing: Plan your planting schedule based on the types of flowers you choose to optimize growth. Different flowers have specific planting times, influenced by seasonal temperature changes. For instance, some annuals should be sown after the last frost, while perennials can be planted in early spring or fall.
2. Spacing: Follow recommended spacing guidelines for each variety to avoid overcrowding and ensure healthy growth. Overcrowding can lead to competition for resources such as light, water, and nutrients, resulting in weak plants. Check seed packets or plant tags for spacing recommendations, as proper spacing promotes airflow and reduces disease risk.
3. Planting Depth: Plant flowers at the appropriate depth for their specific needs to promote healthy root development. Different types of flowers require different planting depths; for instance, small seeds should be sown closer to the soil surface, while larger seeds may need to be buried deeper. Proper depth helps ensure that seeds have the right conditions for germination.
4. Watering After Planting: Gently water flowers after planting to settle the soil and provide initial moisture. Newly planted flowers require adequate hydration to establish their root systems. Be careful not to overwater, as this can lead to waterlogged soil and root rot.
5. Mulching: Apply organic mulch to retain moisture, suppress weeds, and maintain a consistent soil temperature. Mulch also adds nutrients to the soil as it decomposes. Organic materials like wood chips, straw, or grass clippings can help regulate soil temperature and keep it moist, benefiting flower growth.
Read Also: 16 Medicinal Health Benefits Of Scleromitrion diffusum (Spreading Diamond Flower)
Watering Practices for Healthy Flowers

1. Frequency: Water deeply and infrequently to encourage deeper root growth and drought resistance. Shallow, frequent watering can lead to weak root systems that are more susceptible to drought. Aim for about one inch of water per week, adjusting based on weather conditions.
2. Time of Day: Water in the early morning or late afternoon to minimize evaporation and stress on plants. Watering during the hottest part of the day can lead to significant water loss, while evening watering may leave plants vulnerable to fungal diseases due to prolonged moisture on the leaves.
3. Checking Soil Moisture: Monitor the top inch of soil; water when it feels dry to the touch. This method ensures that you are not overwatering or underwatering your plants. Stick your finger into the soil to gauge moisture levels; if it feels dry, it’s time to water.
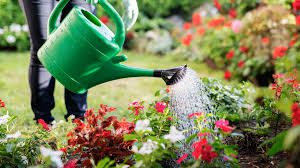
4. Watering Technique: Use a watering can, hose, or drip system to deliver water directly to the soil and root zone. Avoid wetting the foliage, as this can promote disease. A drip irrigation system can be especially beneficial, providing consistent moisture while minimizing waste.
5. Adjusting for Weather: Modify your watering schedule based on weather conditions to prevent over- or under-watering. During hot, dry spells, flowers may require additional watering, while rainy periods may necessitate reducing your watering frequency. Be flexible and responsive to the conditions.
Fertilization Methods for Flowering Plants
1. Soil Testing: Conduct soil tests to assess nutrient levels and pH for effective fertilization. Soil tests can help identify nutrient deficiencies or excesses, allowing you to tailor your fertilization strategy accordingly. Most garden centers or agricultural extension offices offer soil testing services.
2. Types of Fertilizers: Choose between organic options (like compost) and synthetic fertilizers based on your garden’s needs. Organic fertilizers release nutrients slowly and improve soil structure, while synthetic fertilizers provide immediate nutrients. Understanding the pros and cons of each type can help you make informed choices.
3. Fertilizer Application Timing: Apply fertilizers at the beginning of the growing season and follow up as needed. For most flowering plants, a balanced fertilizer applied in early spring can stimulate growth and blooming. Regularly reassess and adjust your fertilization schedule based on plant performance.
4. Method of Application: Evenly distribute granular fertilizers on the soil surface and lightly rake them in for best results. Liquid fertilizers can also be used for a quick nutrient boost, but be careful to follow the manufacturer’s instructions to avoid burning the plants.
5. Monitoring Plant Response: Observe flowers for nutrient deficiencies and adjust fertilization practices accordingly. Signs of nutrient deficiencies can include yellowing leaves, stunted growth, or poor blooming. Being attentive to these indicators allows you to react promptly to any issues that arise.
Do you have any questions, suggestions, or contributions? If so, please feel free to use the comment box below to share your thoughts. We also encourage you to kindly share this information with others who might benefit from it. Since we can’t reach everyone at once, we truly appreciate your help in spreading the word. Thank you so much for your support and for sharing!
Read Also: Complete Composting Guide for Beginners

