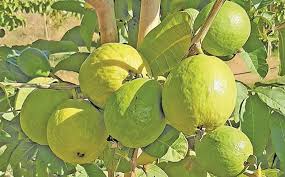
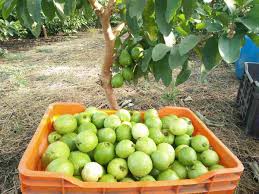
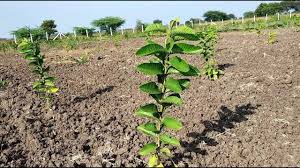
Guava Psidium guayaba is becoming one of the most important fruits in Nigeria. It was not important in the past because it was erroneously believed that consumption of it was capable of causing appendicitis, (inflammation of the vermiform appendix) in human being. It contains very high concentration of vitamin C which makes it a leading economic fruit tree crop.
It grows quite well throughout Nigeria and produces prolifically in the dries parts of the country if supplemented with irrigation during the dry season.
Field Site Suitable for Guava
Your guava will survive on nearly every type of soil, but it grows best in a well- drained sandy soil. You should avoid planting guava on heavy soils because it will limit its growth especially in the dry.
Guava Varieties
The following cultivars have been found to be promising for cultivation and further propagation:
1. Jumbo white
2. Ruby supreme
3. Webber supreme
4. Branca arredondede Supreme
Propagation
If you want to obtain guava trees which would produce uniform fruits of good quality as the mother trees, guava should not be propagated through seeds. Rather, you should use any of the vegetative propagation techniques.
Read Also: Reasons why Fishes Refuse to Eat their Feed and How to Correct it
Nursery Establishment

1. Sowing of Seeds and Raising of Rootstock
Although seeds of guava will retain their viability to up to one or one and half year after extraction, you should plant guava seeds as soon as possible, after removal from fruits.
You may sow the seeds in flats or trays containing light sandy loam soil and cover to a depth of 1cm. after the seedlings have formed their second leaves you can transplant them into the nursery you should use a space of 75cm between rows in the nursery and 30cm between plants in the row.
You may commence your grafting when the seedlings are about pencil thick. Best time in the year throughout the country is between May and September, because this is the most moist period in the year.
2. Selection of Scion
If you choose to adopt the technique of veneer grafting, you should select your scion shoot from the current season’s growth and it should be green and quadrangular in shape.
The selected scion should be defoliated one week prior to removal from mother plants, as defoliation helps in activating the axillary buds. Immediately after you have detached the shoot from the mother tree, you should wrap the scion sticks in moist newspaper and pack in polytheme buds.
This way the scions can be kept in good condition for about one week, but you should graft these on rootstocks without much delay.
3. Technique of Grafting
Make a slightly slanting cut about 3.5cm long at the proximal end of the vigorous and healthy root stock seedlings taking adequate care that both fit together completely without any gap in between. This will give you success in grafting.
After joining the two, you should now wrap tightly with polythene tape. The scion bud should start to sprout in about 21 days. At this stage the upper part of the stock should be removed.
About 45 to 50 days later, when the scion has sufficiently, you may cut off the stock just above the point of union. Your grafted plant that you have prepared is now ready for planting.
Rooting of Hard Wood Cuttings
Collect leafy hardwood cuttings from selected plants. Make four vertical incisions at the base of the cuttings. Dip the cut ends briefly in a solution of Indole butyric acid (IBA) 250 ppm (in 50% alcohol). Plant the treated cuttings in a shaded area.
Roots should begin to appear in 25 days. Transfer the rooted cuttings to large pots or polythene bags filled with a well-manured soil mixture. The plants will be ready for transplanting in 15 days. These plants can be further multiplied using the stooling technique described below.

Stooling
Establishing stooling plots by planting plants prepared by cuttings from the selected trees. In the succeeding year you should cut back the plants to a height of 30cm during the month of March.
Multiple shoots grow usually in the months from leading back. Made two rings 3-4 apart on new shoots near the base. Remove the bark and apply Insole Butyric Acid paste (500ppm) in lanolin. After about 10 days, you should cover the ringed portion with a mound of soil.
The same stool will give you rooted shoots every year for several years to come. You should plant the rooted shoots immediately after removal in polythene bags containing well manused soil. You can transplant these in a few weeks time.
Orchard Planting and Care

Guava grafts are slightly difficult to transplant and require extra care when handling them from the nursery to the field. The usual practice involves cutting the tap root after the onset of rain to induce fibrous feeding roots. After about 45–50 days, the grafts are removed from the nursery bed with a ball of earth.
If the graft is too large, prune the branches to reduce leaf area. In extreme cases, all the leaves may be removed before transplanting. Adequate care is necessary to reduce graft mortality in the field during wet seasons.
In the case of plants raised by stooling or cuttings, no such care is necessary, as these plants are already settled in polythene bags.
Planting holes should be dug at 50cm x 50cm with a spacing of 7m x 7m. The pits are filled with about one bucket of compost, mixed with soil.
One plant is placed in each pit, and the plants must be watered immediately after planting. Watering should continue during any dry spell. Mulching the ground around the base of the plant helps retain moisture.
Fertilizer Application
Fertilizer is applied in a ring about 30cm from the crop, and this also applies to guava plants. The recommended fertilizer proportions for young guava trees are as follows:
1st year: 50g of NPK mixture (1:1:1) in one dose
2nd year: 300g of NPK mixture (1:1:1) in three doses
3rd year: 450g of NPK mixture (1:1:1) in three doses
4th year: 600g of NPK mixture (1:1:1) in three doses
5th year: 600g of NPK mixture (1:1:1) in three doses
Guava trees can be intercropped with leguminous or vegetable crops during the first 3 to 4 years.
Read Also: Reasons why Feeding your Fishes is very Important
Weed Control in A Guava Orchard

Weed control in a guava orchard is typically done by manual slashing or using mowers. Regular ring weeding around young seedlings is necessary, while total weeding can be done every 1 to 2 months, depending on the season.
Contact herbicides like paraquat or glyphosate may be used according to recommended guidelines. Intercropping with cover crops can also serve as an effective method for weed control. Regardless of the approach, maintaining a clean orchard is essential for healthy guava production.
Harvesting, Packing and Transport
As a general rule, guava should be harvested when the fruits begin to yellow, except for green varieties such as Jumbo White. For distant markets, mature green fruits can be harvested.
Guava is typically harvested carefully in well-ventilated baskets or wooden crates. Fruits intended for processing factories should be harvested according to their specific requirements and standards.
Pests and Diseases of Guava
Some common pests that you may likely experience on guava fields are:
1. Homeecerus Pallens – an insect pest which attacks the fruits of the guava.
2. Pachnoda spp: this also feeds on fruits
3. Argyoploce spp: (false codling moth) attacks the leaves
Control: Spray the crop weekly with ambush at the rate of 4m in 10 litres of water. You must use clean potable water.
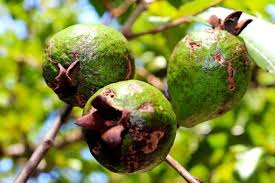
There are not many known major diseases in guava. However, fungal diseases such as leaf and fruit spots may occur. If noticed, fungicide should be applied. Fruit rot in guava is usually caused by fruit worms.
Do you have any questions, suggestions, or contributions? If so, please feel free to use the comment box below to share your thoughts. We also encourage you to kindly share this information with others who might benefit from it. Since we can’t reach everyone at once, we truly appreciate your help in spreading the word. Thank you so much for your support and for sharing!
Read Also: Analysis of Biodata Relating to Water Quality (H2O)
Frequently Asked Questions
We will update this section soon.
