
Raising broilers can be one of the most rewarding poultry enterprises you can start, especially if you’re new to farming or looking for a quick return on investment. The speed at which broilers grow makes them perfect for school projects, backyard farming, or anyone wanting to test the waters of poultry production before committing to larger operations.
What makes broiler farming particularly attractive is the timeline. Within just ten weeks (a single school term), you can raise chicks from day one to full market weight. This rapid turnaround means you see results fast, unlike other farming ventures that might take months or years before you know if you’re doing things right.
For beginners, broiler production offers something invaluable: a crash course in poultry management. The skills you develop while raising your first batch of broilers translate directly to other poultry operations and even other types of livestock. You learn about feeding schedules, disease prevention, environmental control, and daily care routines. These fundamentals stay with you regardless of what farming direction you take later.
When managed properly with good-quality stock, broilers reach market weight by eight weeks. At this point, they typically weigh between 1.7 and 2 kilograms each. This predictable growth pattern makes planning easier and helps you calculate costs and potential profits before you even start.
However, success in broiler production depends heavily on understanding proper management practices. Temperature control, feeding programs, disease prevention, and housing all play critical roles. Small mistakes in any of these areas can lead to poor growth rates, increased mortality, or broilers that don’t reach market weight on schedule. This guide walks you through everything you need to know to raise healthy, productive broilers from start to finish.
Read Also: Methods of Preparation for the Arrival of Poultry Chicks
1. Broiler Housing and Equipment
The physical setup of your broiler operation determines how easy or difficult your daily management will be. Getting this right from the start saves you countless headaches later.
A. Housing
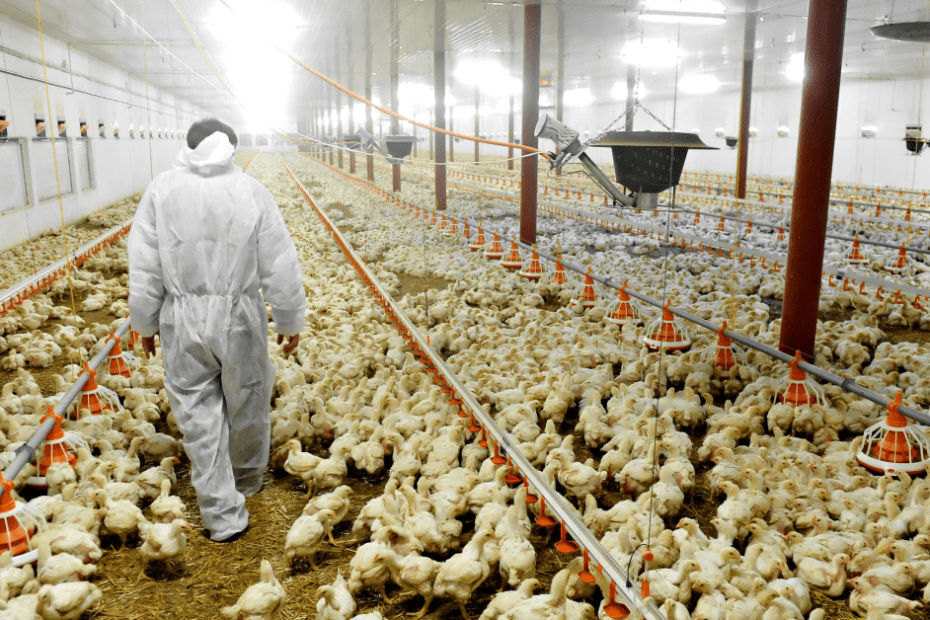
I. All-in, all-out system: The most practical system for broiler management is the “All in” and “All out” method whereby chicks are brought into one house at day old and reared to slaughter weight. They are then removed at once. The house is cleansed, washed, disinfected, and allowed to rest for not less than two weeks before a new set is brought in. This system breaks disease cycles and gives you a clean slate for each batch.
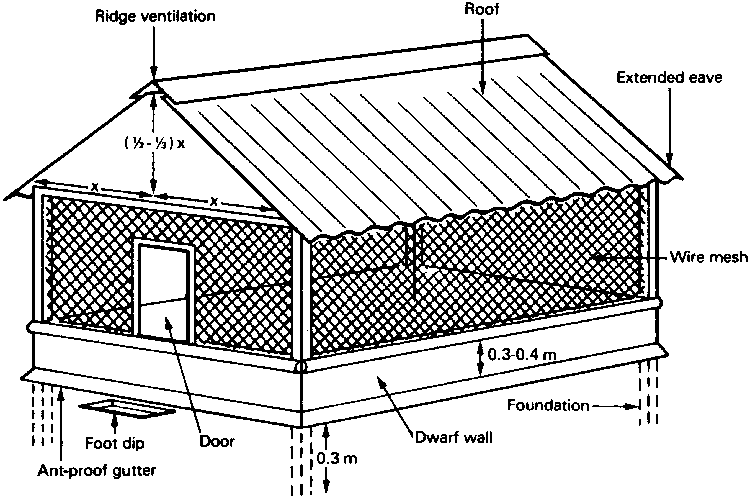
ii. House selection: Housing designed for brooding only can be used during the cold months in the North but at other times, the conventional open-sided houses can be used so long as the recommendations for optimum brooding conditions are observed. The key is maintaining proper temperature and ventilation regardless of the house type you choose.
B. Equipment
I. Basic equipment needs: The equipment for broiler production is as described under brooding management. You’ll need feeders, waterers, a heat source, and proper ventilation. Because the watering chore takes more time than other routines, it is advisable to install an automatic water system if you’re raising more than a small flock.
ii. Automatic watering systems: Automatic watering only requires an overhead tank, a pump to deliver water into the tank, and the automatic waterers. Once the tank is full, water fills the waterers naturally by the force of gravity. However, it is important to check the watering lines every day to ensure that there are no blockages. This system can cut your daily labor time significantly and ensures birds always have access to clean water.
C. Feeds and Feeding
I. Feed types: Broiler feeds are high-energy, high-protein-containing feeds designed to promote rapid growth. There are two types of broiler feeds available commercially. The broiler starter, which should be fed for the first one to five weeks, and the broiler finisher which should be fed from five weeks to finish. These feeds are specially formulated to match the nutritional needs of broilers at different growth stages.
ii. Nutritional requirements: Although both feeds can have the same energy level (300 ME Kcals/kg of diet), the broiler starter should have a higher protein (23 per cent) than the finisher (20 per cent). Studies by Olomu and Offiong (1980) have shown that good-quality vegetable protein can be used as the sole source of protein in finishers but not in starters.
Hence there is the need to ensure that broiler feeds contain a good quality protein source to meet the indispensable amino acid requirements. Good quality feed is an absolute necessity for the successful production of broilers and other poultry. Cutting corners on feed quality will show up immediately in slower growth and higher feed conversion ratios.
iii. Feeding schedule: Broilers are usually fed ad libitum (free choice, meaning feed is always available). The use of artificial lights to stimulate feeding day and night can increase feed intake and promote more rapid growth. To make feed available all the time means that care must be taken to minimise feed wastage as this tends to increase with such liberal feeding practices.
iv. Feed consumption: The amount of feed required to raise a set of broilers would depend on the quality of feed, the duration for which the broilers are kept, and the amount of feed wastage. The consumption of starter mash should be between 1.5 to 2.0 kg per bird from 0 to five weeks, while the amount of broiler finisher should be between 3 to 4 kg per bird. The table below summarizes the requirements per 100 broilers.
Table: Broiler Feed Requirements per 100 Birds
| Feed Name | Age to Feed | Quantity/100 birds (Kg) | No. of 25kg bags |
|---|---|---|---|
| Broiler Starter | 0-5 weeks | 200 | 8 |
| Broiler Finisher | 5-9 weeks | 300 | 12 |
2. Management Schedule

Following a systematic schedule keeps your operation organized and ensures you don’t miss critical tasks. The table below provides a week-by-week breakdown of activities for a complete broiler production cycle.
Table: Broiler Management Guide
| Week | Age of Birds (weeks) | Activity |
|---|---|---|
| 0-2 | – | Sweep, wash, and disinfect house. Assemble all equipment and check to ensure it is in working order. Carry out house repairs if needed. |
| 1-2 | 0 | Allow house to rest |
| 2-3 | 0 | Set brooder house ready for arrival of chicks. |
| 3-4 | 0-1 | Arrival of chicks. Provide optimum brooding care. Vaccinate birds against Newcastle disease, Marek’s, and Gumboro before 10 days of age. |
| 4-5 | 1-2 | Continue brooding care. Complete vaccinations as above. |
| 5-6 | 2-3 | Gradually reduce supplementary heat. |
| 6-7 | 3-4 | Gradually reduce supplementary heat. |
| 7-9 | 4-6 | Discontinue supplementary heat. Vaccination against Newcastle disease, Gumboro, and Fowl pox. Change feed to broiler finisher. Change to adult feeders and drinkers. |
| 9-10 | 6-7 | Activate the machinery for marketing |
| 10-11 | 7-8 | Complete arrangements for marketing |
| 11-13 | 8-10 | Sell off broilers. Sweep, wash, and disinfect the house and get ready for the new set |
3. Daily Management Routines
I. Standard practices: Daily and periodic routines during brooding have already been described in general brooding management. These include checking feed and water, observing bird behavior, removing dead birds, maintaining proper temperature, and keeping records.
ii. Broiler-specific considerations: However, broiler production has the following peculiarities. No deworming is necessary due to the short production cycle. Check weights weekly by sampling about five per cent of the birds. This helps you track whether birds are growing according to schedule and whether you need to adjust feeding or management practices.
iii. Monitoring growth: Weekly weight checks give you early warning if something is wrong. If your sample birds are below expected weights, you can investigate potential problems like disease, poor feed quality, inadequate water access, or stress from overcrowding or temperature extremes.
Read Also: Poultry Brooding Management Practices
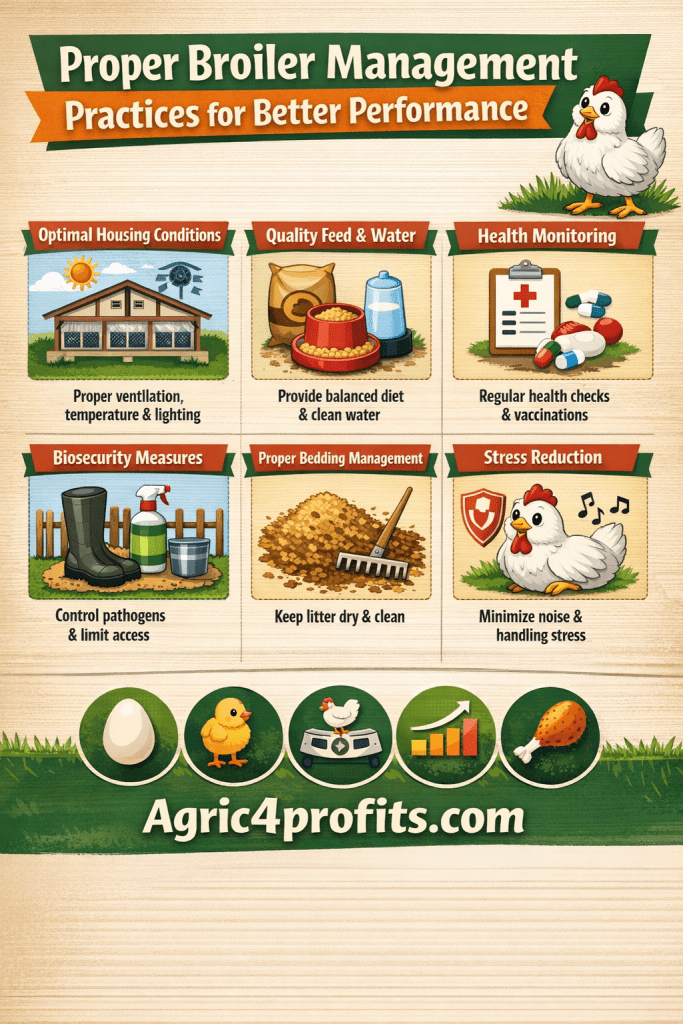
Summary on Proper Broiler Management Practices for Better Performance
| Aspect | Key Points | Timeline |
|---|---|---|
| Production Cycle | Fast return on investment, market weight in 8 weeks at 1.7-2 kg | 8-10 weeks total |
| Housing System | All-in, all-out method with 2-week rest period between batches | Continuous cycles |
| Equipment | Feeders, waterers (preferably automatic), heat source, proper ventilation | Setup before chicks arrive |
| Feed Types | Starter (23% protein) for 0-5 weeks, Finisher (20% protein) for 5+ weeks | Change at 5 weeks |
| Feed Consumption | 1.5-2 kg starter per bird, 3-4 kg finisher per bird | 200kg starter + 300kg finisher per 100 birds |
| Feeding Method | Ad libitum (free choice), artificial lights to encourage night feeding | Continuous |
| Heat Management | Start with supplementary heat, gradually reduce from weeks 2-6, discontinue by week 7 | 0-7 weeks |
| Vaccinations | Newcastle, Marek’s, Gumboro before 10 days; repeat Newcastle, Gumboro, Fowl pox at 4-6 weeks | Days 1-10, weeks 4-6 |
| Weight Monitoring | Check 5% of flock weekly to track growth performance | Weekly |
| Deworming | Not necessary due to short production cycle | N/A |
| House Cleaning | Clean, wash, disinfect between batches; rest house minimum 2 weeks | After each batch |
| Marketing | Begin arrangements at week 6-7, complete sales by weeks 8-10 | Weeks 6-10 |
Frequently Asked Questions About Proper Broiler Management Practices for Better Performance
1. How long does it take to raise broilers to market weight?
Well-managed broilers reach market weight in about 8 weeks, though the complete production cycle including house preparation and rest perio, ds takes 10-13 weeks. At 8 weeks, broilers should weigh between 1. andto 2 kilograms each.
2. What is the all-in, all-out system and why is it important?
The all-in, all-out system means bringing all chicks into a house at once, raising them together, and removing them all at the same time. The house then gets cleaned, disinfected, and rested for at least 2 weeks before starting a new batch. This breaks disease cycles and prevents older birds from infecting younger ones.
3. How much feed do I need for 100 broilers?
For 100 broilers, you need approximately 200 kg (8 bags of 25kg) of starter feed for the first 5 weeks and 300 kg (12 bags of 25kg) of finisher feed from week 5 onwards. Individual birds consume about 1.5-2 kg of starter and 3-4 kg of finisher.
4. Should I use an automatic watering system?
If you’re raising more than a small backyard flock, automatic watering systems save significant time and ensure birds always have clean water available. They require an overhead tank, a pump, and automatic waterers. Just check daily for blockages in the water lines.
5. What is the difference between broiler starter and finisher feed?
Both feeds have similar energy levels (around 300 ME Kcals/kg) but differ in protein content. Starter feed contains 23% protein for rapid early growth during weeks 0-5, while finisher feed contains 20% protein for weeks 5 onwards when growth rate naturally slows.
6. When should I vaccinate my broilers?
Vaccinate against Newcastle disease, Marek’s disease, and Gumboro before the chicks are 10 days old. Repeat vaccinations for Newcastle disease, Gumboro, and add Fowl pox between 4-6 weeks of age. Follow your local veterinary officer’s recommendations for your specific area.
7. Do broilers need to be dewormed?
No, deworming is not necessary for broilers because of their short production cycle. The birds go to market before worm infestations become a significant problem. This is one advantage broiler production has over layer production.
8. How do I know if my broilers are growing properly?
Check the weight of about 5% of your flock every week. Compare these weights to standard growth charts for your breed. If birds are below expected weights, investigate potential problems like disease, poor feed quality, inadequate water, or environmental stress.
9. When should I stop providing supplementary heat?
Begin gradually reducing supplementary heat starting from week 2-3 as chicks develop feathers and can better regulate their body temperature. Continue reducing heat through weeks 4-6. By week 7 (around 4-6 weeks of age), you can discontinue supplementary heat completely in most climates.
10. How do I prepare my house between batches of broilers?
After selling all broilers, sweep out all litter and debris. Wash the entire house with water and detergent. Apply a disinfectant approved for poultry houses. Allow the house to rest for at least 2 weeks before bringing in new chicks. This rest period helps break disease cycles and gives any remaining pathogens time to die off.
Do you have any questions, suggestions, or contributions? If so, please feel free to use the comment box below to share your thoughts. We also encourage you to kindly share this information with others who might benefit from it. Since we can’t reach everyone at once, we truly appreciate your help in spreading the word. Thank you very much for your support and for sharing!
Read Also: Methods of Livestock Breeding in the Tropical Environment