Maintaining a beautiful and vibrant Lawn requires a little extra care from time to time. One essential task that can greatly benefit your lawn is scarification. Don’t let the word intimidate you – scarifying your lawn is a straightforward process that can make a big difference in the health and appearance of your grassy oasis.
But what exactly does scarifying mean? Think of it as giving your lawn a rejuvenating spa treatment. Scarifying involves using a special tool, known as a scarifier or dethatcher, to gently lift away layers of accumulated dead grass, moss, and other debris from the surface of your lawn. This process allows your grass to breathe better, receive more nutrients, and grow stronger.
Why bother scarifying your lawn, you might wonder? Imagine your lawn as a cozy blanket of green – over time, this blanket can become a bit heavy and stifling due to the build-up of dead grass and other materials. Scarifying helps to remove this excess, allowing sunlight, water, and air to reach the soil beneath. This promotes healthier grass growth and contributes to a lush and vibrant lawn.
The timing for scarifying is crucial. The optimal periods to scarify are during the active growing seasons, typically in the spring and early autumn. These seasons provide the best conditions for your grass to recover and flourish after scarification. Avoid scarifying during the harsh heat of summer or when your lawn is dormant in the winter.
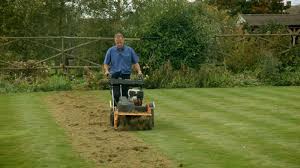
Now, let’s demystify the process of scarifying your lawn. First, trim your grass to a slightly shorter length than usual. Next, using the scarifier, gently comb through the grass, allowing its blades to delicately cut into the soil and lift away the thatch and moss. Don’t be alarmed if your lawn looks a bit disheveled afterward – it’s all part of the healing process.
After scarifying, take a moment to collect the debris that has been unearthed. Some lawn enthusiasts also choose to apply a thin layer of sand or a mixture of soil and grass seed. This helps to level the ground and encourages new grass to take root. Following scarification, ensure your lawn receives a good watering to aid in its recovery.
In addition, scarifying your lawn might sound like an elaborate task, but it’s truly a straightforward way to promote the health and vitality of your grass. By clearing away the old, you’re making room for the new – new growth, improved airflow, and a rejuvenated lawn. So, roll up your sleeves, grab your scarifier, and treat your lawn to a well-deserved makeover.
Read Also: Methods of Weed Control on a Pineapple Farm
Step-by-Step Guide to Scarify Your Lawn

Here’s a step-by-step guide to scarify your lawn:
Step 1: Choose the Right Time
Pick the right season for scarification, which is usually during the active growth periods in spring or early autumn. Avoid scarifying during hot summer months or when the lawn is dormant in winter.
Step 2: Gather Your Tools
You’ll need a few tools for the job: a scarifier (dethatcher), a lawn mower, a garden rake, a wheelbarrow or bags for collecting debris, and optional items like lawn sand or grass seed mixture.
Step 3: Mow the Lawn
Begin by mowing the lawn to a slightly shorter length than usual. This helps the scarifier to reach the thatch and moss more effectively.
Step 4: Check the Lawn
Walk around your lawn and inspect it for areas with excessive thatch, moss, or compacted soil. These are the areas that will benefit the most from scarification.
Step 5: Adjust Scarifier Depth
Most scarifiers have adjustable settings for depth. Start with a shallow setting and make a pass over a small test area. Gradually lower the depth until you find the right setting where the scarifier effectively lifts the thatch without damaging the grass roots.
Step 6: Scarify the Lawn
Hold the scarifier’s handle and push it steadily across the lawn in straight lines. Make sure to overlap each pass slightly to ensure thorough coverage. The scarifier’s blades will cut into the thatch, moss, and debris, lifting them up to the surface.
Step 7: Collect Debris
As you scarify, the debris will be lifted to the surface. Use a garden rake to collect the debris into a wheelbarrow or bags for disposal. You can also add the debris to a compost pile if it’s mostly organic material.
Step 8: Optional Steps
If desired, spread a thin layer of lawn sand or a mixture of soil and grass seed across the scarified areas. This helps to level the lawn and encourages new grass growth.
Step 9: Water the Lawn
Give your scarified lawn a thorough watering to help it recover. This provides the soil and grass with much-needed hydration after the scarification process.
Step 10: Monitor Recovery
Keep an eye on your lawn over the next few weeks. You might notice it looks a bit rough immediately after scarification, but don’t worry – it’s part of the process. New growth should start to fill in the areas that were scarified.
Remember, scarifying your lawn is a rejuvenating process that might seem intense at first, but it’s all for the long-term health of your grass. With proper care and attention, your lawn will thank you by growing greener and more vibrant than ever before.
Lawn Treatment

Lawn treatment plays a crucial role in maintaining a vibrant and flourishing yard. A well-cared-for lawn not only enhances the beauty of your outdoor space but also provides a welcoming environment for relaxation and outdoor activities. By following some simple steps and practices, you can achieve a lush and healthy lawn that will be the envy of your neighborhood.
1. Mowing: Regular mowing is key to maintaining a well-kept lawn. Set your mower to the appropriate height to prevent cutting the grass too short, which can weaken the grass and expose it to diseases and pests. Aim to mow when the grass is dry to achieve a clean cut.
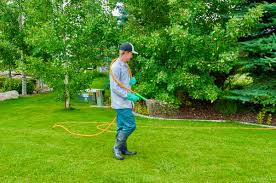
2. Watering: Proper watering is essential for the health of your lawn. Water deeply and infrequently to encourage the growth of deep roots. Early morning is the best time to water, as it allows the grass to absorb moisture before the sun’s heat evaporates it.
3. Fertilizing: Regular fertilization provides the necessary nutrients for your lawn to thrive. Choose a fertilizer that suits your grass type and follow the recommended application rates. Slow-release fertilizers are a great option as they provide nutrients gradually over time.
4. Aeration: Lawn aeration involves perforating the soil with small holes to allow air, water, and nutrients to penetrate deeply. This helps roots grow stronger and allows the grass to breathe. Aeration is especially beneficial for compacted soils.
5. Weed Control: Weeds can quickly invade your lawn and compete with grass for nutrients and space. Regularly inspect your lawn and manually remove weeds. You can also use herbicides, but be cautious to choose products that target weeds without harming your grass.
6. Pest Management: Keep an eye out for pests such as grubs, insects, and diseases. Early detection is essential. Consider using integrated pest management techniques, which involve a combination of cultural, biological, and chemical methods to control pests.
7. Overseeding: Over time, your lawn might develop thin or bare spots. Overseeding involves spreading grass seed over existing grass to promote new growth and improve density. This can help fill in bare areas and improve the overall appearance of your lawn.
8. pH Balancing: A balanced pH level in the soil is essential for nutrient absorption. Test your soil’s pH and adjust it as needed using lime or sulfur. This simple step can greatly enhance the effectiveness of fertilizers and overall lawn health.
9. Seasonal Care: Different seasons require different care approaches. Adjust your lawn treatment practices based on the changing weather conditions. For instance, in colder months, your lawn might need less frequent mowing and more focus on preparation for winter.
10. Professional Help: If you’re uncertain about how to best care for your lawn, consider consulting with a professional lawn care service. They can provide expert advice, recommend suitable treatments, and help you achieve the desired results.
In addition, a well-maintained lawn contributes significantly to the overall aesthetics and enjoyment of your outdoor space. With consistent care, attention to detail, and a combination of essential practices, you can achieve a lush and healthy lawn that adds value to your property and provides a relaxing environment for you and your loved ones to enjoy.
Reseeding Lawn
Reseeding your lawn is a valuable practice that can breathe new life into your yard, filling in bare spots and enhancing overall grass density. Whether you’re dealing with patchy areas, thinning grass, or simply looking to rejuvenate your lawn’s appearance, reseeding can be a straightforward and rewarding process. Here’s a step-by-step guide to help you successfully reseed your lawn and achieve a fuller, greener landscape.
Step 1: Assess Your Lawn
Take a close look at your lawn to identify areas that require reseeding. Look for patches of thin or bare grass, as well as spots where the grass seems weak or discolored. Understanding the extent of reseeding needed will guide your efforts.
Step 2: Choose the Right Time
The best time to reseed your lawn is during the cooler months of early fall or spring. The soil is still warm enough to promote germination, and the cooler temperatures reduce stress on newly growing grass.
Step 3: Prepare the Soil
Before reseeding, prepare the soil in the targeted areas. Use a rake to loosen the top layer of soil, creating a slightly rough surface. This helps the grass seeds make better contact with the soil for improved germination.
Step 4: Select the Right Seed
Choose grass seed that matches the existing grass type in your lawn. If you’re unsure, seek advice from a local nursery or lawn care expert. Opt for a high-quality grass seed blend that suits your climate and soil conditions.
Step 5: Spread the Seed
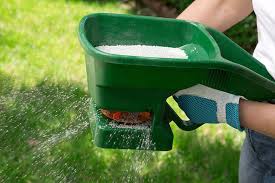
Evenly spread the grass seed over the prepared soil. A broadcast spreader can help achieve uniform coverage. Be sure not to oversow, as this can lead to competition among the growing grass seedlings.
Step 6: Rake and Press
Lightly rake the soil again to cover the grass seeds with a thin layer of soil. This helps protect the seeds from birds and ensures good soil-seed contact. Use a roller or walk gently on the soil to press the seeds into the ground.
Step 7: Water Thoroughly
Water the reseeded areas immediately after planting. Keep the soil consistently moist but not waterlogged during the germination period. A light misting several times a day can help prevent the soil from drying out.
Step 8: Fertilize
Apply a starter fertilizer to provide essential nutrients for the newly germinating grass. Follow the manufacturer’s instructions for application rates.
Step 9: Maintenance
As the grass seedlings begin to sprout, continue to water regularly and avoid heavy foot traffic on the reseeded areas. Once the grass reaches a mowing height, gradually reduce the frequency of watering.
Step 10: Mowing and Integration
Once the reseeded grass reaches a height of about 3 inches, you can mow it for the first time. Be gentle to avoid disturbing the young grass plants. As the reseeded areas blend with the rest of the lawn, resume your regular lawn maintenance routine.
By following these steps and providing consistent care, you can successfully reseed your lawn and achieve a fuller, greener landscape. Reseeding is an investment that will pay off with a lush and vibrant lawn that you can enjoy for seasons to come.
Lawn Fungicide

Lawn fungicides are valuable tools in the battle against fungal diseases that can threaten the health and appearance of your lawn. Fungi are microorganisms that can thrive in various conditions, causing issues like brown patches, powdery mildew, and other unsightly problems. Proper use of fungicides, along with good cultural practices, can help prevent and control these issues, ensuring your lawn remains lush and vibrant. Here’s what you need to know about lawn fungicides and how to manage fungal problems effectively.
1. Identifying Fungal Issues: Before considering the use of fungicides, it’s crucial to correctly identify the fungal problem affecting your lawn. Different fungi cause different symptoms, such as discolored patches, powdery substances, or unusual growth. Local garden centers or agricultural extension offices can assist you in identifying the specific issue.
2. Cultural Practices: Maintaining proper cultural practices is the foundation of preventing fungal problems. A healthy lawn with strong, well-maintained grass is less susceptible to fungal attacks. Here are some practices to keep in mind:
a. Proper Watering: Avoid overwatering, as moist conditions can encourage fungal growth. Water your lawn deeply and infrequently, preferably in the early morning.
b. Adequate Air Circulation: Ensure proper air circulation by trimming trees and shrubs that might shade your lawn excessively. Proper air circulation helps reduce the chances of fungal outbreaks.
c. Mowing Technique: Mow your lawn regularly but avoid cutting more than one-third of the grass height at a time. Taller grass shades the soil, preventing fungal spores from germinating.
d. Dethatching and Aeration: Thatch buildup and compacted soil can create ideal conditions for fungal growth. Periodic dethatching and aeration help prevent these issues.
3. Choosing and Using Fungicides: If cultural practices alone aren’t sufficient to manage the fungal problem, you might consider using fungicides. Here’s how to choose and use them effectively:
a. Select the Right Fungicide: Different fungicides target specific types of fungi. Choose a product that’s labeled for the type of fungal issue you’re dealing with. Read the label carefully to ensure it’s safe for your grass type and follow the instructions.
b. Timing: Apply fungicides as a preventive measure or at the first signs of fungal activity. Early intervention is key to successful control.
c. Application: Follow the manufacturer’s instructions for application rates and methods. Most fungicides require mixing with water and even distribution using a sprayer.
d. Safety Precautions: Wear appropriate protective gear, such as gloves and goggles, when handling and applying fungicides. Keep children and pets away from treated areas until they’re dry.
e. Reapplication: Depending on the fungicide used, you might need to reapply it at specific intervals. Follow the recommended reapplication schedule for best results.
4. Integrated Approach: An integrated approach that combines proper cultural practices, targeted fungicide use, and disease-resistant grass varieties can provide the most effective solution to fungal issues. Regular monitoring and proactive measures can help keep your lawn healthy and resilient against fungal attacks.
However, lawn fungicides are valuable tools for managing fungal diseases, but they should be used alongside good cultural practices. By identifying the specific issue, implementing preventative measures, and choosing and applying the right fungicides, you can maintain a lush and healthy lawn that’s resilient against fungal challenges.
Read Also: The Ideal Soil Type Required for Pineapple Farming
Topdressing a Lawn
Topdressing is a beneficial practice that involves applying a thin layer of soil or soil mixture over your existing lawn. This technique helps improve soil structure, level uneven areas, and enhance the overall health and appearance of your grass. Whether your lawn is suffering from compacted soil, thatch buildup, or uneven terrain, topdressing can rejuvenate your yard. Here’s a step-by-step guide to successfully topdressing your lawn:
Step 1: Assess Your Lawn
Before you begin, evaluate your lawn to determine whether it would benefit from topdressing. Look for signs of compaction, thatch buildup, or unevenness. A soil test can also help you identify any nutrient deficiencies.
Step 2: Choose the Right Materials
Select high-quality materials for topdressing, such as compost, sand, or a combination of soil and compost. The materials should be free from weed seeds and pathogens. The amount of material needed depends on the size of your lawn and the severity of the issues you’re addressing.
Step 3: Prepare Your Lawn
Mow your lawn to a height slightly lower than usual. This allows the topdressing material to make better contact with the soil. Remove any debris, such as sticks or leaves, from the lawn.
Step 4: Apply the Topdressing
Evenly spread the topdressing material across the lawn using a shovel, wheelbarrow, or specialized topdressing equipment. Aim for a layer that is about ¼ to ½ inch thick. Avoid smothering the grass by ensuring the tips of the grass blades remain visible.
Step 5: Level and Smooth
Use a leveling rake or a drag mat to distribute the topdressing material evenly and smooth out any bumps or uneven areas. This step helps create a uniform surface and ensures good soil contact.
Step 6: Water the Topdressing In
Lightly water the topdressing material to help it settle into the existing soil. Be careful not to overwater, as excessive moisture can lead to compaction.
Step 7: Overseeding (Optional)
If your lawn has thin or bare areas, consider overseeding after topdressing. The topdressing layer provides a conducive environment for seed germination and establishment.
Step 8: Post-Topdressing Care
For the next few weeks, monitor the lawn’s moisture levels and provide light, frequent watering to promote the integration of the topdressing material with the soil. Avoid heavy foot traffic during this period.
Step 9: Regular Maintenance
As the grass begins to grow through the topdressing layer, resume your regular lawn maintenance routine, including mowing, watering, and fertilizing. The improved soil structure and nutrient availability should contribute to healthier grass growth.
Topdressing is an effective way to address soil compaction, thatch buildup, and uneven terrain, leading to a healthier and more vibrant lawn. By following these steps and giving your lawn the attention it needs, you can enjoy a lush and well-maintained yard that enhances the beauty of your outdoor space.
Read Also: Recycling Rates: What You Need to Know
