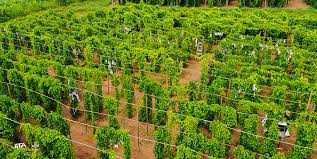
Yam farming is an essential agricultural practice in many tropical regions, particularly in West Africa, where it serves as a staple food and a significant source of income for farmers. Yams are not only rich in carbohydrates, vitamins, and minerals, but they also play a crucial role in the cultural and economic fabric of the communities that cultivate them.
To achieve optimal growth and yield, yam farmers must adopt effective farming techniques that address various aspects of the crop’s development. This introduction aims to highlight essential yam farming techniques that can enhance productivity and ensure successful cultivation.
One of the fundamental steps in yam farming is selecting the right variety. Different yam species have varying growth requirements and yield potentials. Popular varieties include white yam, yellow yam, and water yam, each suited to specific climatic and soil conditions. Farmers should choose varieties that are resistant to pests and diseases, ensuring healthier crops. Additionally, understanding local market demands can help farmers select varieties that are more likely to sell well, maximizing profitability.
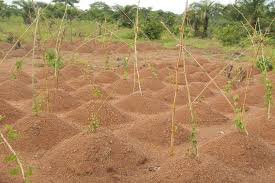
Soil preparation is another critical aspect of yam farming. Yams thrive in well-drained, loamy soils rich in organic matter. Before planting, farmers should test their soil to assess its nutrient content and pH level. Based on the results, necessary amendments can be made to improve soil fertility. Tillage is essential to aerate the soil and remove any weeds that may compete with the young yams for nutrients and water. Creating ridges or mounds can also help in proper drainage and prevent tuber rot during the rainy season.
Planting techniques are vital for ensuring optimal growth. Yam tubers should be planted at the right depth, typically 10 to 15 centimeters, depending on the variety. Spacing is also crucial; adequate distance between tubers allows for better air circulation and minimizes competition for nutrients. Farmers should also consider the timing of planting, as this greatly influences the growth cycle. Planting at the onset of the rainy season ensures that the young plants receive adequate moisture for healthy establishment.
Water management is critical in yam farming. While yams require sufficient moisture during their growth phase, overwatering can lead to diseases such as tuber rot. Implementing effective irrigation practices, especially in drier regions, can help maintain optimal soil moisture levels. Farmers should monitor weather patterns and be prepared to irrigate if rainfall is insufficient.
Pest and disease control is essential for achieving high yields in yam farming. Common pests include yam beetles and mealybugs, which can significantly damage crops if not managed properly. Integrated Pest Management (IPM) practices, such as crop rotation, use of resistant varieties, and natural predators, can help mitigate pest issues. Additionally, farmers should be vigilant in identifying signs of diseases like yam mosaic virus and ensure timely intervention.
Yam Varieties
Yams are important staple crops in many parts of the world, and several varieties are cultivated for their unique flavors, textures, and uses. Here are some common yam varieties:
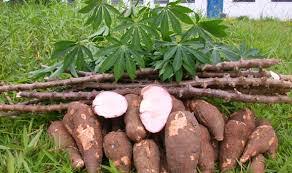
1. White Yam (Dioscorea rotundata): This is one of the most popular yam varieties in West Africa. It has a white, starchy flesh and a thick brown skin. White yam is known for its creamy texture when cooked and is often used in dishes like pounded yam.
2. Yellow Yam (Dioscorea cayenensis): This variety has a yellowish flesh and a slightly sweeter taste than white yam. It is commonly grown in Jamaica and other Caribbean countries. Yellow yam is often boiled, roasted, or fried.
3. Water Yam (Dioscorea alata): Also known as purple yam, this variety has a moist, sweet flesh and can be purple or white in color. Water yam is often used in desserts, soups, and stews. It has a high moisture content, making it ideal for various culinary applications.
4. Chinese Yam (Dioscorea opposita): This variety has a slightly crunchy texture and is often used in Asian cuisine. It can be eaten raw in salads or cooked in soups and stir-fries. Chinese yam is known for its health benefits, including its ability to boost immunity.
5. Bitter Yam (Dioscorea dumetorum): This less common variety has a bitter taste and is often consumed only after proper cooking and processing. Bitter yam is primarily used for medicinal purposes and in traditional dishes.
Each yam variety has specific growth requirements and culinary applications, making them versatile crops in various agricultural and culinary practices.
Preparing the Land for Planting

Preparing the land for yam planting is crucial for achieving a successful crop. Follow these steps to prepare the land effectively:
1. Site Selection: Choose a well-drained site with plenty of sunlight. Yams prefer loamy or sandy soils that are rich in organic matter.
2. Clearing the Land: Clear the selected area of weeds, grass, and debris. Use a hoe, machete, or tractor for larger plots. Ensure the land is clean to reduce competition for nutrients and water.
3. Tilling the Soil: Use a hoe or plow to till the soil to a depth of about 12-18 inches (30-45 cm). This helps aerate the soil, improves drainage, and breaks up compacted soil.
4. Soil Testing: Conduct a soil test to check pH and nutrient levels. Yams thrive in slightly acidic to neutral soils (pH 5.5-7.0). Based on the test results, you may need to amend the soil with lime to raise pH or sulfur to lower it.
5. Adding Organic Matter: Incorporate well-rotted manure, compost, or organic fertilizers into the soil to improve fertility and structure. Aim for a mix of at least 2-4 tons of organic matter per hectare.
6. Forming Mounds or Ridges: After tilling, form mounds or ridges spaced about 1 meter apart. This allows for better drainage and prevents waterlogging, which can harm yam roots.
7. Marking Rows: Mark out the planting rows on the prepared mounds or ridges to ensure proper spacing for yam planting. This facilitates easy cultivation and harvesting later on.
By thoroughly preparing the land, you create an optimal environment for yam growth and increase your chances of a successful harvest.
Soil Requirements for Yam Cultivation
Yams have specific soil requirements to thrive and produce high yields. Here are key factors to consider:
1. Soil Type: Yams prefer well-drained, loamy soils with a good balance of sand, silt, and clay. Sandy loam soils are particularly ideal because they provide adequate drainage and aeration while retaining moisture.
2. Soil pH: The optimal pH range for yam cultivation is between 5.5 and 7.0. Soils that are too acidic or alkaline can hinder nutrient availability and affect yam growth. Regular soil testing and amendments can help maintain the desired pH.
3. Nutrient Content: Yams require a balanced supply of nutrients, particularly nitrogen (N), phosphorus (P), and potassium (K). Adequate levels of organic matter in the soil are essential for providing these nutrients and improving soil structure.
4. Drainage: Good drainage is crucial for yam cultivation. Waterlogged soils can lead to tuber rot and other diseases. If the site tends to retain water, consider planting on raised beds or mounds to improve drainage.
5. Moisture Retention: While yams prefer well-drained soils, they also need sufficient moisture for proper growth. Incorporating organic matter can help retain moisture in the soil while allowing excess water to drain away.
6. Soil Preparation: Before planting, thoroughly prepare the soil by tilling and adding organic matter. This helps create a loose, aerated environment that supports healthy root development.
Read Also: 15 Medicinal Health Benefits Of Echinacea purpurea (Purple Coneflower)
Planting Techniques for Yam

Planting yams requires careful consideration to ensure optimal growth and yield. Here are the recommended techniques:
1. Selecting Seed Yams: Choose healthy seed yams that are free from diseases. Look for tubers with at least one eye (bud) for effective sprouting.
2. Preparing the Land: Clear the planting area of weeds and debris. Plow or till the soil to a depth of 10-12 inches to improve aeration and drainage.
3. Creating Mounds or Ridges: Form mounds or ridges about 3-4 feet apart. Each mound should be 6-12 inches high to facilitate drainage and provide a warm environment for the tubers.
4. Spacing: Plant the seed yams 12-18 inches apart within the mound. This spacing allows for adequate growth and reduces competition for nutrients.
5. Planting Depth: Plant the seed yam about 4-6 inches deep in the soil. Ensure that the eye of the yam is facing upward to encourage sprouting.
6. Mulching: Apply a layer of organic mulch (straw, leaves) around the mounds after planting. This helps retain moisture, suppress weeds, and improve soil quality.
7. Post-Planting Care: Monitor the plants for pests and diseases after planting. Regularly check for sprouting, and ensure that the plants receive proper care as they grow.
Watering and Irrigation Practices
Proper watering is crucial for yam growth. Here are the best practices:
1. Soil Moisture Monitoring: Check the moisture level in the soil regularly. Yams require well-drained soil that is moist but not waterlogged.
2. Irrigation Schedule: Water the yams deeply and consistently, especially during dry periods. Aim for at least 1-2 inches of water per week, either through rainfall or irrigation.
3. Drip Irrigation: If possible, use a drip irrigation system to provide a consistent water supply directly to the roots. This method minimizes water wastage and reduces disease risk.
4. Avoiding Overwatering: Excess water can lead to tuber rot. Ensure proper drainage and avoid watering when the soil is already wet.
5. Watering Technique: Water the base of the plants rather than overhead to reduce the risk of fungal diseases. Water early in the morning or late in the afternoon to prevent evaporation.
Nutrient Management and Fertilization
Effective nutrient management is essential for healthy yam production. Follow these guidelines:
1. Soil Testing: Conduct a soil test before planting to determine nutrient levels and pH. This information will guide your fertilization strategy.
2. Organic Matter Addition: Incorporate organic matter, such as compost or well-rotted manure, into the soil before planting. This enhances soil structure and provides essential nutrients.
3. Fertilization Schedule: Apply fertilizers based on soil test recommendations. Generally, a balanced fertilizer with nitrogen (N), phosphorus (P), and potassium (K) should be applied at planting and during the growing season.
4. Fertilizer Application Methods: Use side dressing to apply fertilizers around the base of the plants during the growing season. This technique ensures that nutrients reach the root zone.
5. Monitoring Plant Health: Observe the plants for signs of nutrient deficiency, such as yellowing leaves or stunted growth. Adjust your fertilization practices accordingly.
6. Mulching for Nutrient Retention: Apply organic mulch around the plants to retain moisture and nutrients in the soil. This practice also helps suppress weeds.
Pest and Disease Management
Effective pest and disease management is crucial for maximizing yam yield and quality. Here are key strategies to consider:
1. Regular Monitoring: Inspect yam plants regularly for signs of pests or diseases. Early detection can prevent significant damage.
2. Cultural Practices: Implement good cultural practices such as crop rotation and intercropping to reduce pest populations and disease incidence.
3. Pest Control Methods: Use integrated pest management (IPM) strategies that combine biological control, chemical pesticides, and mechanical controls. Common pests include yam beetles and nematodes.
4. Disease Prevention: Rotate yam crops to minimize the buildup of soil-borne diseases. Use disease-resistant varieties when available.
5. Proper Hygiene: Maintain cleanliness in the field by removing debris and infected plants. This reduces the spread of diseases.
6. Fungicide Application: If fungal diseases such as black rot or downy mildew are present, consider applying appropriate fungicides as a preventive measure or treatment.
7. Education and Awareness: Educate yourself and other farmers about common pests and diseases in yams. Knowledge of symptoms and control methods can enhance management efforts.
Read Also: The Health Benefits of Using Accent Seasoning on your Cooking
Harvesting Techniques for Yam

Harvesting yams at the right time and using proper techniques ensures quality tubers. Follow these steps:
1. Timing the Harvest: Harvest yams when the leaves begin to yellow and die back, usually 6-12 months after planting. This indicates that the tubers have reached maturity.
2. Tools for Harvesting: Use a spade or fork to carefully dig up the tubers. Avoid using sharp tools that may damage the tubers.
3. Gentle Lifting: Start digging around the mound and gently lift the tuber from the soil. Be careful not to bruise or break the tubers during this process.
4. Inspecting Tubers: After lifting, inspect the tubers for any signs of disease or damage. Set aside any that are affected for immediate use to prevent spoilage.
5. Timing of Harvesting: Harvest early in the morning or on a cloudy day to minimize stress on the tubers and reduce the risk of post-harvest damage.
Post-Harvest Handling and Storage
Proper post-harvest handling and storage are vital for maintaining yam quality. Here’s how to do it:
1. Cleaning the Tubers: Clean the harvested yams gently to remove excess soil. Avoid washing them, as this can introduce moisture and lead to rot.
2. Curing Process: Cure the tubers in a shaded, well-ventilated area for about one to two weeks. This allows the skin to harden and helps heal any minor injuries.
3. Storage Conditions: Store cured yams in a cool, dry, and dark place. Ideal storage temperatures are between 13-15°C (55-59°F) with low humidity to prevent sprouting and decay.
4. Ventilation: Ensure good air circulation in the storage area to minimize humidity and prevent mold growth.
5. Regular Inspection: Check the stored yams periodically for signs of spoilage or disease. Remove any affected tubers immediately to prevent the spread to healthy ones.
6. Using Appropriate Containers: Store yams in breathable containers, such as baskets or crates, to allow airflow. Avoid plastic bags that can trap moisture and cause rot.
Do you have any questions, suggestions, or contributions? If so, please feel free to use the comment box below to share your thoughts. We also encourage you to kindly share this information with others who might benefit from it. Since we can’t reach everyone at once, we truly appreciate your help in spreading the word. Thank you so much for your support and for sharing!

